Multi-Sequence Acquisition
After configuring an isolated acquisition sequence, launch it immediately or append additional sequences to build a Multi-Sequence Acquisition for automated workflows.
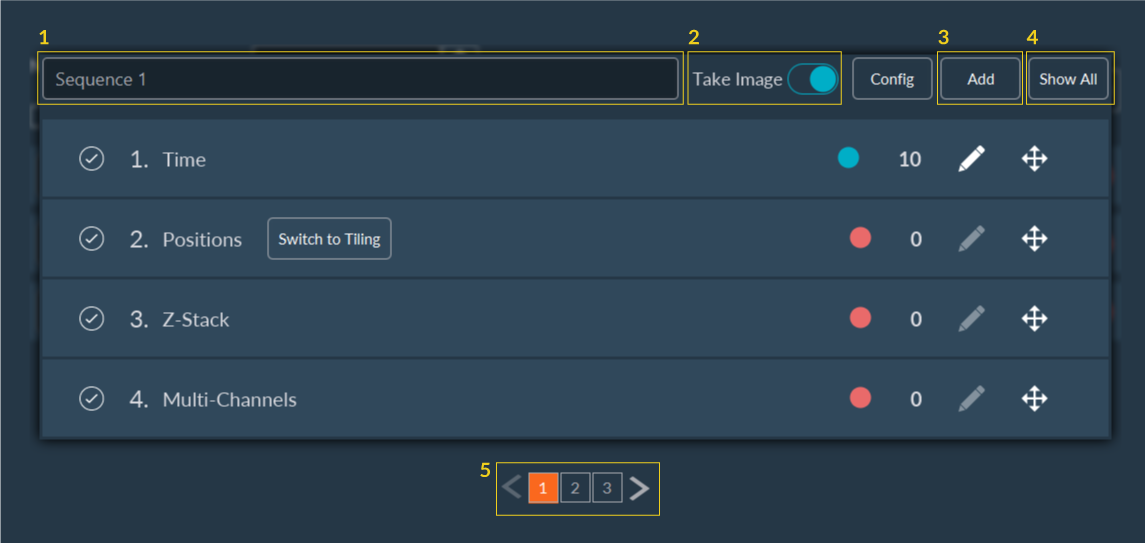
Each sequence within the interface includes the following setup options:
- Rename: Assign a name to the sequence for identification during the experiment.
- Toggle Image Acquisition: Disable or enable image capture for a specific sequence by toggling the Take Image button (useful for setting up delays or hardware moves without saving data).
- Add Sequence: Append a new, empty sequence to the multi-sequence stack.
- Show All: View a summary of all prepared sequences in a bottom panel.
- Navigation: Jump between sequences. The currently selected sequence highlights in orange.
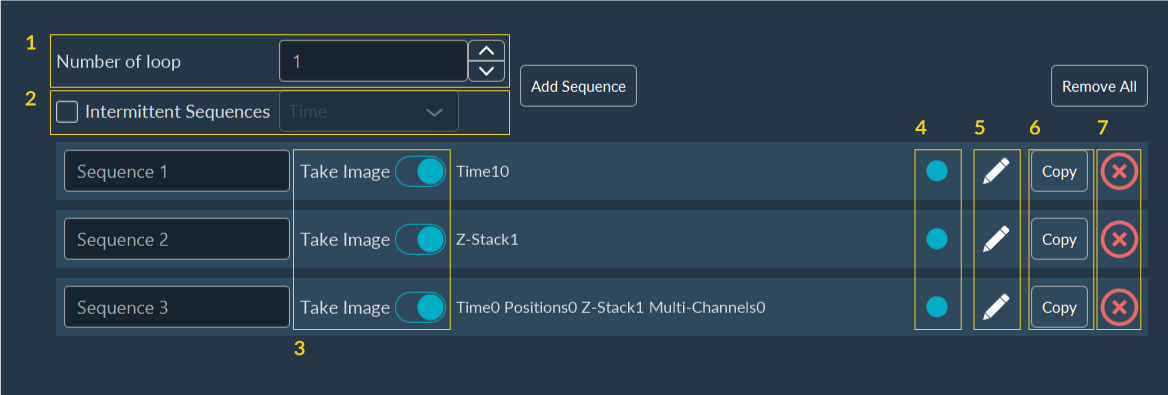
Clicking Show All (4) opens the Summary Tab, providing sequence management:
- Loop Count: Define how many times the entire multi-sequence stack should loop.
- Intermittent Sequences (Optional): Check this box to trigger the sequence intermittently based on a selected dimension (e.g., execute this sequence only on every 3rd time point).
- Take Image Toggle: Quickly enable or disable image capture for individual sequences from the summary view.
- Active Status: Activate or deactivate an entire sequence by clicking its colored indicator (red indicates inactive, blue indicates active).
- Edit: Click the Pen icon to open the configuration for that sequence.
- Duplicate: Clone an existing sequence by clicking Copy.
- Delete: Remove a sequence by clicking Delete.