Shading correction
Shading correction is a tool used to ensure uniform
illumination of the field of view across the image. Perform this calibration using a
chroma slide.
.png)
Performing a Shading Correction
- Click on Shading Correction.
- Specify the number of acquisitions — the shading
correction image will be generated as the average of
all captured images.
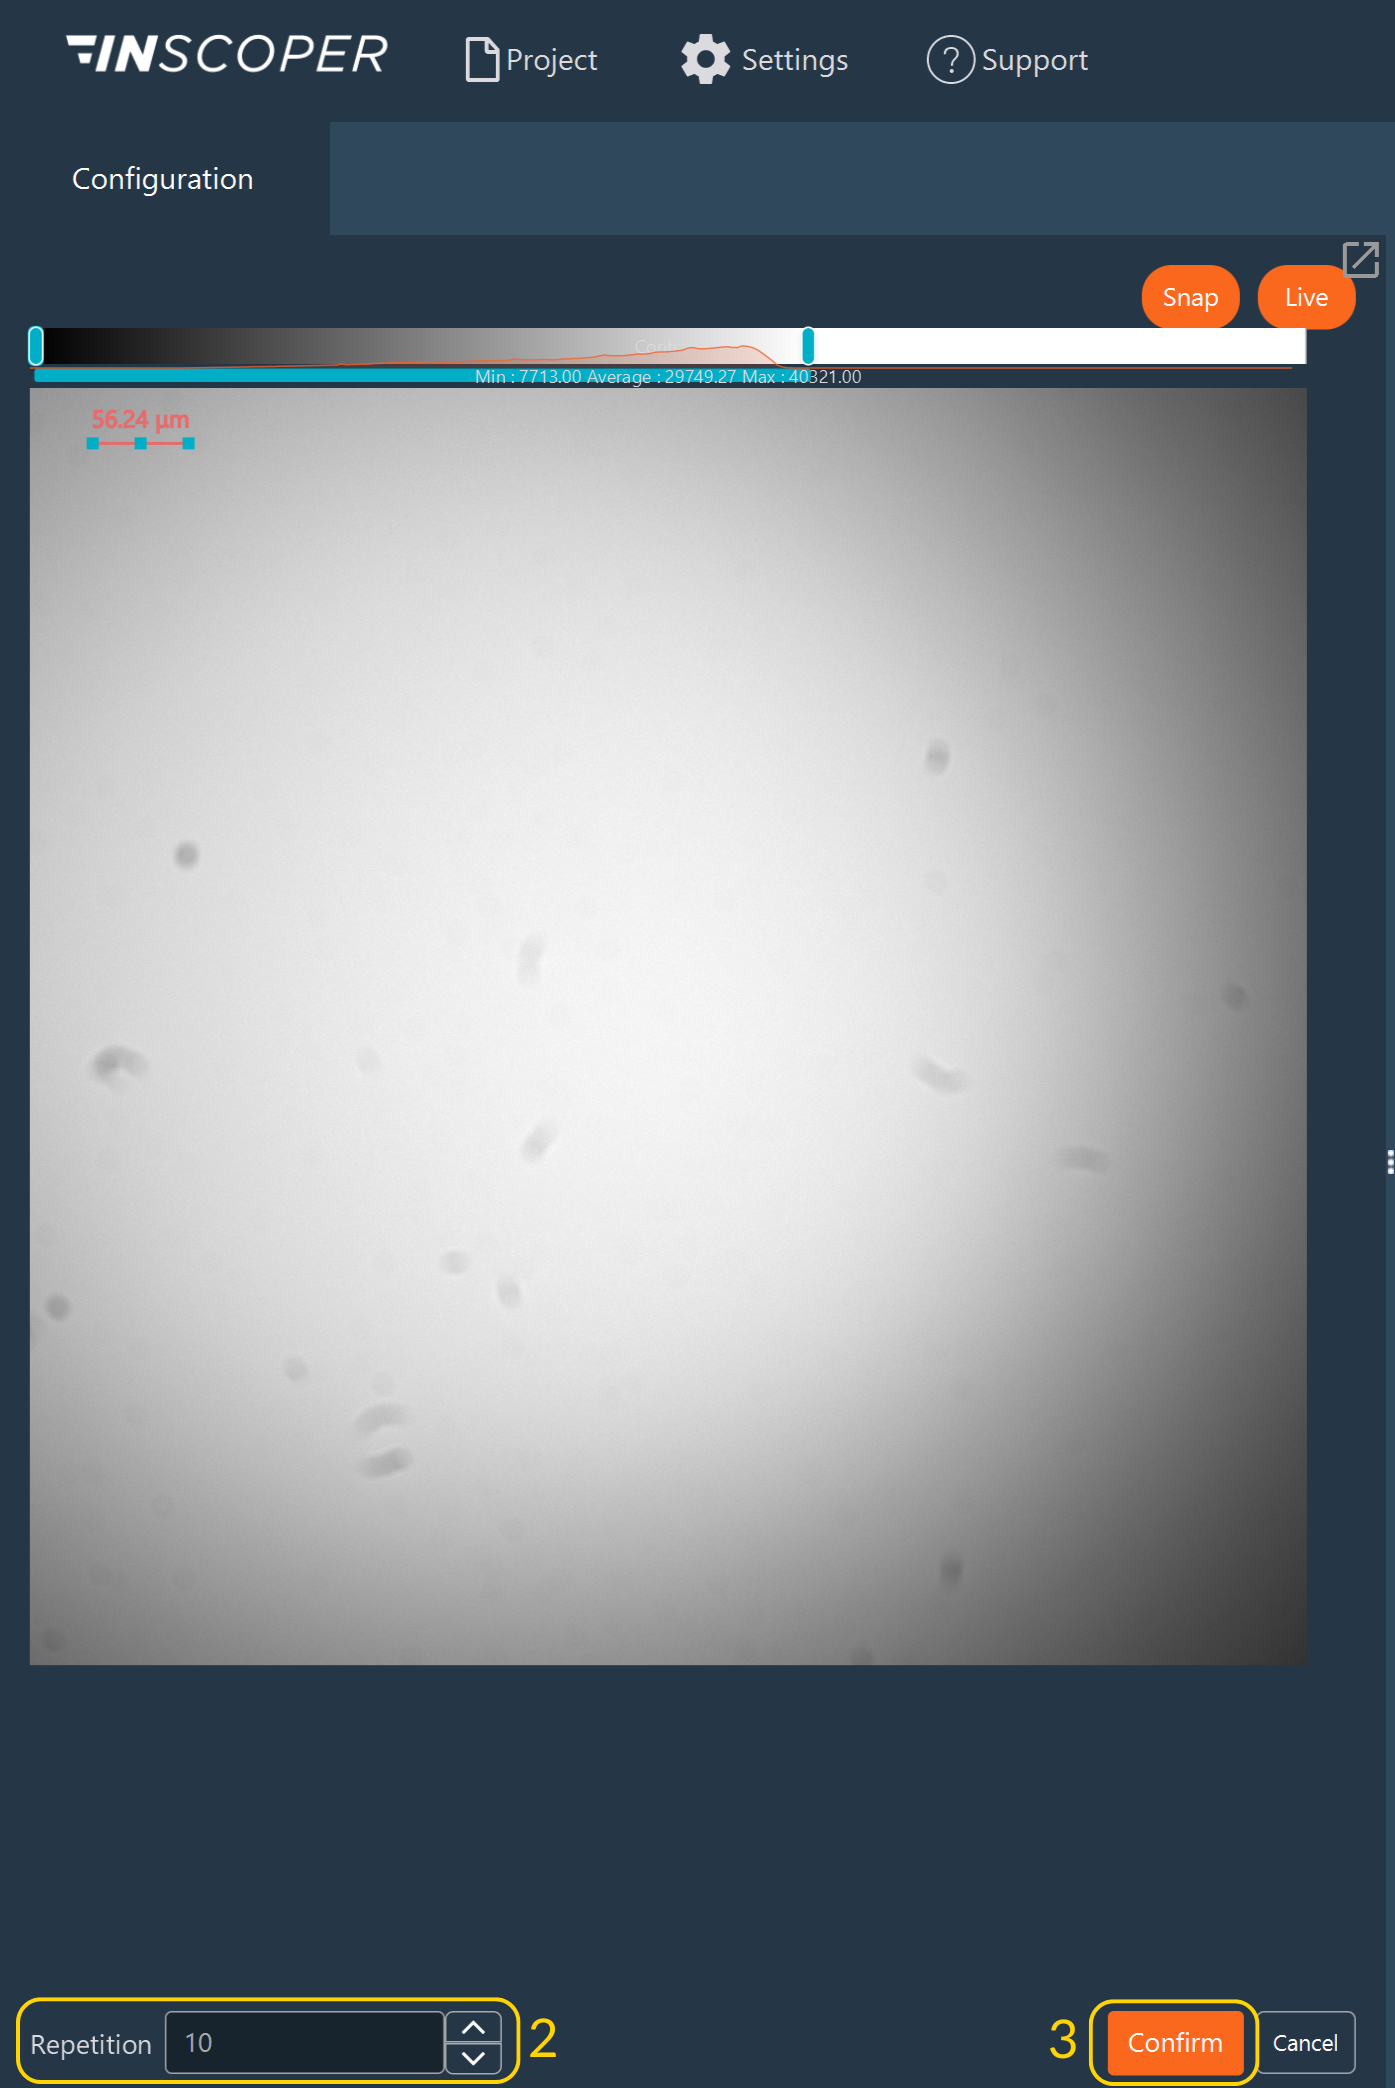
- Click Confirm to start the calibration
- Once the calibration is complete, you can:
- Verify the result by clicking Test Shading in Live mode, or
- View the generated shading image by clicking Show Shading Image.

- Click Confirm to validate the calibration.
- When the shading calibration is successfully done, the Shading Correction button changes from red to green.
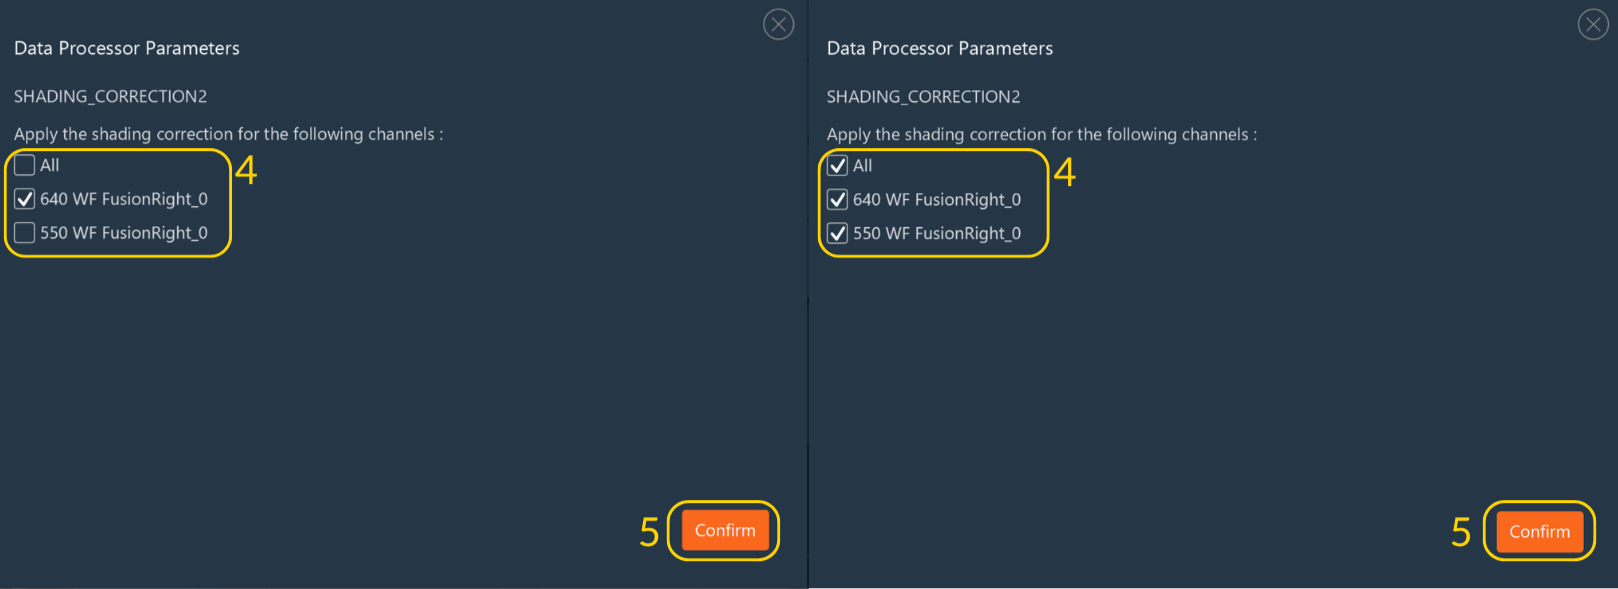
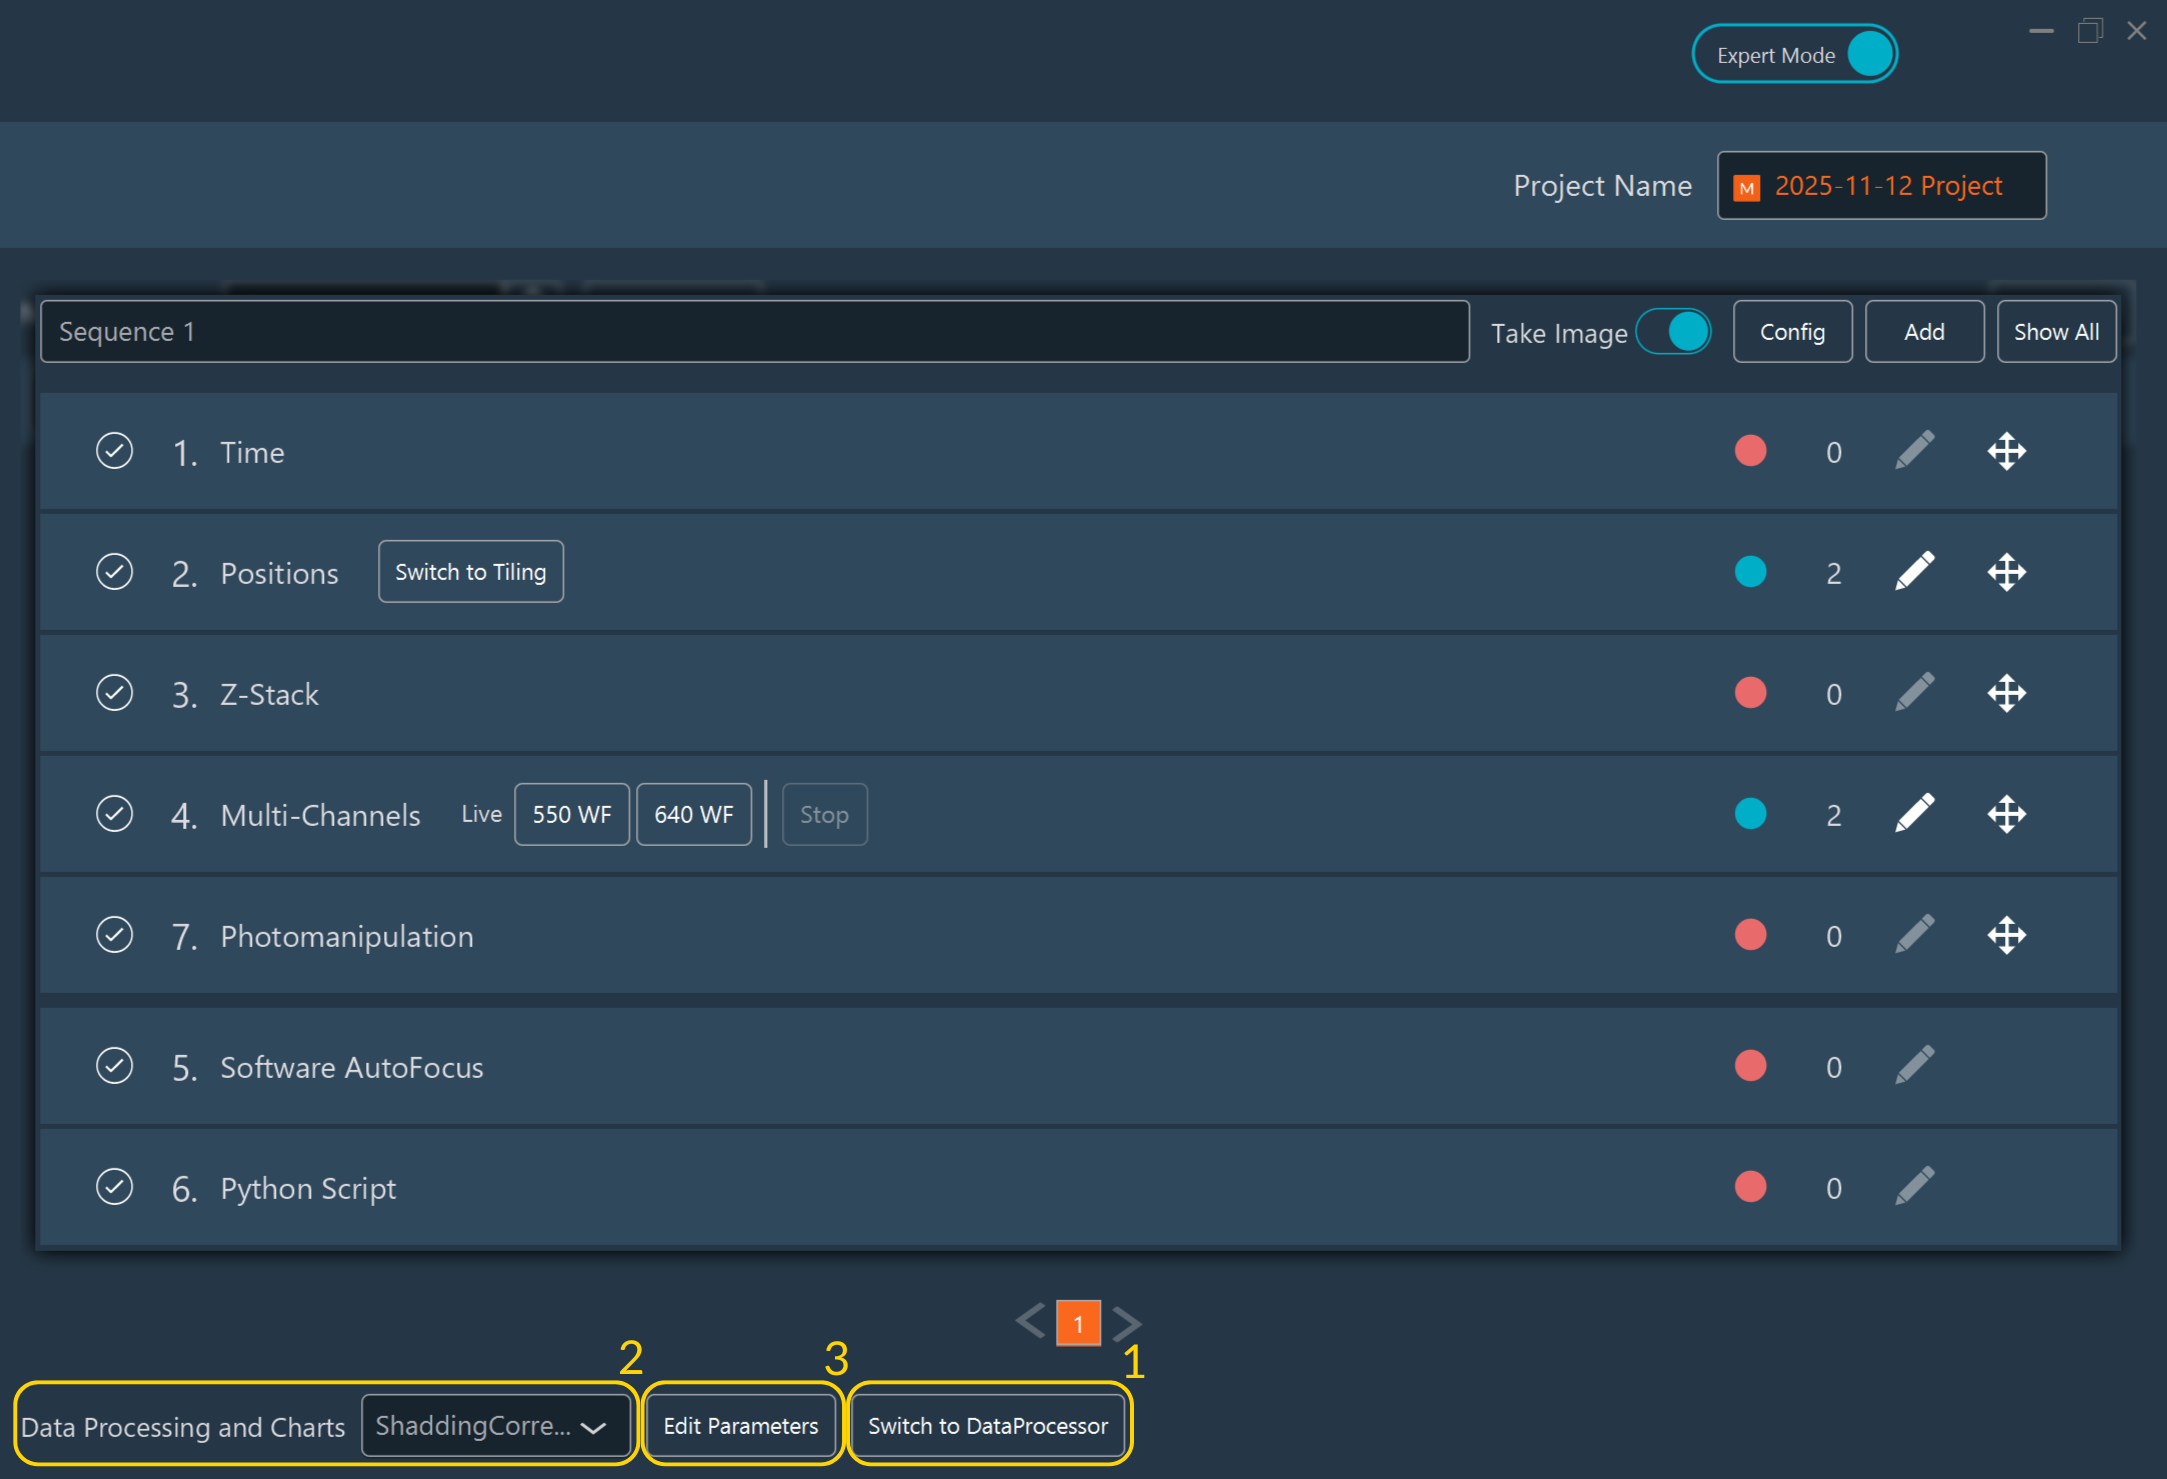
Using shading correction by channel with the data processor
- Create your data processor (in Expert Mode) including the following nodes: Raw Data, Shading Correction, and Tiling.
- Apply the data processor after configuring your sequence (during the data processor and charts selection step).
- Click Edit Parameters.
- Select the channel(s) on which you want to apply the shading correction — it can be a single channel or all channels.
- Click Confirm to validate your selection.