Create a new data processing workflow
-
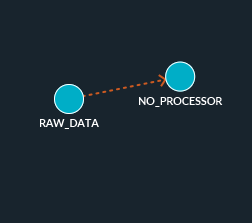
The starting point of the workflow are the raw images. They are represented by
a node named RawData. To apply a treatment to these images, you need to
create a new node by right-clicking on RawData and selecting
New Node.

-
A new node will appear on the screen. At the moment there is no treatment
associated with this node. To add one, double click on it or right click and
select Edit Node.
Note:For better ergonomics, users can right-click in the area and select Sort Nodes. This option will organize all nodes to make them easily visible. Nodes can also be moved by dragging and dropping.
-
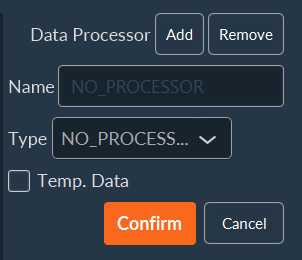
In the current window, the Type drop-down menu allows
you to select the treatment to be applied from the list of available algorithms
(stitching, shading correction, maximum projection, background subtraction,
etc.). If you don't want to save this process to disk, check the
Temp. Data box. This can be useful to reduce the
duration and the total size of the data on the computer/server.
The list of all applicable processes is detailed in the following table.
|
NO_PROCESSOR |
No effect. |
|
SIMPLE_TILING |
Position each image at its theoretical position on a global tiling. |
|
STITCH_TILING |
Stitch adjacent images of a tiling, taking into account the overlap (requires SIMPLE_TILING before). |
|
STANDARD_DEVIATION_ON_FLY |
Calculates the standard deviation of the intensity pixel by pixel of an image stack. |
|
SHADING_CORRECTION |
Removes unwanted signals from the image (misalignment, dust in the optical system, ...) Given an image of the background, the following calculation is made for each pixel: (current intensity of the pixel / initial intensity of the pixel on the background) x average intensity of the background. |
|
FILTER |
Noise reduction by removing anomalous pixels from an image (despeckle). For each pixel, the intensity values of the surrounding pixels (according to a radius value) are recovered. It is then possible to apply a median or average filter to each pixel from these values. The pixels with an intensity value lower than this calculated value are then ignored (value equal to 0) thanks to a median or average filter (the median filter is recommended). |
|
TIME_MAX |
Keep the maximum value for each pixel of a stack from the “Time” dimension. |
|
FOCUS_MAX |
Keep the maximum value for each pixel of a stack from the “Z-stack” dimension. |
|
TIME_AVERAGE |
Keep the average value for each pixel of a stack from the "Time" dimension. |
|
FOCUS_AVERAGE |
Keep the average value for each pixel of a stack from the "Z-stack" dimension. |
|
CHANNEL_MULTICOLOR |
Merge images from different channels. The maximum intensity values for each pixel are retrieved and a blend of LUTs is performed. |
|
SUBTRACT_BACKGROUND |
Removes background from an image to improve contrast. |
|
CHANNEL_RATIO |
Rationalize the intensity of a single pixel using several different channels. The "SUBSTRACT_BACKGROUND" is directly present in "CHANNEL_RATIO" to optimize the output. |
|
MULTI_CHANNEL_MERGE |
Merges channels. Mainly used for SPIM with two excitation beams. |