Saving images and metadata
To save the acquired images and metadata:
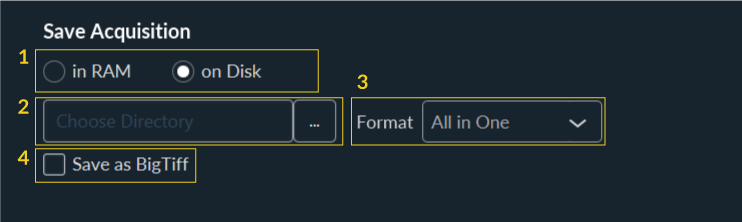
- Select the type of data storage you want:
- in the RAM of the computer (not recommended: all data stored in the RAM of the computer are not saved and will be lost when the program is closed)
- in the computer/hard disk, SSD or servers (recommended).
- Select the path to save your data.
- Select the format to save all images:
- all in one file;
- one tiff per image.
- It is also possible to create a .bigTiff file (recommended for long and heavy acquisitions).
If you need to standardize the name of all saved data files before the acquisition, please, click here