Positions
This dimension is dedicated to image different XYZ positions from a sample. You can switch from this dimension to the Tiling dimension by the button Switch to Tiling.
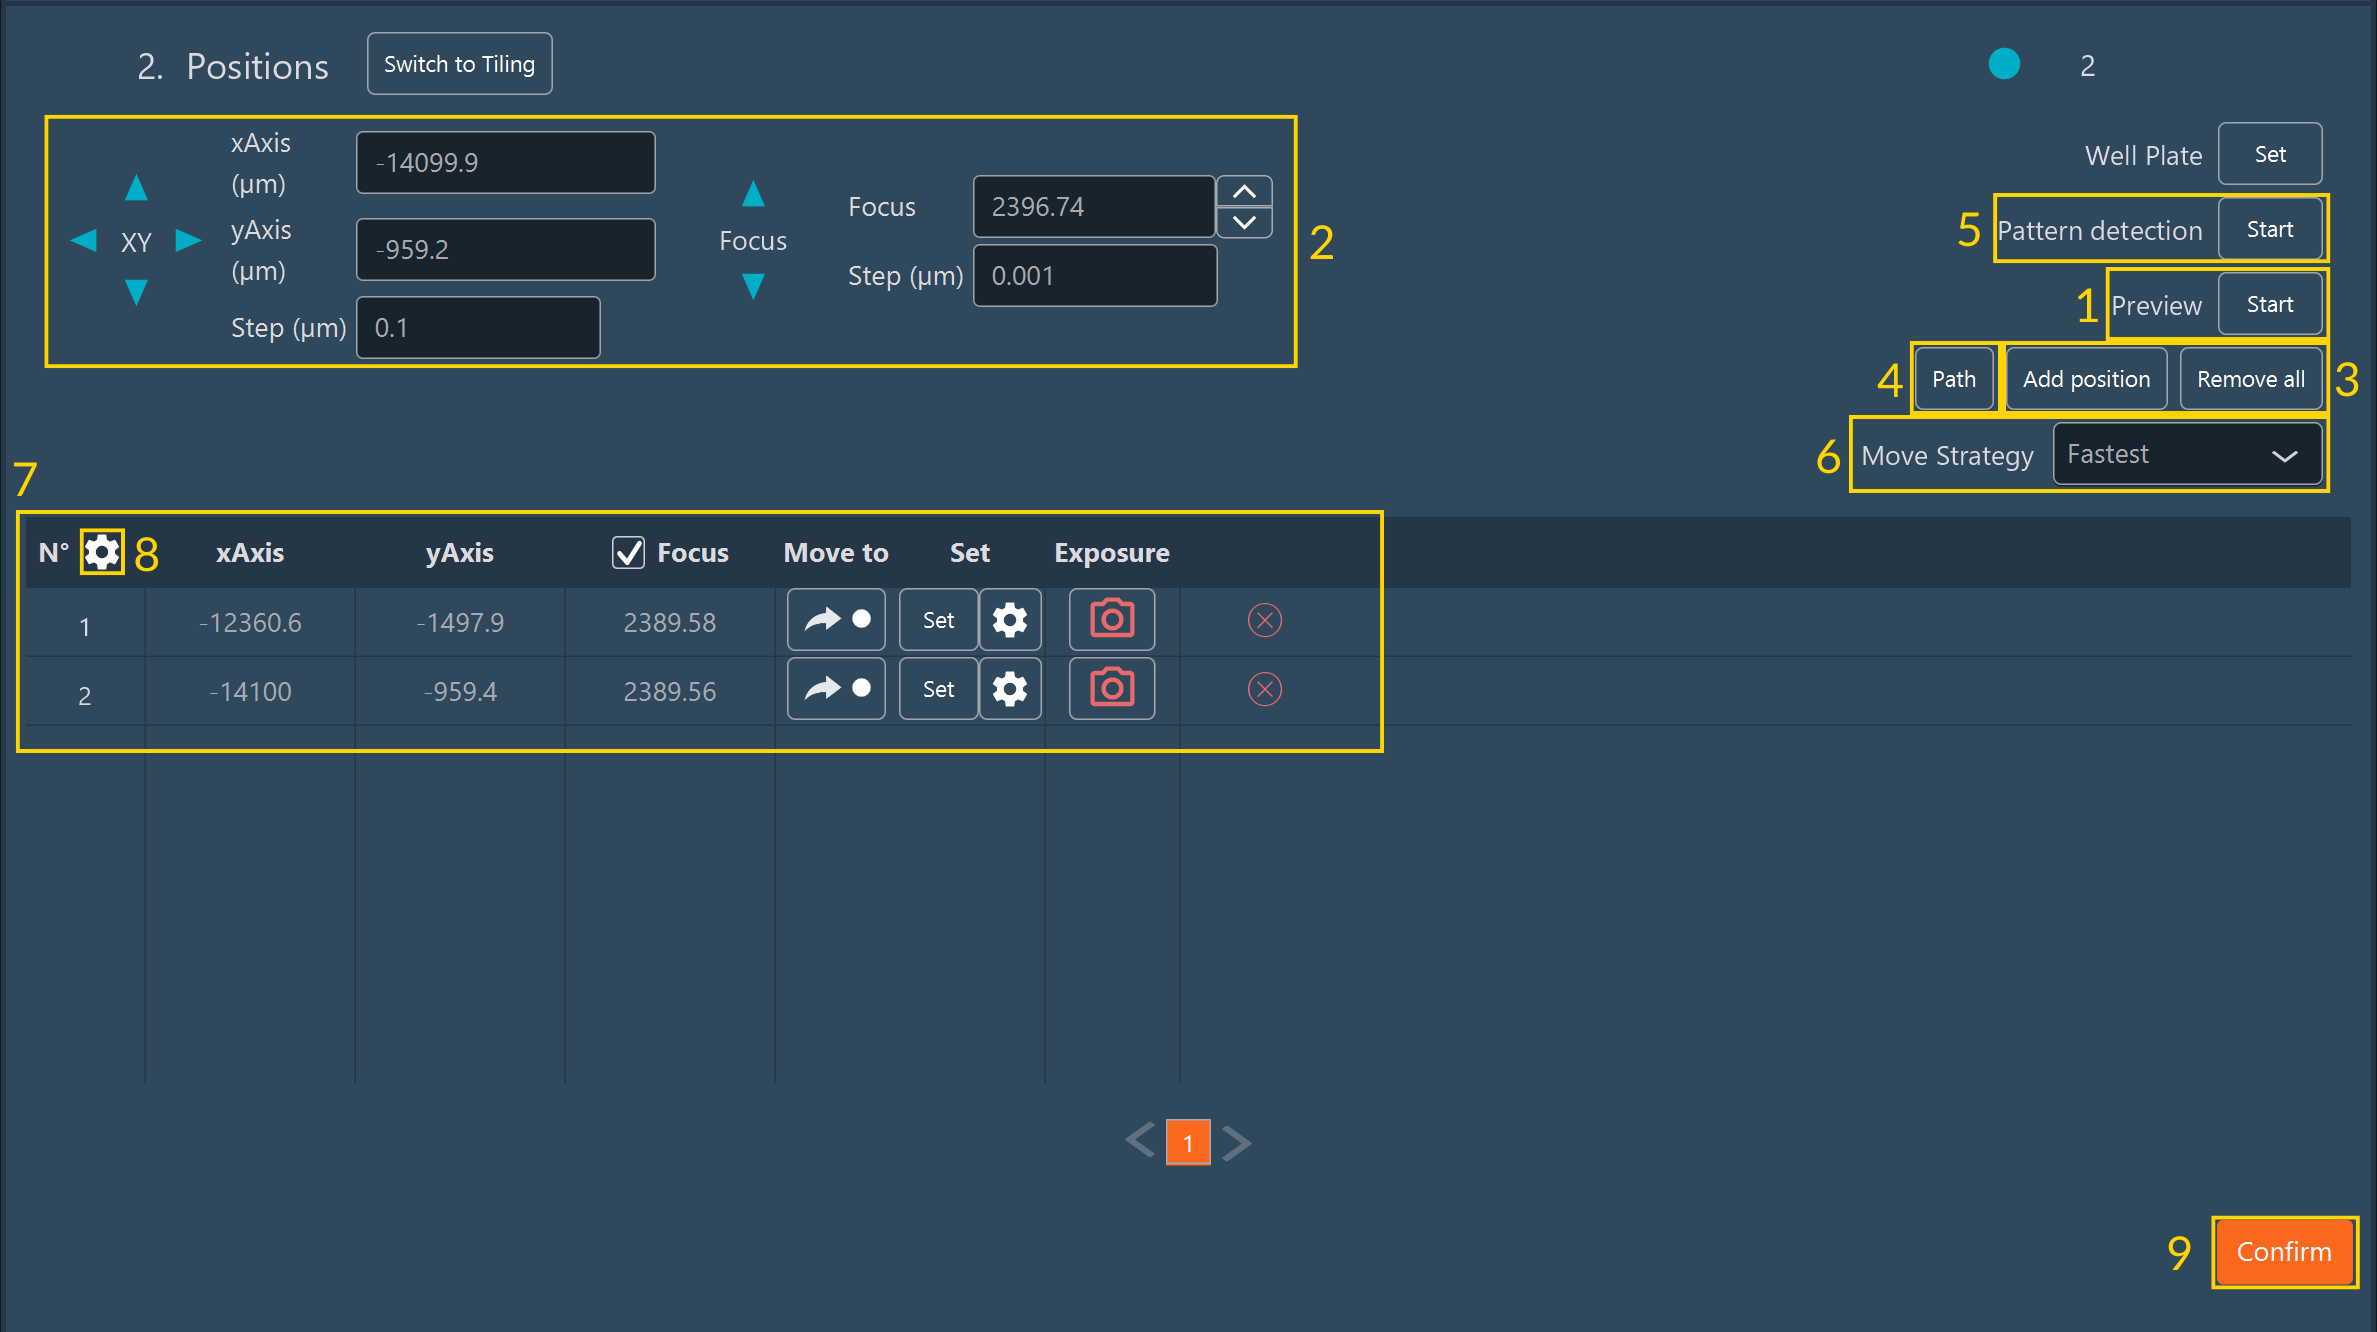
To use the Positions dimension:
- Do a Preview of your sample.
- Move the stage and the focus to the desired position.
- Click on Add position to add the XYZ coordinates in the position list.
-
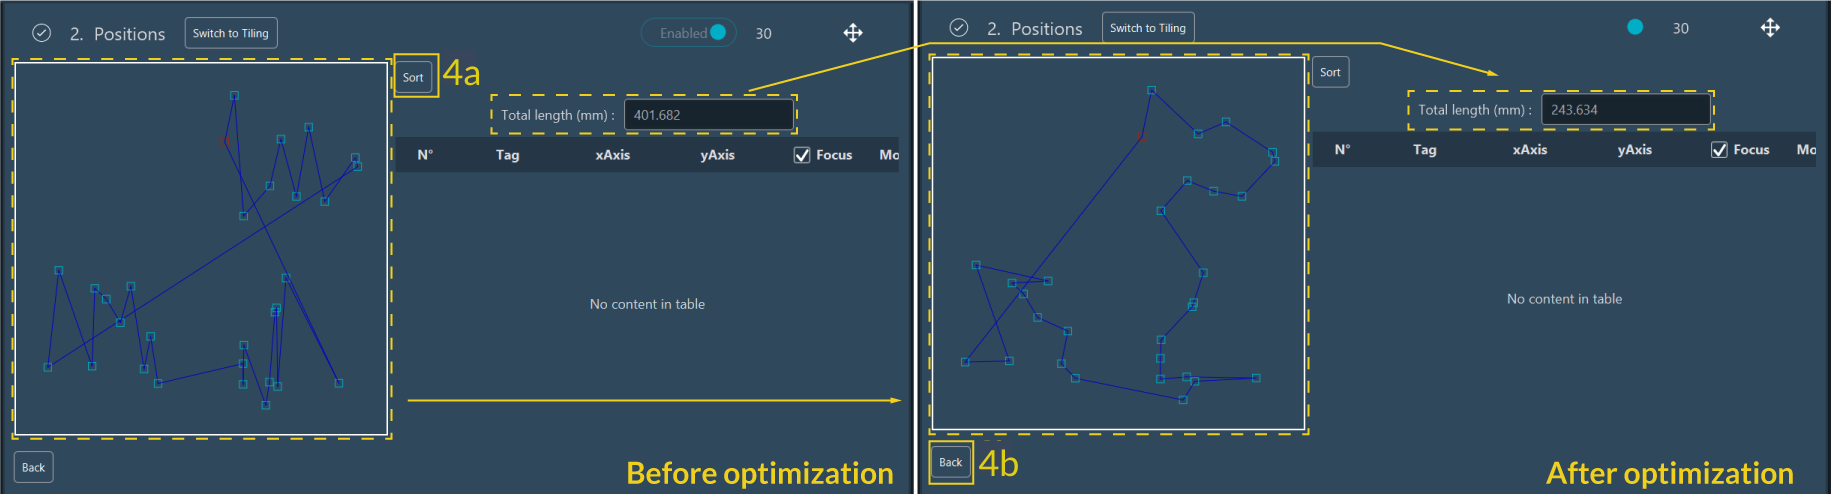
Click on the Path button if you need to optimize the
stage mouvement when you have multiple
positions.
-
Once optimization is complete, click the Back
button to return to the position dimension view.
-
Once optimization is complete, click the Back
button to return to the position dimension view.
-
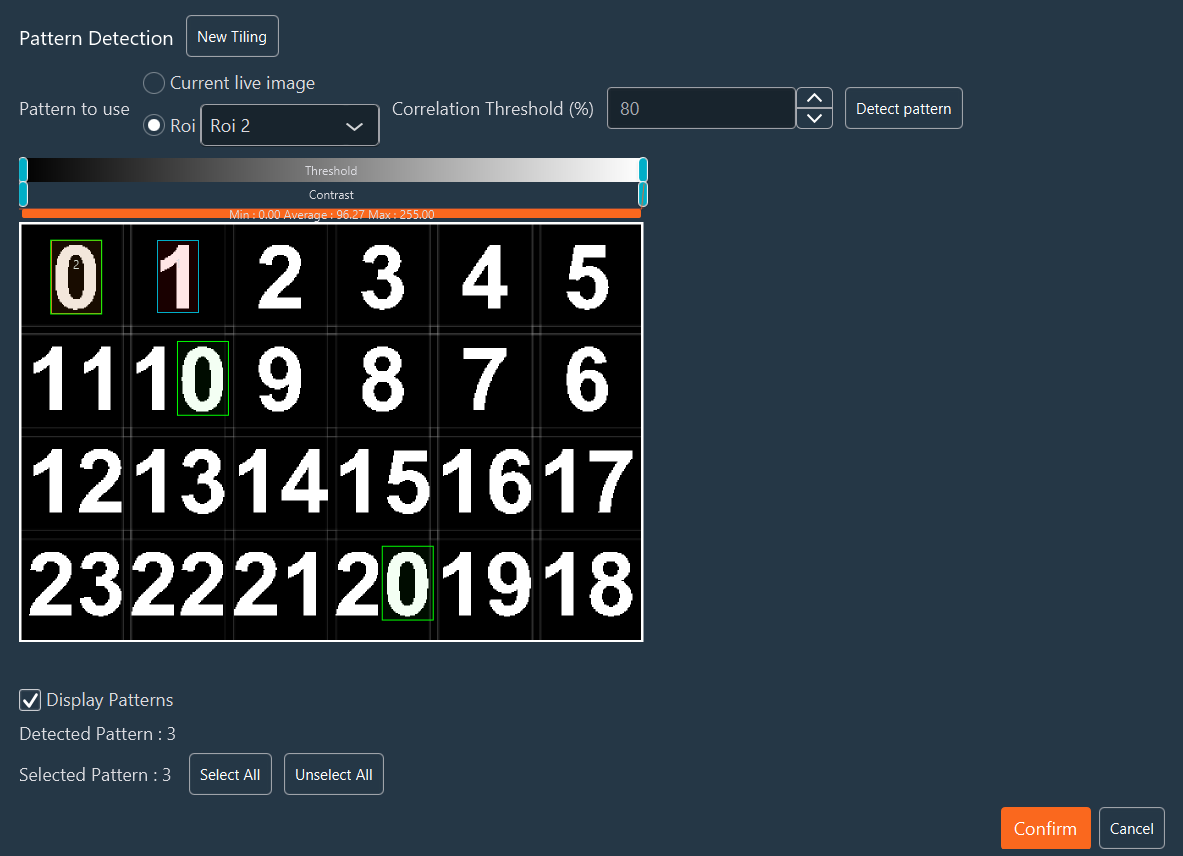
If necessary use Pattern Detection tool which allows the
recognition of patterns from the current live image or from ROI:
-
Click on Detect pattern to start the
detection.

-
Once it’s done, all patterns recognized are surrounded like ROI. You
can select or unselect some ROI by clicking on Select
all or Unselect All or by
clicking directly on the ROI.
-
Then click on Confirm button and position of
each pattern will be registered on the position list.
-
Click on Detect pattern to start the
detection.
-
Adjust Move Strategy if necessary: When performing a
multiposition acquisition with a significant distance between two
positions, two options are available for the stage moving between these
two positions:
- Fastest: Move directly from position A to position B;
- XY Split: Move between 2 positions with small steps. Indicate the step by filing the Step (µm);
-
Make other adjustments or manipulations if necessary:
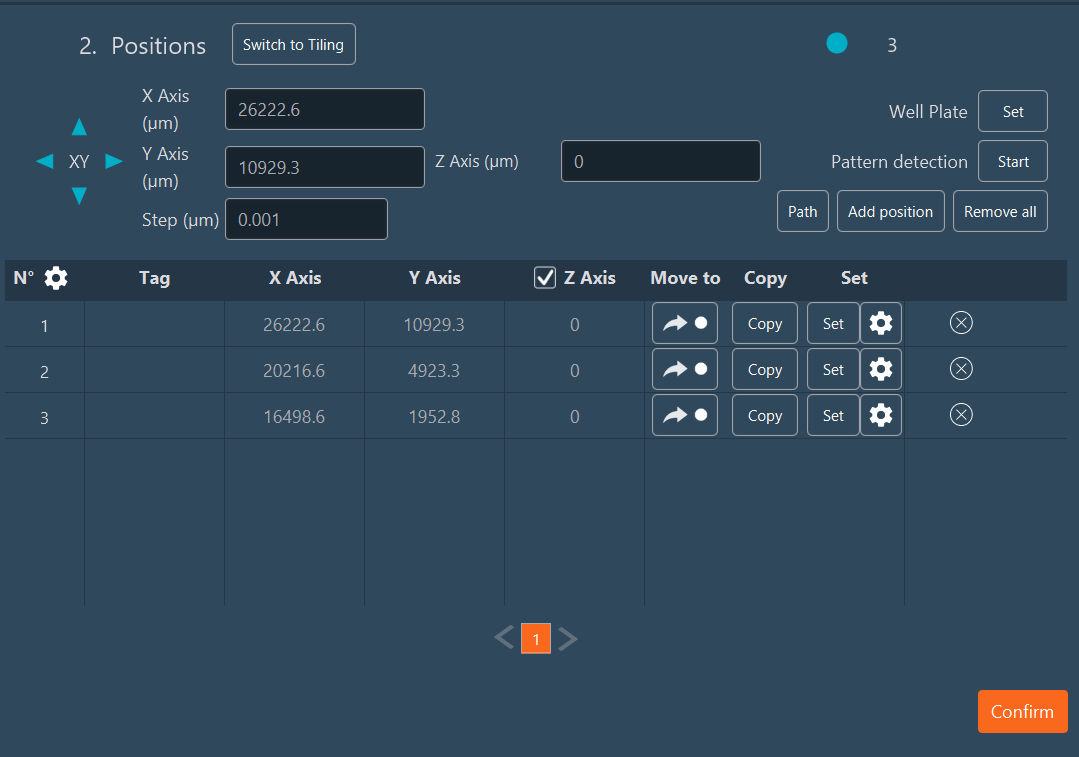
- X-Axis/Y-Axis: Change/adjust position if necessary.
- Focus or Z-axis: Use the focus value used for the selection of the positions. If the checkbox is not selected, the current focus value of the microscope will be used.
- Move to: Move the stage to this position.
- Set: Update coordinate of the position by the
actual XYZ position of the system; You can modify the axis (X,Y and
focus), apply offset on the axis for all positions or for the selected
position by clicking on the
 . You can select
which axis you want to modify by checking it.
. You can select
which axis you want to modify by checking it.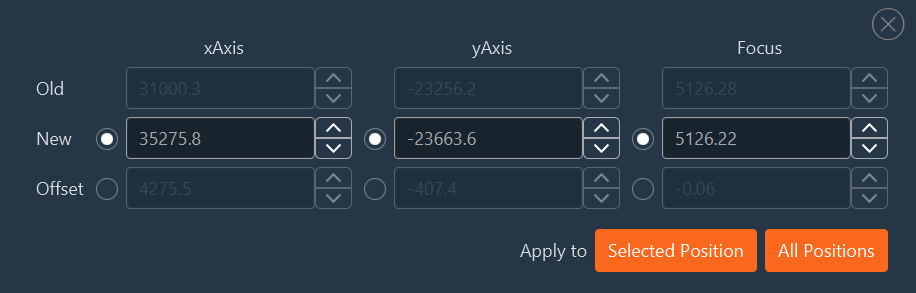
- Adjusting Exposure Time by Position: This feature
allows you to modify the exposure time for specific
positions.
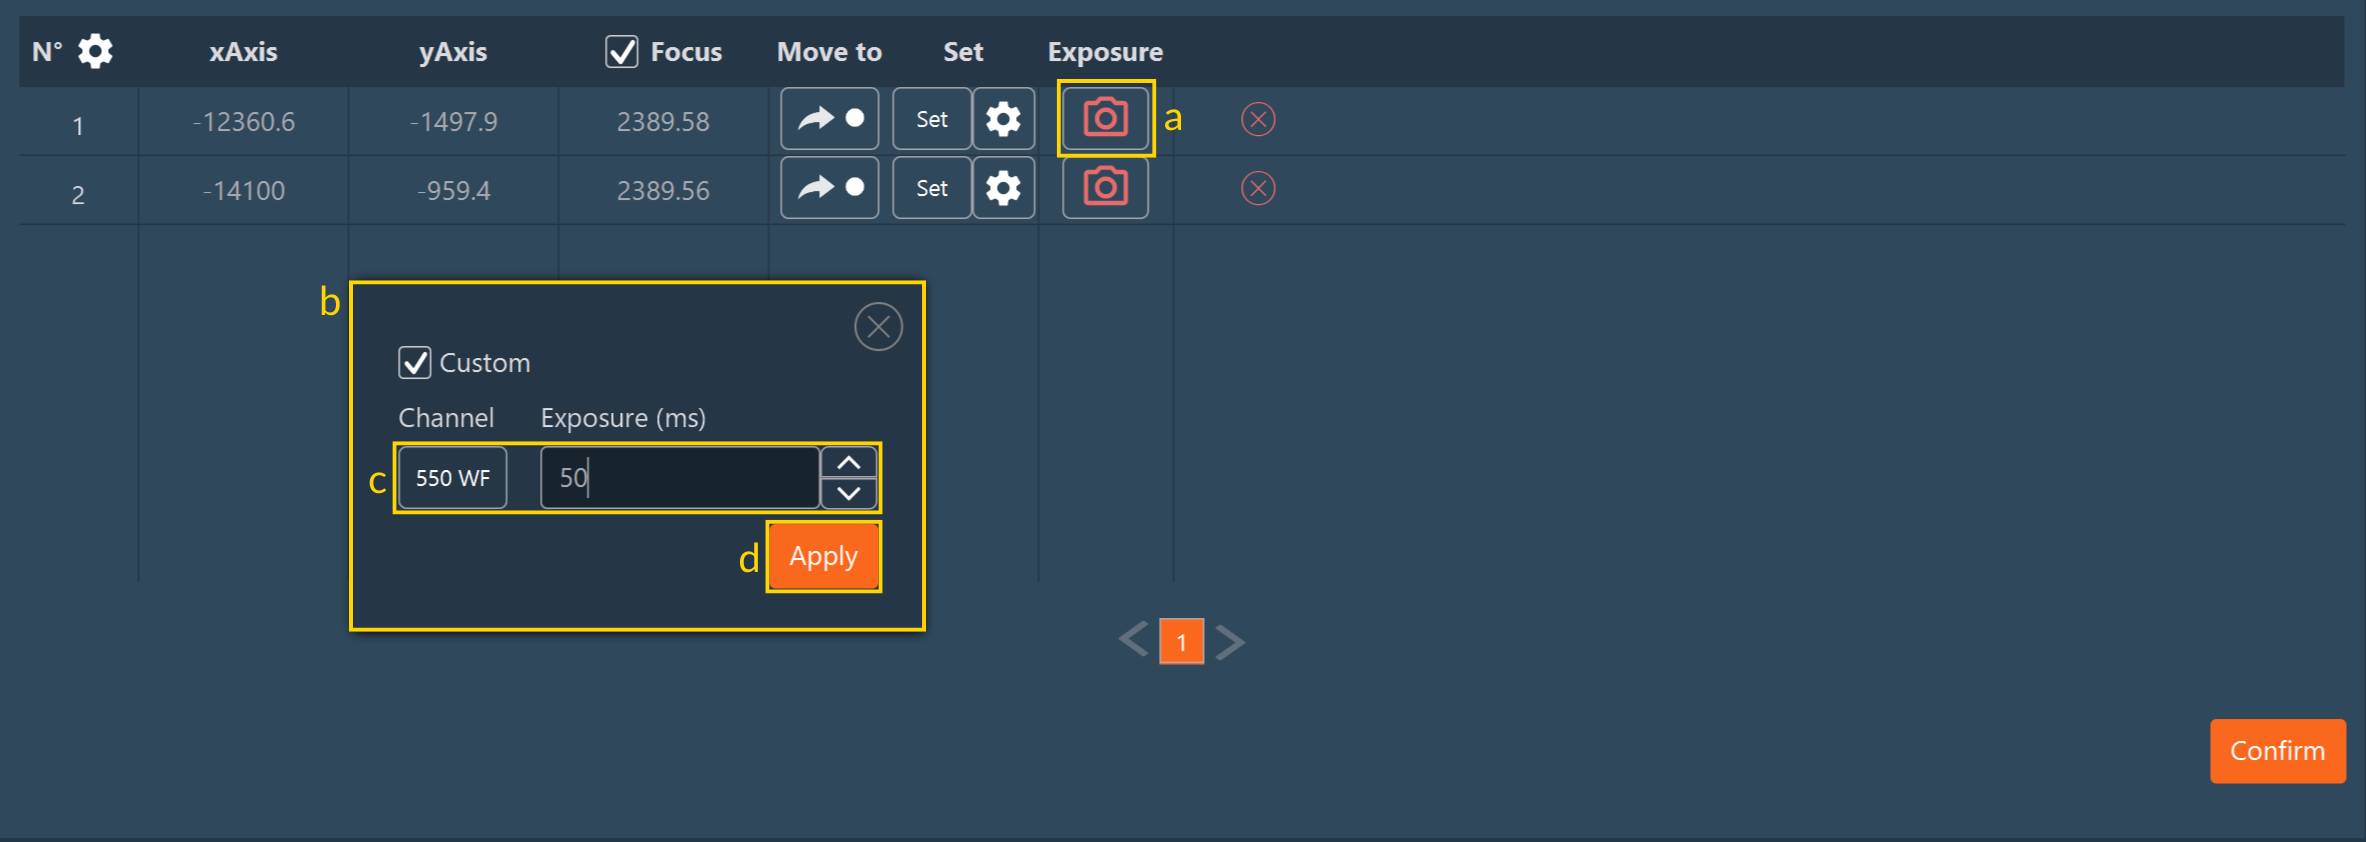
- Click the camera icon on the line corresponding to the position where you want to adjust the exposure time.
- Check the Custom box to enable exposure time modification.
- Update the channel value you wish to adjust. The channel corresponds to the one defined in the channel dimension or if no channel is defined in the dimension, the current channel will be used by default.
- Click Apply to confirm your changes.
When a line has been modified, the camera icon color changes from red to green, indicating that a custom exposure time has been set.

 : delete this position from the position
list.
: delete this position from the position
list.
-
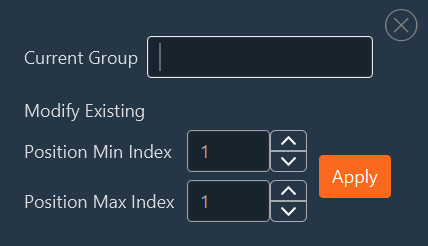
If you have multiple positions you can create different groups of positions.
For this click the gear icon to open the settings
menu:
- Name your group.
- Indicate the range of the position index that you want to group together.
- Click on Apply.
- Repeat those steps if you want to do multiple groups.
- When all positions are set up, click on Confirm.