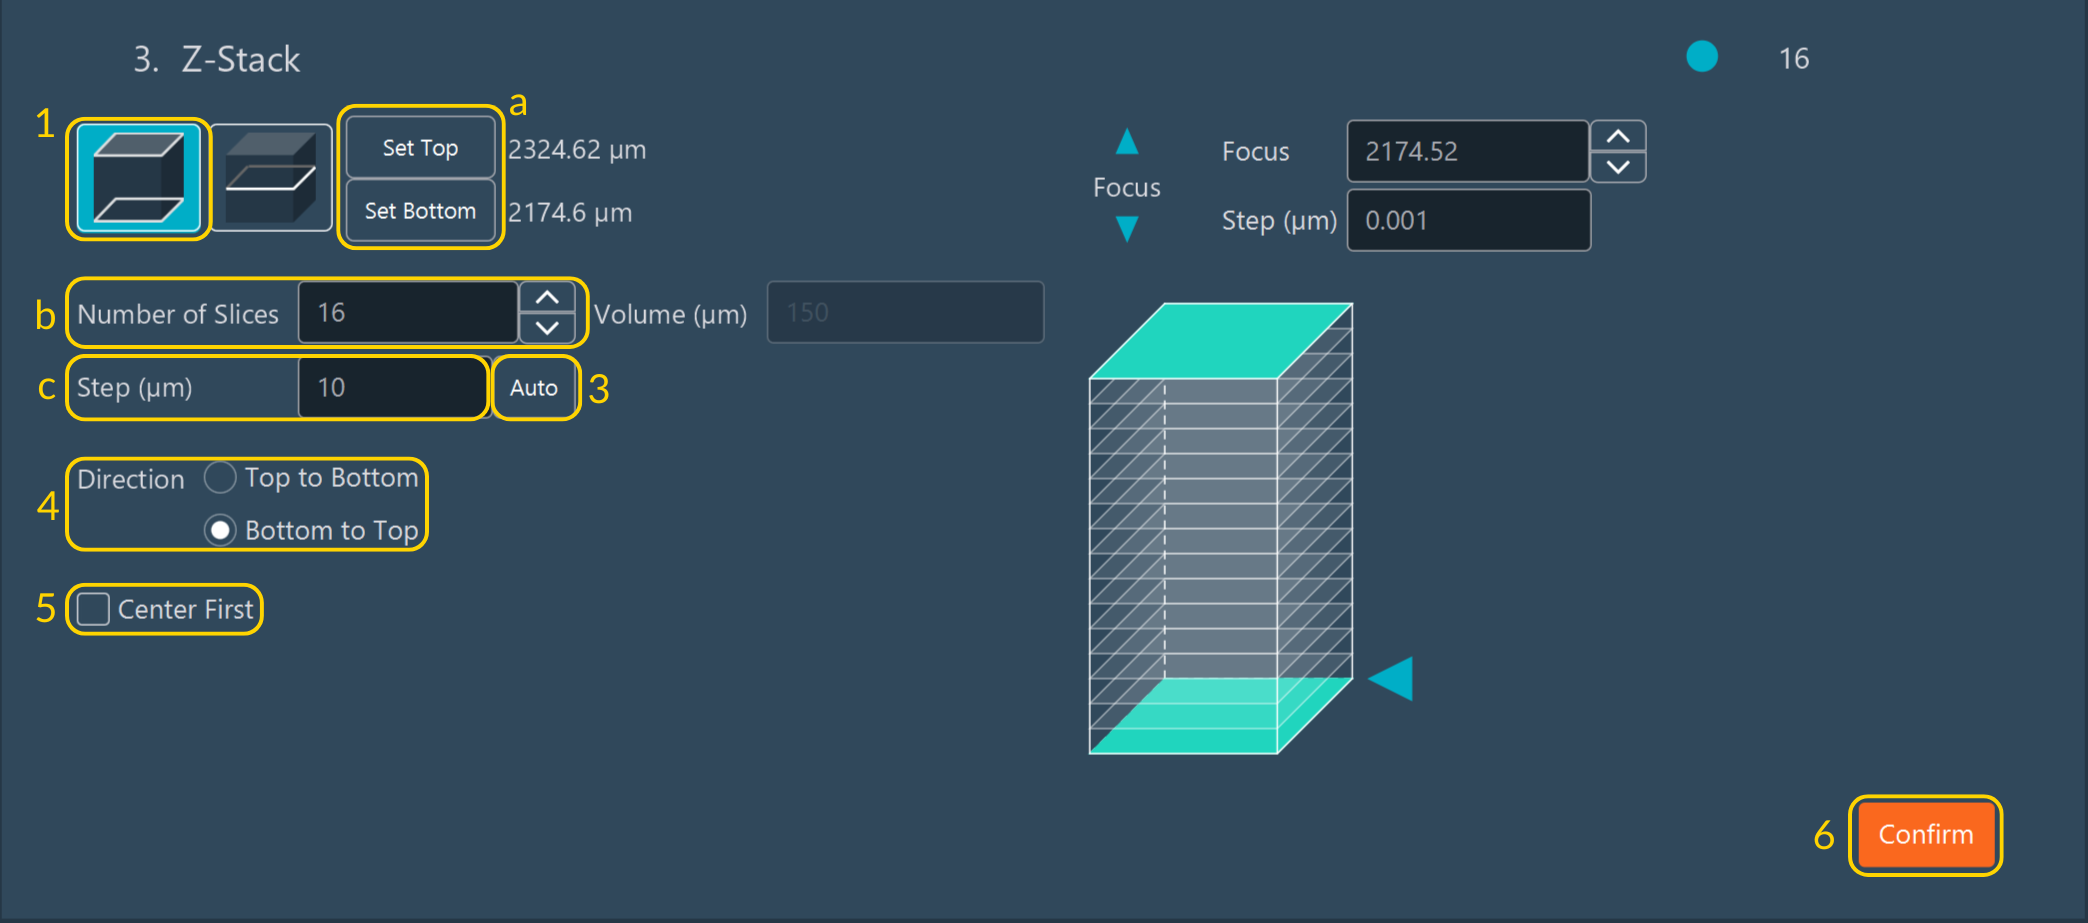
Z-stack
The volumetric imaging with Inscoper I.S. can be performed using the Z-Stack dimension.
You can configure your Z-stack in two ways:
- By defining the top and bottom limits:
- Click Set Top and Set Bottom to define the upper and lower limits of your Z-stack.
- Enter the number of focal planes in the Number of slices field.
- Define the step size (in µm) between each focal plane.
- By selecting a single reference plane.
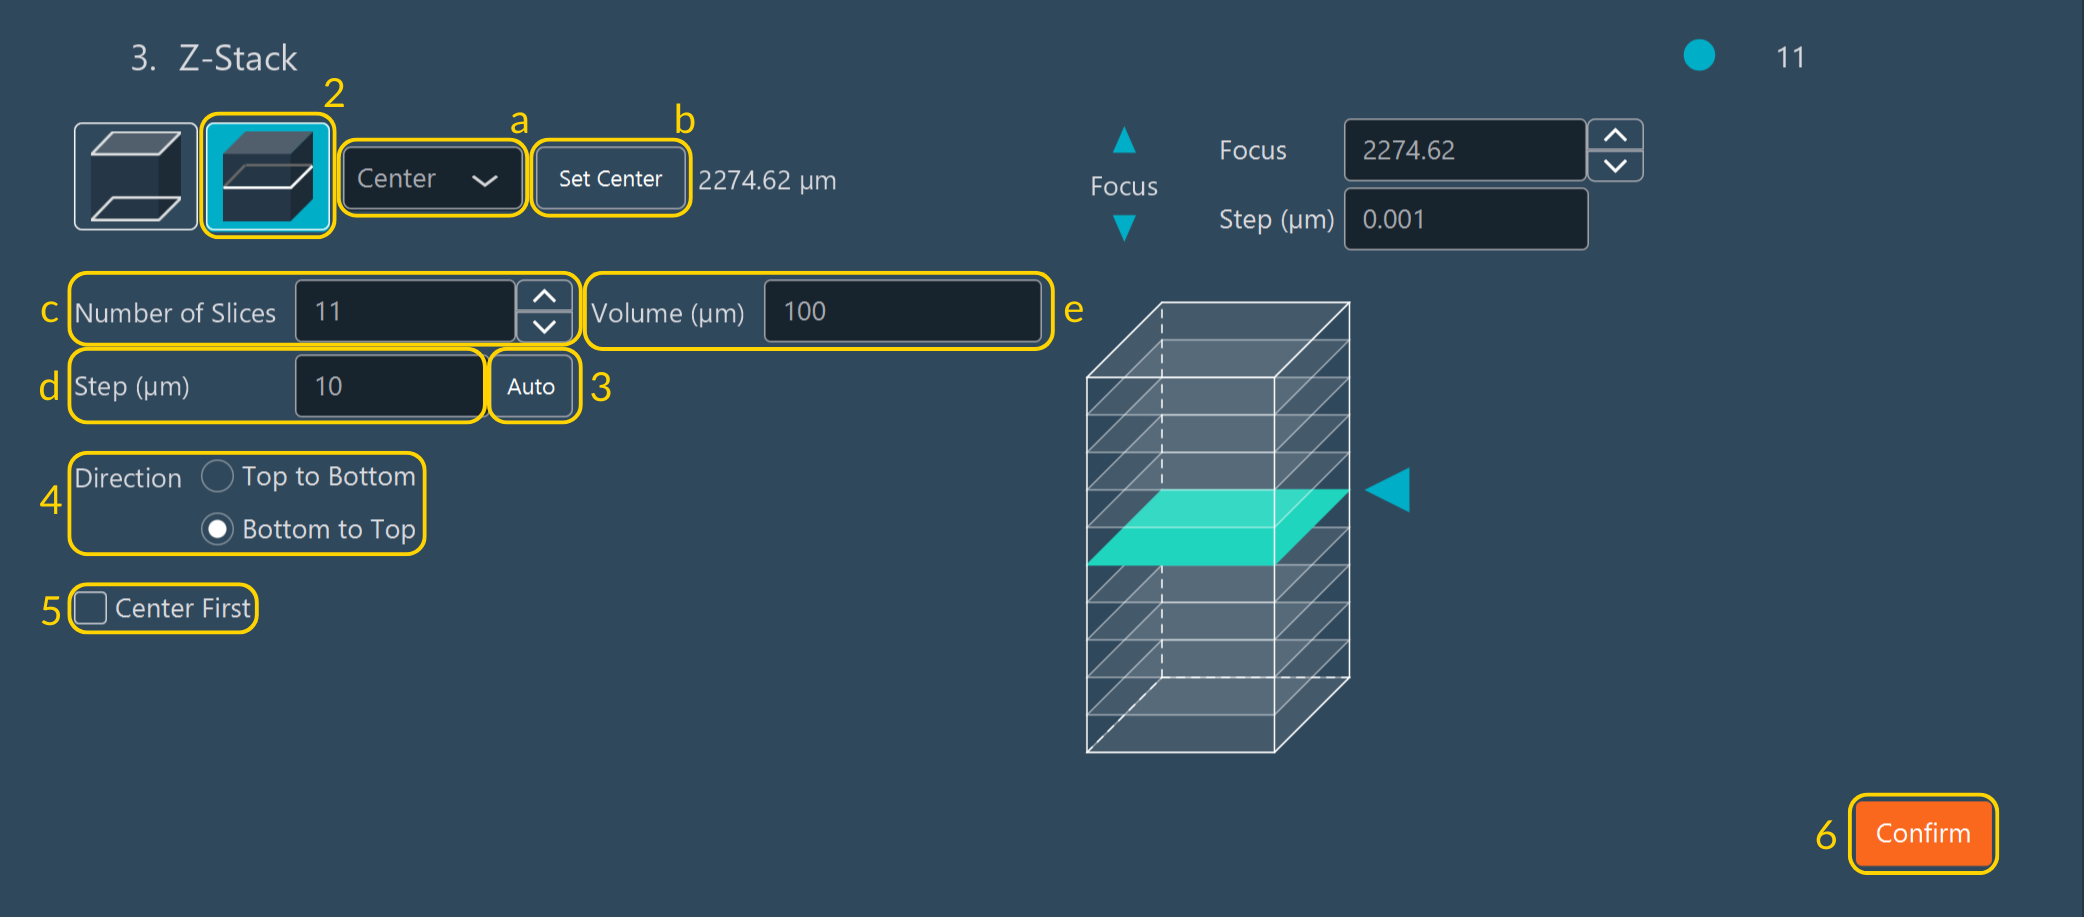
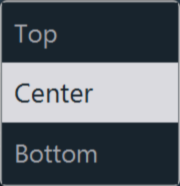
- Choose whether you want to define the center,
top, or bottom of your
Z-stack.
- Click Set Center, Set Top, Set Bottom to select the focal plane.
- Specify the number of focal planes in the Number of Slices field.
- Set the step size (in µm) between each focal plane.
- Enter the volume of the Z-stack (in µm).
- Choose whether you want to define the center,
top, or bottom of your
Z-stack.
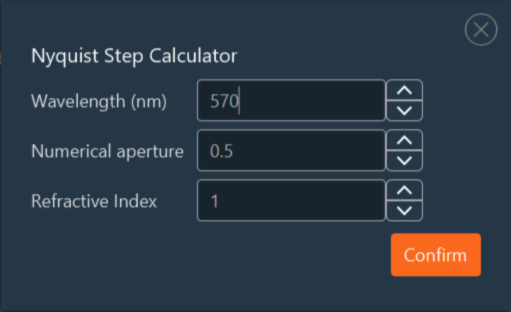
- Click Auto to automatically calculate the optimal Z sampling
for your Z-stack. The software uses the highest wavelength defined in the
channel dimension to determine the optimal step size.
All fields remain editable, allowing you to manually adjust the calculated step if needed. [Modify the emission wavelength, the numerical aperture of your objective and the refractive index of your objective immersion medium] then click Confirm to validate your settings.
- Choose the acquisition direction: from top to bottom or bottom to top.
- Enable Center First if you want the acquisition to start from the central plane of the Z-stack. This option must be activated when using a hardware autofocus system such as PFS.
- Click Confirm to validate.
Note:
Use the visual Z-stack diagram to check
your setup — you can either move the blue arrow or click directly
on the diagram to preview your stack.
Notice:
If you set your ZStack with the center plan, the
Volume, Step and Size are linked. If you have position dimension activated and the
Z-axis is checked for your position, this focus will be the center of your
Z-stack.