Preview feature in Position and Tiling dimension
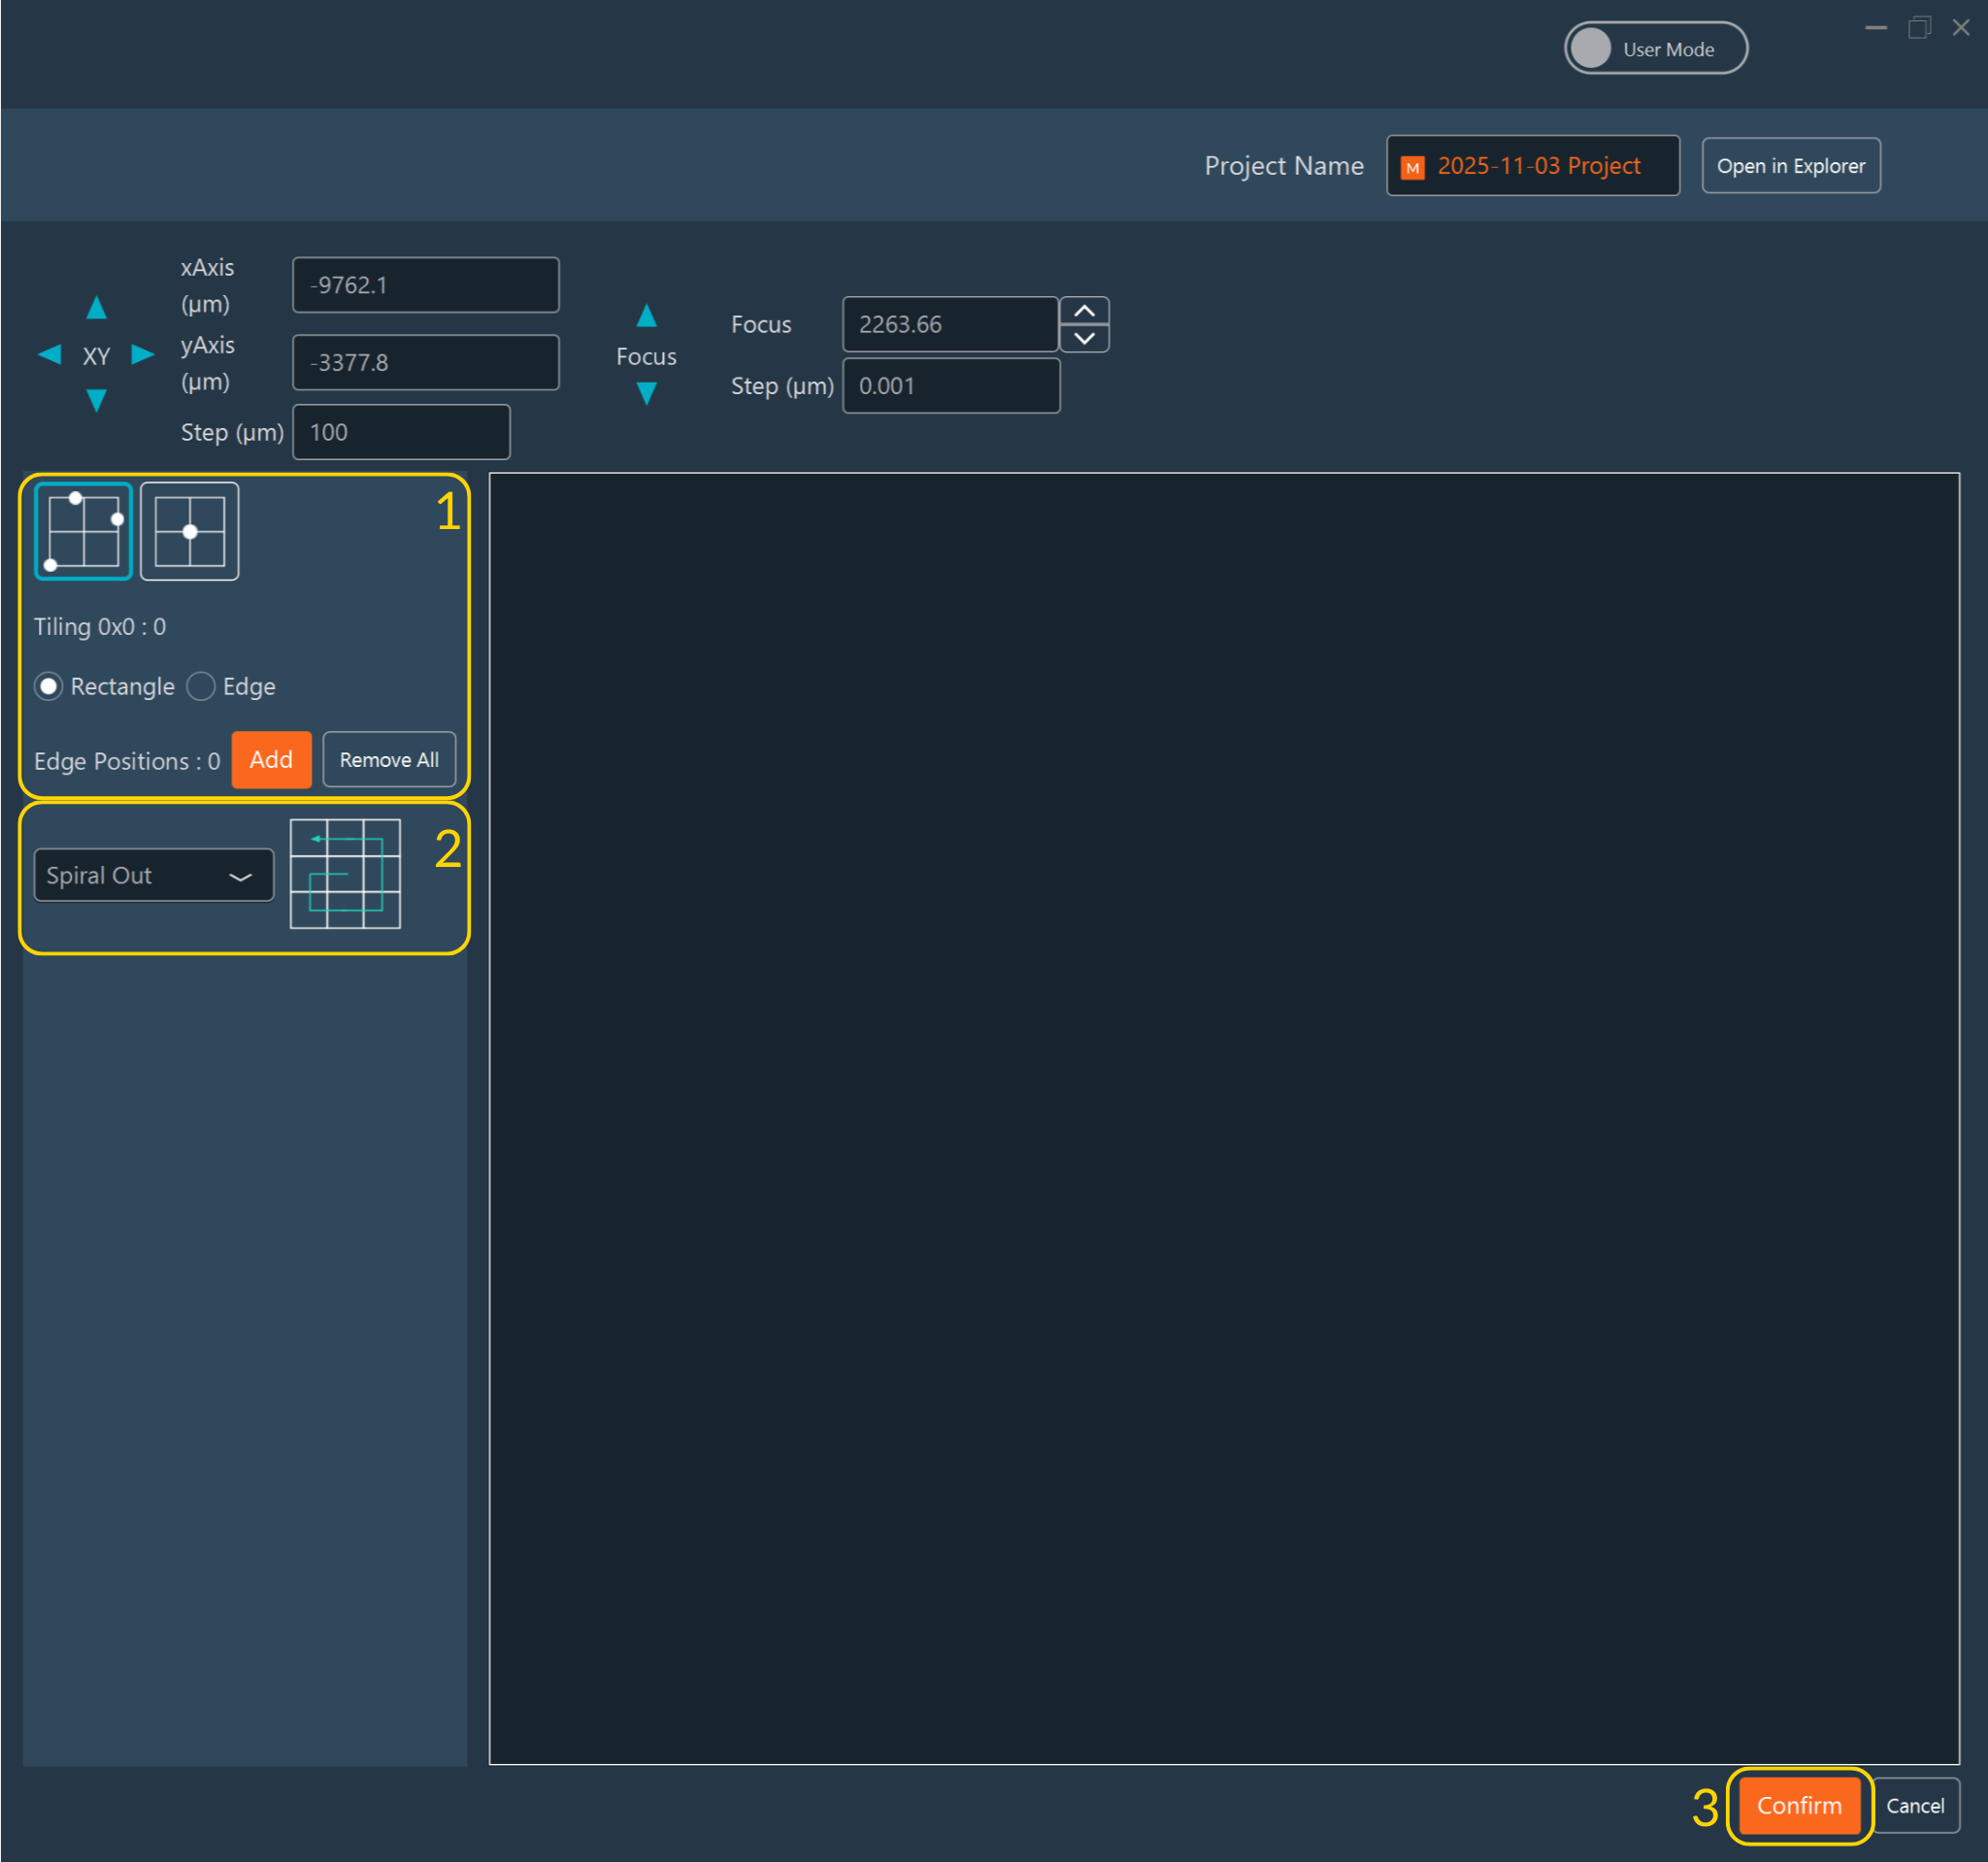
- Configure the Preview: Similar to Tiling Edition, you can
either:
- Define multiple points to create either a rectangular preview or a custom preview by outlining its edges (not limited to rectangular shapes) by clicking Add, or,
- Define the center of your tiling by clicking Set, then specify the number of tiles.
- Select the Read Mode (Spiral, snake,..).
- Click Confirm to validate your configuration.
-
Follow the preview process in real time. You can stop it at any time by clicking Cancel.
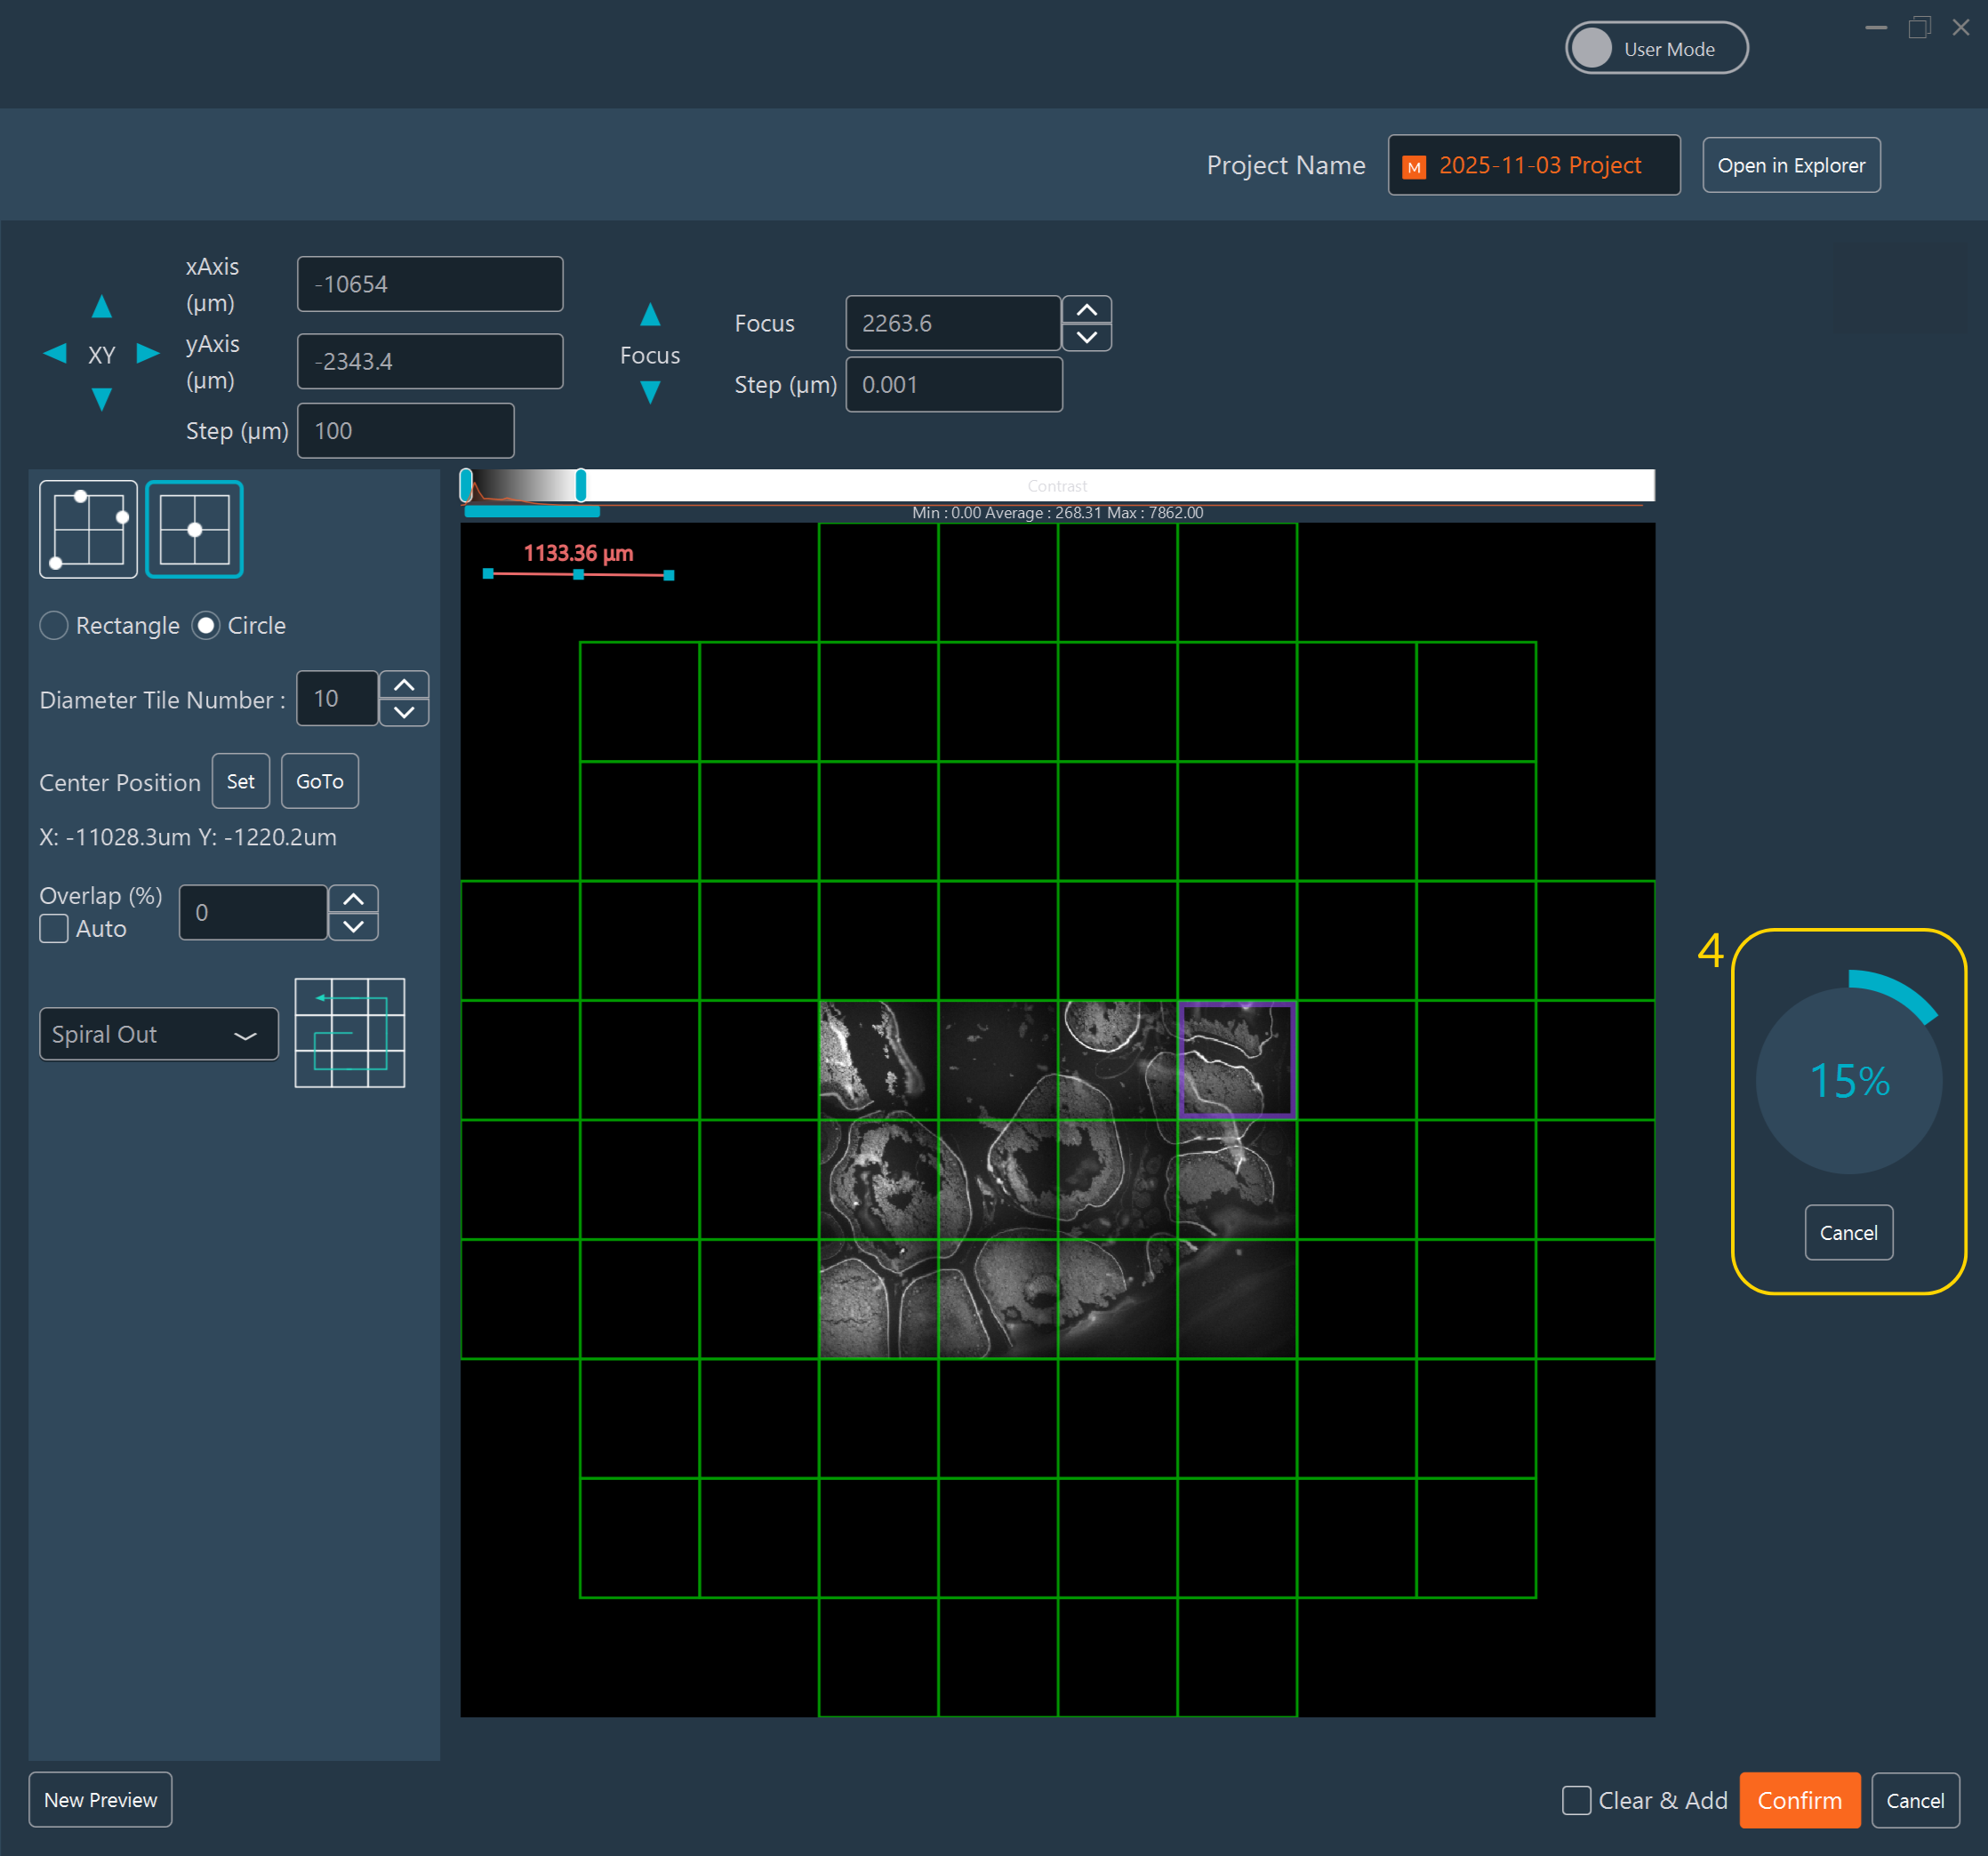
Once the preview is complete:.png)
- Click New Preview to start a new setup.
- Draw multiple ROIs in various shapes: point (useful when the preview is created in position dimension), freehand, circle, or rectangle.
- Specify the tile overlap.
- Enable Auto Mode to automatically calculate the exact overlap based on the coordinates defined during the tiling setup (available only when the preview is created in tiling dimension).
- Choose the read mode (only available in tiling dimension).
- Check the box if you want to use the Z position saved in the focus map or used to set-up the tiling as the center of your Z-stack. If the box is unchecked, the Z-stack will use the Z value defined in the Z-Stack Dimensions instead.
- Check Clear & Add if you wish to replace existing tiling or positions. Leave it unchecked to add new ones.
- Click Confirm to validate.
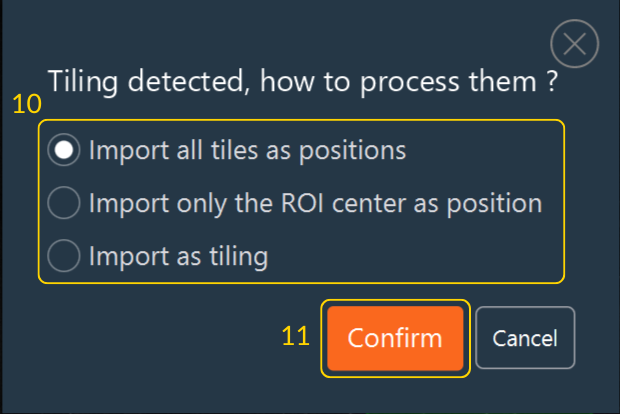
- If your preview is done in Position dimension and you
draw an ROI containing multiple tiles, a popup will appear asking how to import
this ROI:
- Import all tiles as positions: Creates one position per tile.
- Import only ROI center as position: Creates one position per drawn ROI.
- Import as tiling: Switches to tiling dimension, even if there is only one tile.
-
Click Confirm to apply your choice.
After confirmation, all created positions or tilings appear in the corresponding dimension.
- Click the Pen to edit them: you will find the preview
associated to the tiling:
- Move, modify, or delete an ROI.
- Change the Read Mode.
- Add a focus Map if your sample is not flat or if you need to adjust the value of the Z.
Select if you want to use the Z position saved in the preview as the center of your Z-stack. If the box is unchecked, the Z-stack will use the Z value defined in the Z-Stack Dimensions instead.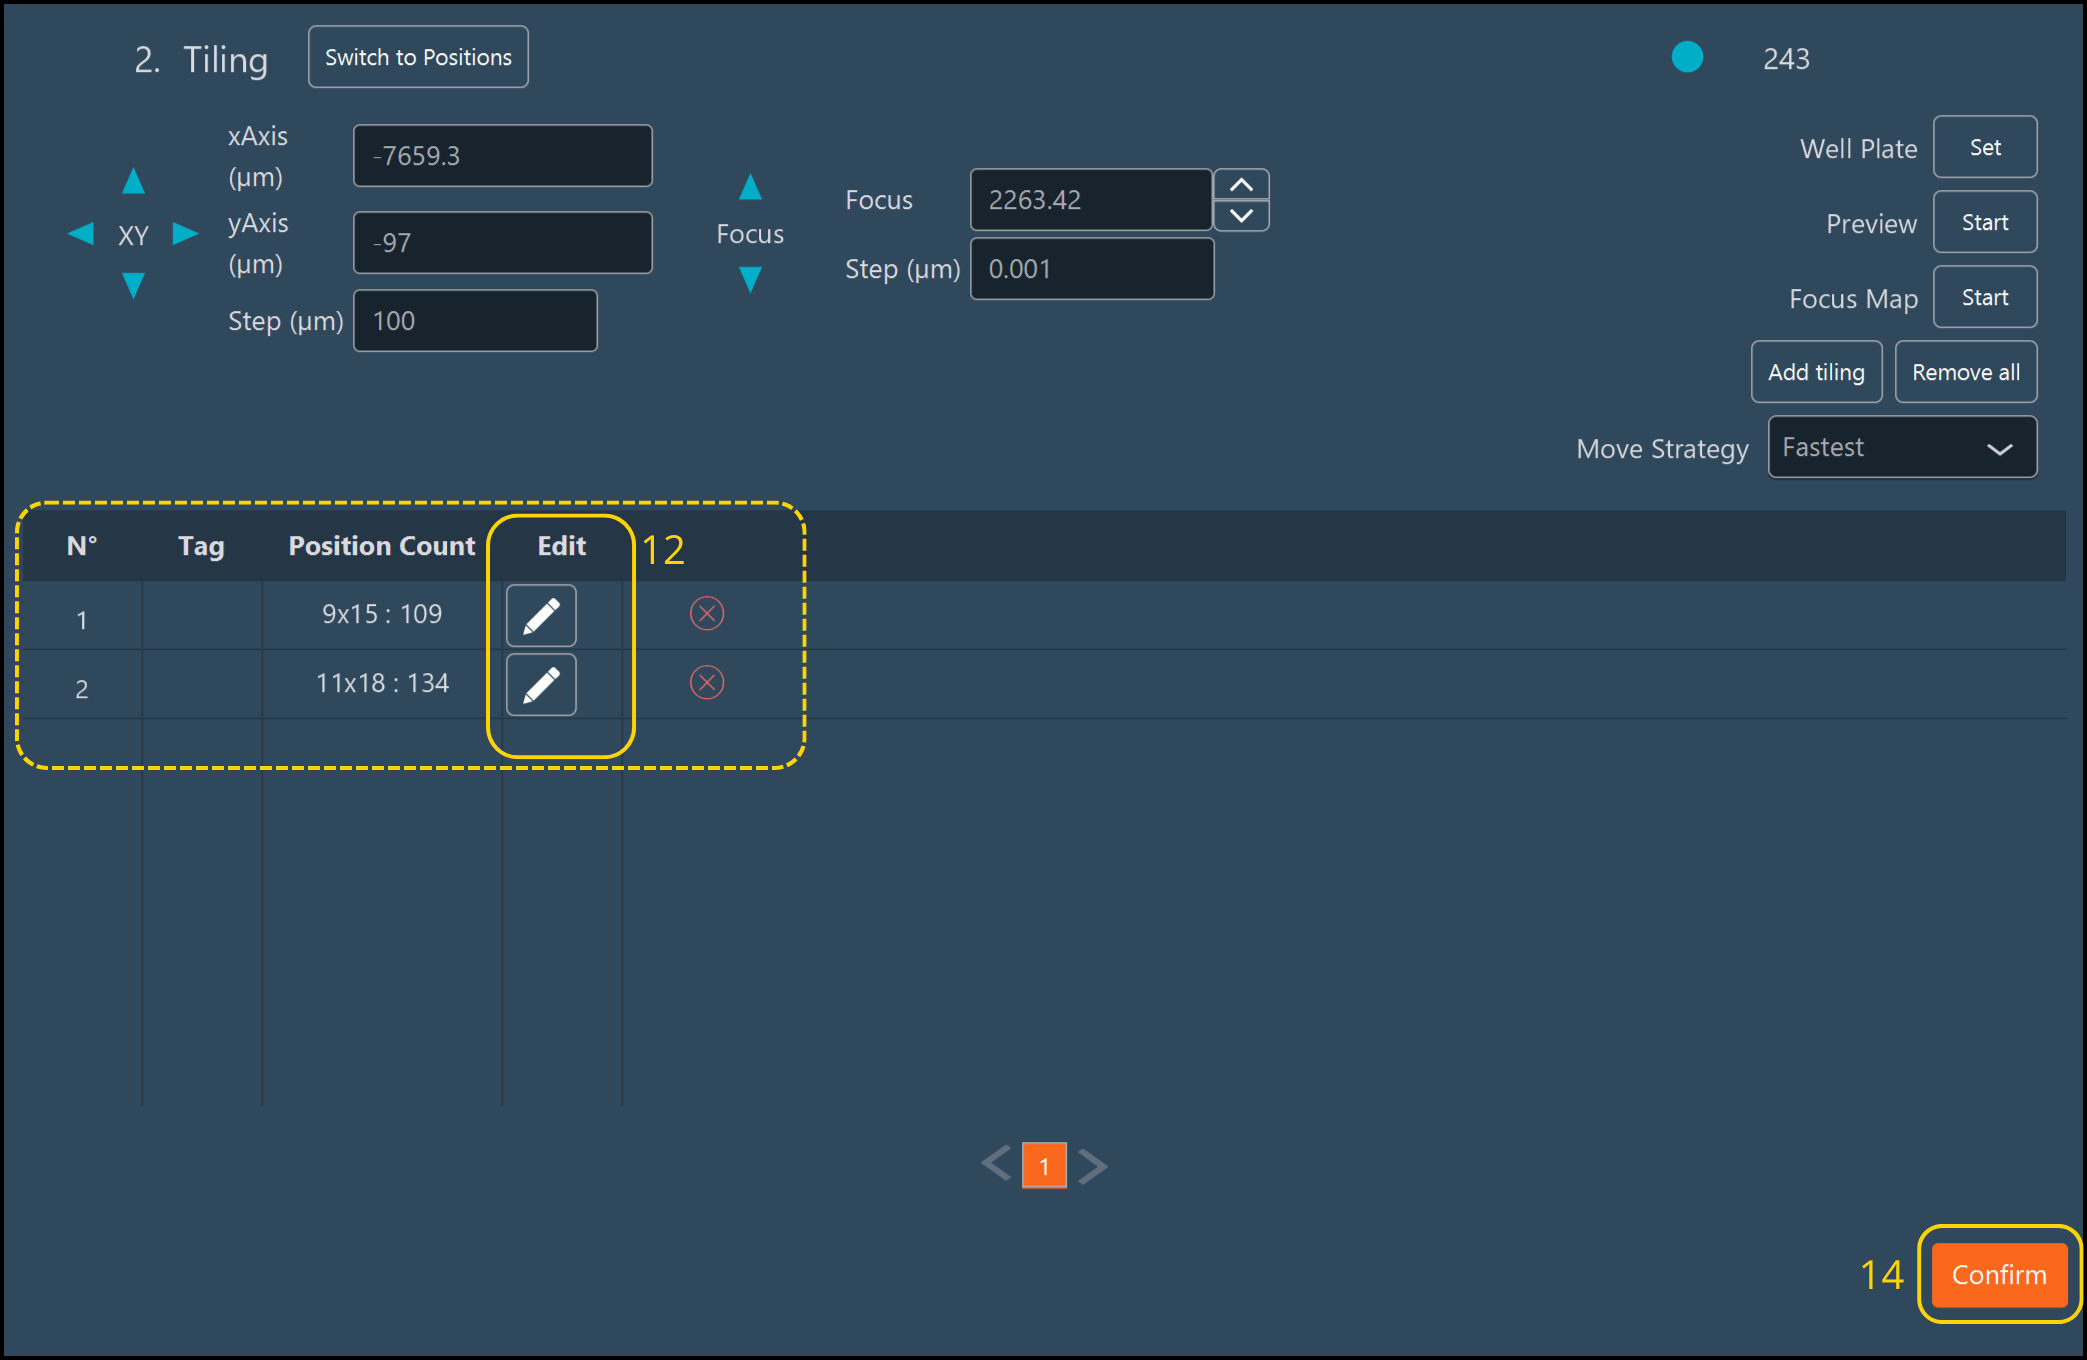
.png)
- Click Confirm to save your modifications.
- Click Confirm to validate the Tiling
Dimension.Note:To save your preview, right-click on the preview window.