Positions
The Positions dimension captures multiple discrete XYZ locations across a sample.
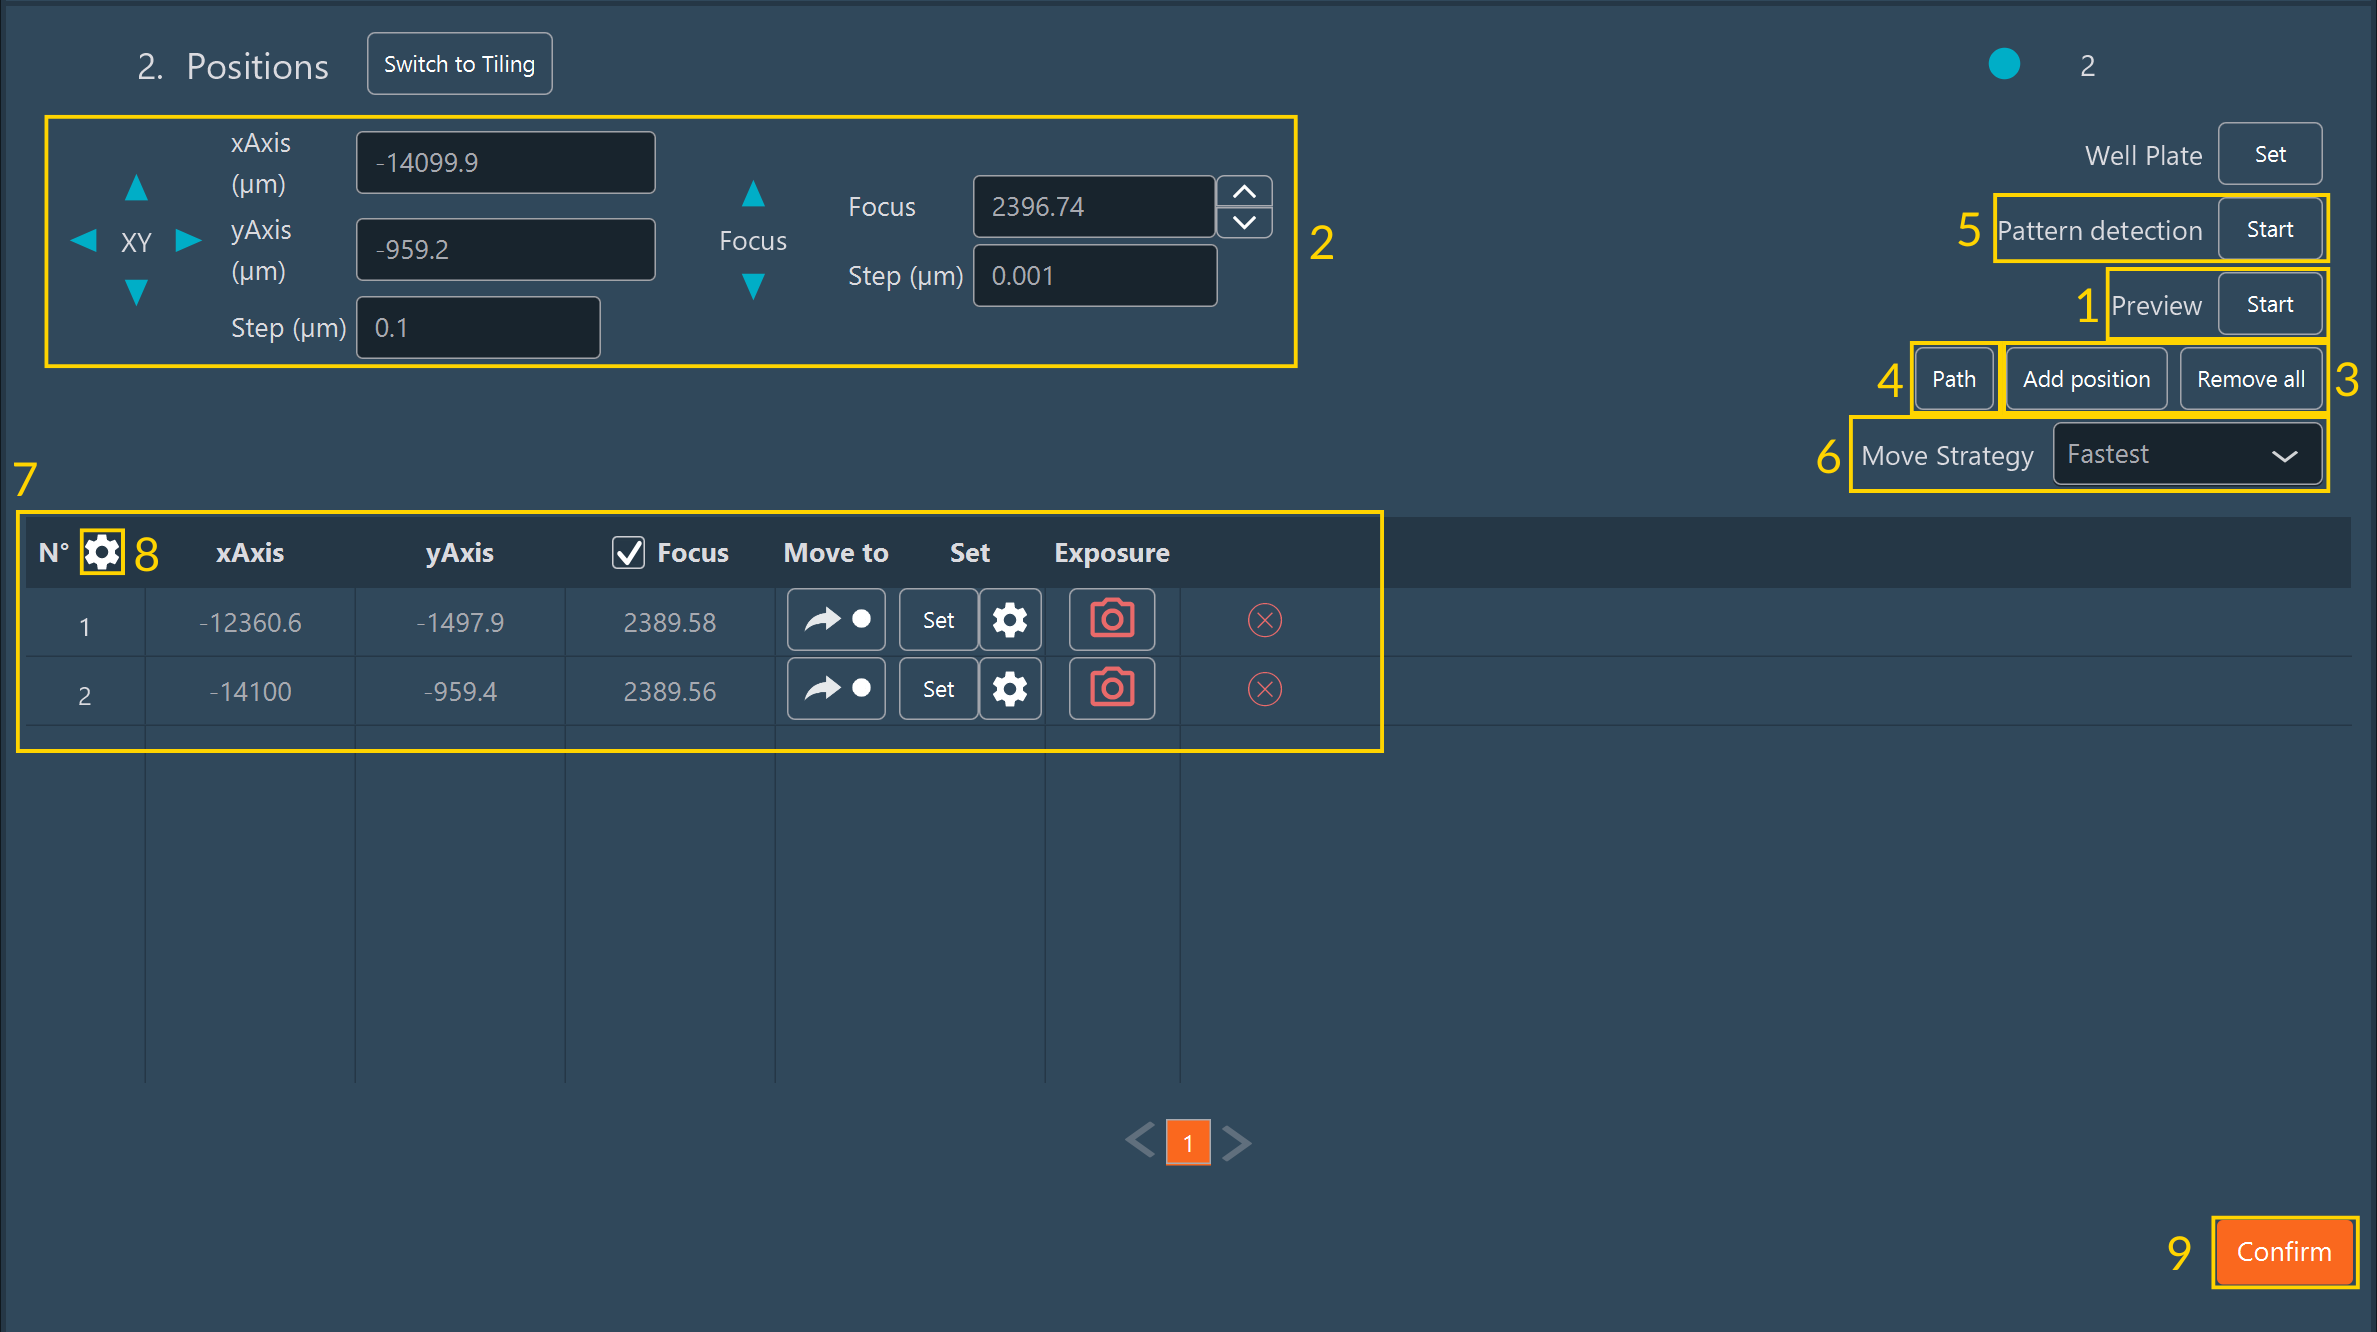
Switch to Tiling
Toggle directly to the Tiling dimension using the Switch to Tiling button to capture a continuous mosaic rather than discrete points.
Adding and Optimizing Positions
- Generate a fast Preview of the sample to act as a navigation map.
- Move the stage to the target area and adjust the focus.
- Click Add position to record these XYZ coordinates in the position list.
-
To optimize the stage movement trajectory across multiple positions, click the Path button.
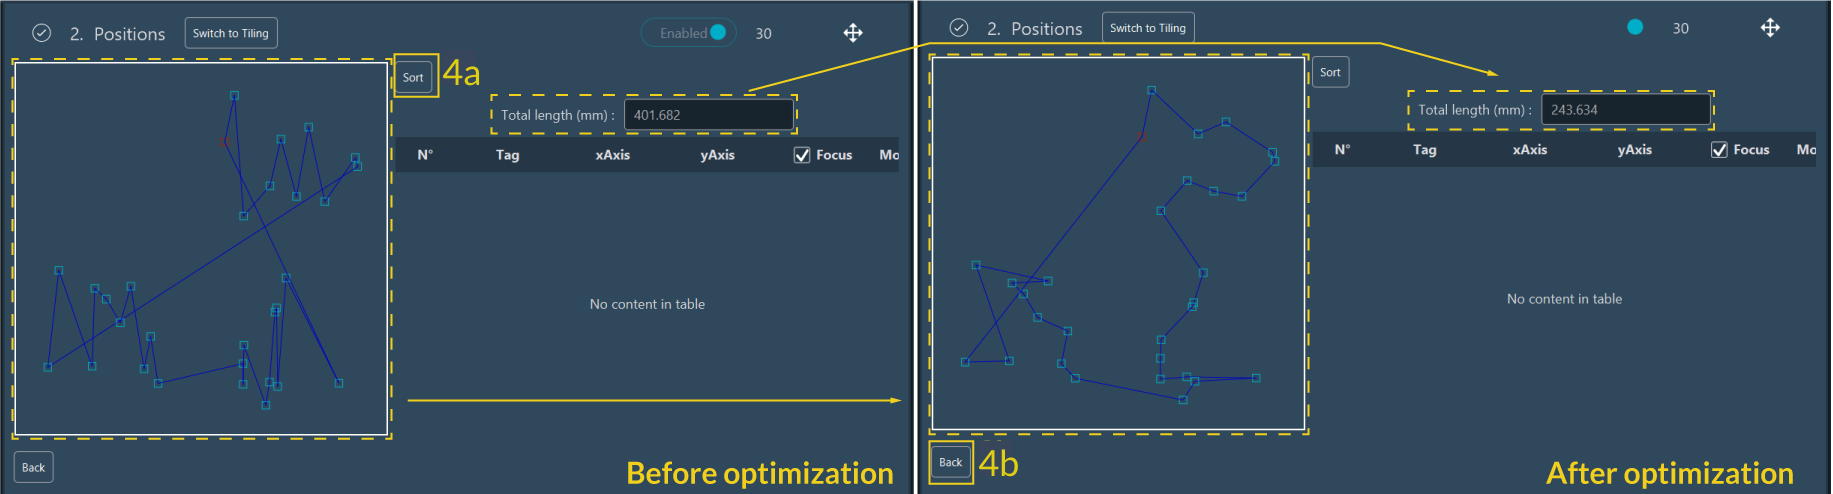
- a. By default, the stage visits positions in the order they were added. The interface visualizes this path and calculates the total travel distance. Click Sort to compute an optimized route (e.g., shortest path) that minimizes travel time.
- b. Once optimization is complete, click the Back button to return to the principal position view.
-
Use the Pattern Detection feature to automatically find XYZ coordinates matching a visual pattern in the sample.

- a. Click the Start button located in the Pattern Detection section.
- b. Create a reference scanning area by clicking New tiling. Configure it as described in the Tiling dimension section.
-
c. Define the source pattern to detect:
- Current Live Image: Extracts the pattern from the current live FOV.
- ROI: Draw an ROI around the specific biological pattern to detect.
-
d. Set the Correlation Threshold (this defines the minimum similarity percentage to identify a match).
- e. Click Detect pattern to initiate the scanning algorithm.
-
f. Recognized patterns are highlighted with bounding ROIs over the preview. Manage these selections using Select All, Unselect All, or by clicking individual ROIs to toggle them.

-
g. Click the Confirm button. The geometric coordinates of each detected pattern are appended automatically to the position list.
-
Configure the Move Strategy: For multiposition acquisitions spanning large travel distances, select how the stage translates:
- Fastest: Navigates directly from point A to point B at maximum speed.
- XY Split: Translates between positions incrementally. Specify the movement interval in the Step (µm) field.
-
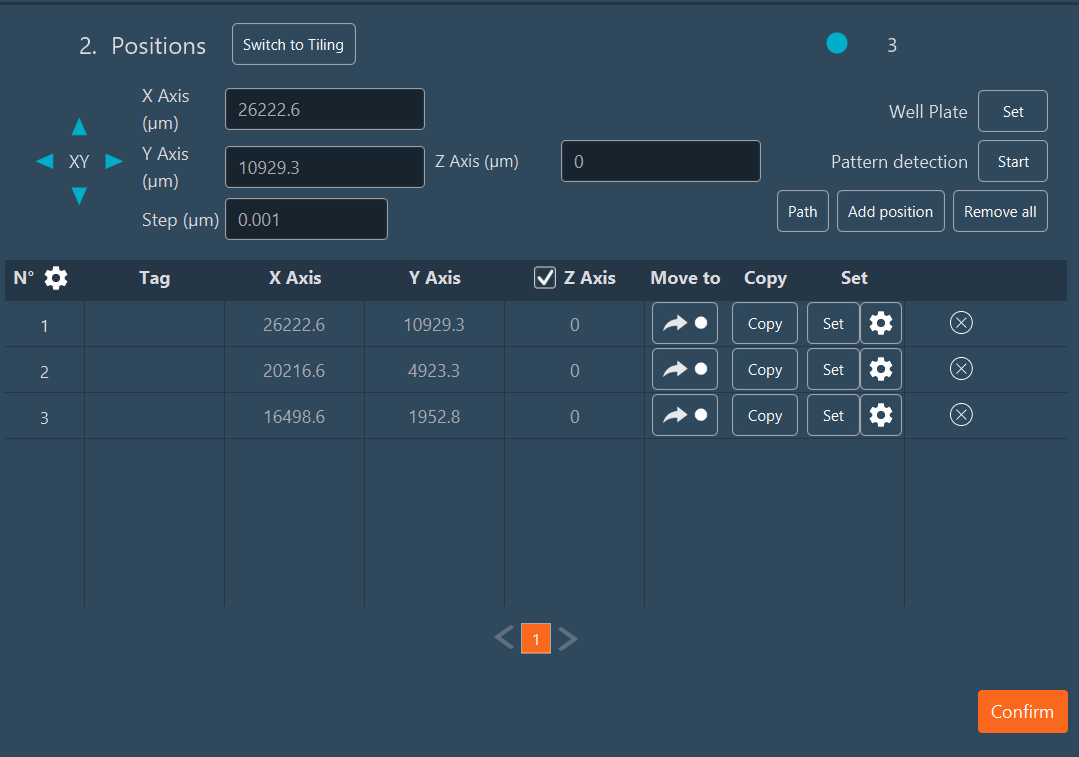
Position Editing & Overrides:
- X-Axis/Y-Axis: Manually modify coordinates.
- Focus / Z-axis: Check this box to force the system to use the Z-value saved for this position. If unchecked, the microscope maintains its current live Z-value upon arrival.
- Move to: Immediately drives the stage to this coordinate.
-
Set: Overwrites the saved coordinates for this position with the current live XYZ stage position. Clicking the
 modifies specific axes (X, Y, or Z) and applies global offsets.
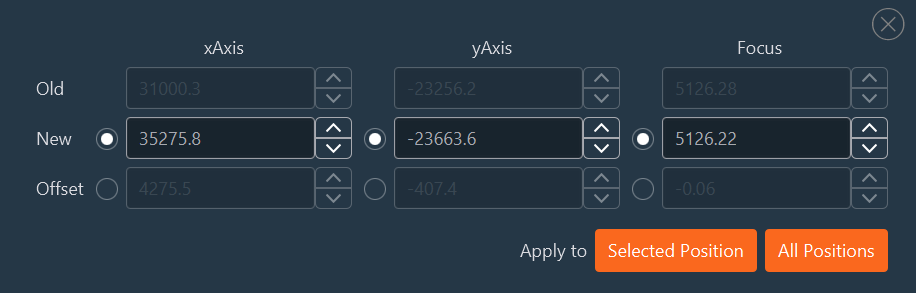
-
Custom Exposure per Position: Assign unique camera exposure times to specific spatial positions (useful if sample brightness varies drastically across a tissue section).
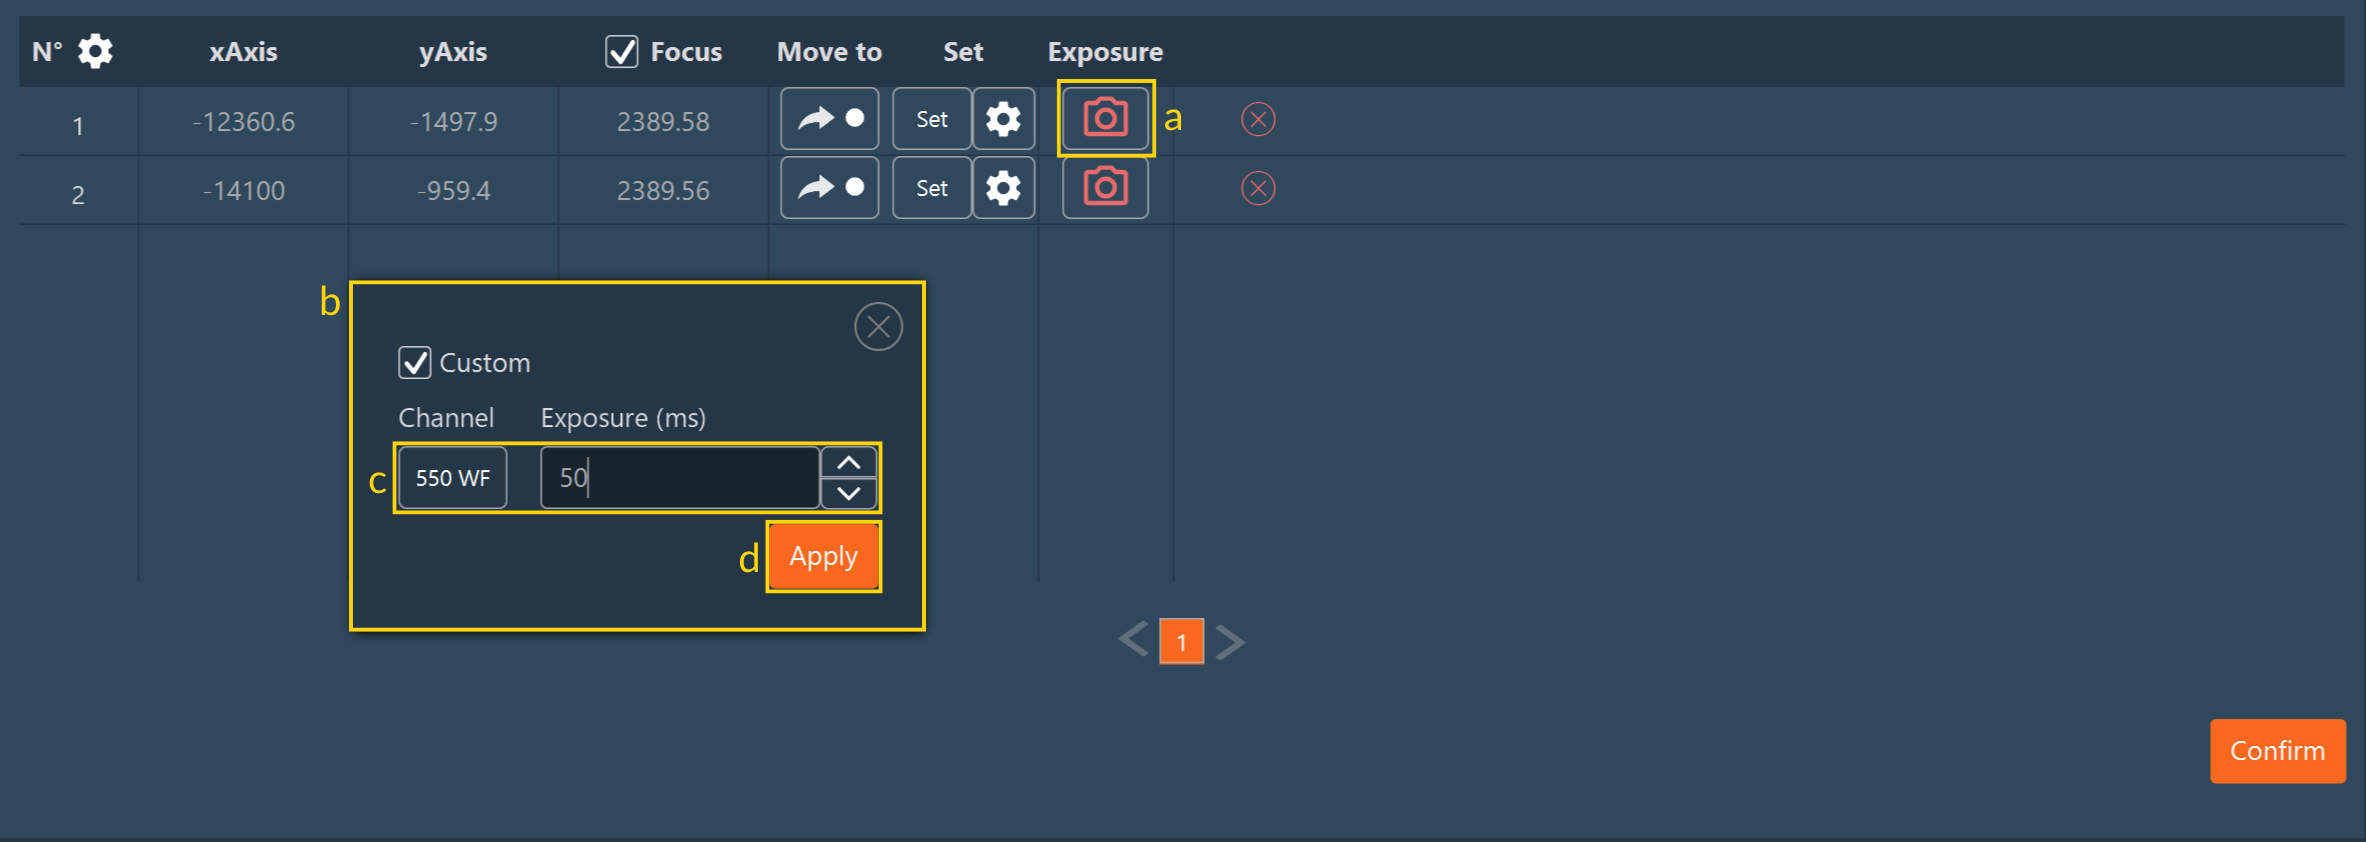
- Click the camera icon on the row corresponding to the position where you want to adjust the exposure time.
- Check the Custom box to unlock exposure time modification.
- Modify the exposure value in milliseconds. This override applies only to the currently active channel.
- Click Apply to confirm the changes.
When a row is modified, the camera icon color changes from red to green, serving as a visual indicator that a custom exposure time is active.

-
 : Permanently deletes this position from the list.
-
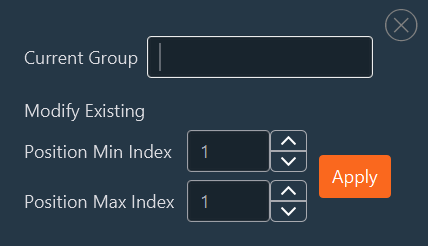
Grouping: To manage large numbers of positions, cluster them into logical groups. Click the gear icon to access group settings:
- Assign a semantic name to the group.
- Indicate the contiguous range of position indices to group together (e.g., 1-15).
- Click Apply.
- Repeat these steps to create multiple, non-overlapping groups.
-
When all position geometries and parameters are finalized, click Confirm.