Display Settings
Access interface preferences by navigating to Settings > Display Settings.
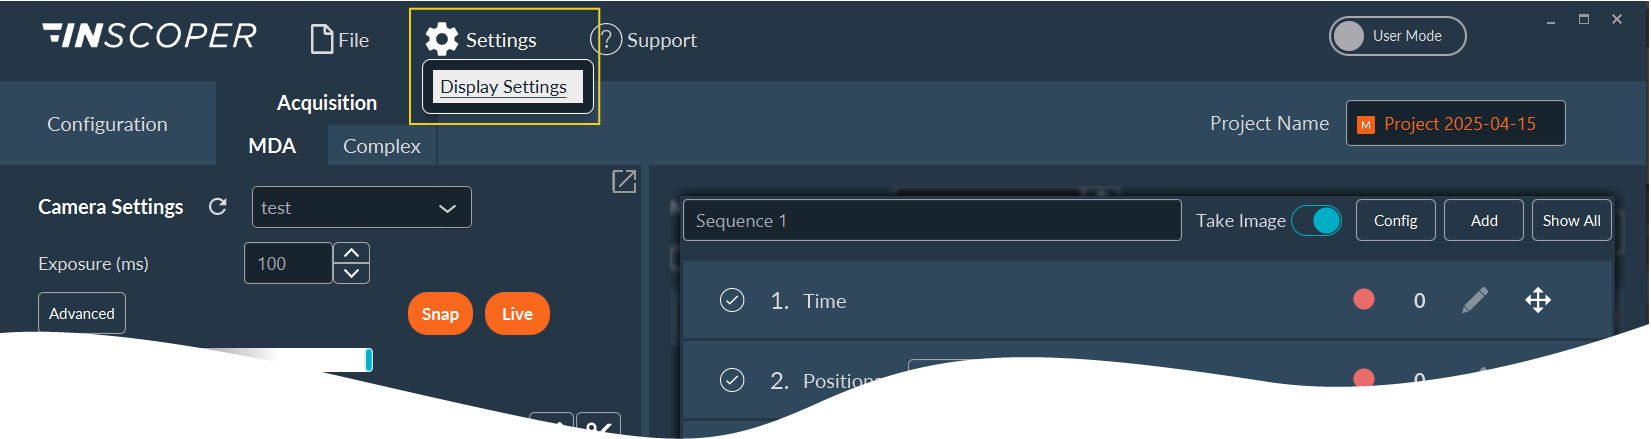
Use this window to configure software behavior, storage paths, and interface elements. Each tab in the left-hand list is documented below under the name shown in the application.
- Well Plate Editor
- Snap & Live
- Change Password
- Project Name
- Tiff Name
- Metadata File Name
- Logs
- Crash Dump
- Camera
- FRAP
- Memory
- Image Display
- Objectives
- Wavelength
- Preferences
Well Plate Editor
Construct and edit multi-well plate configurations used during acquisition:
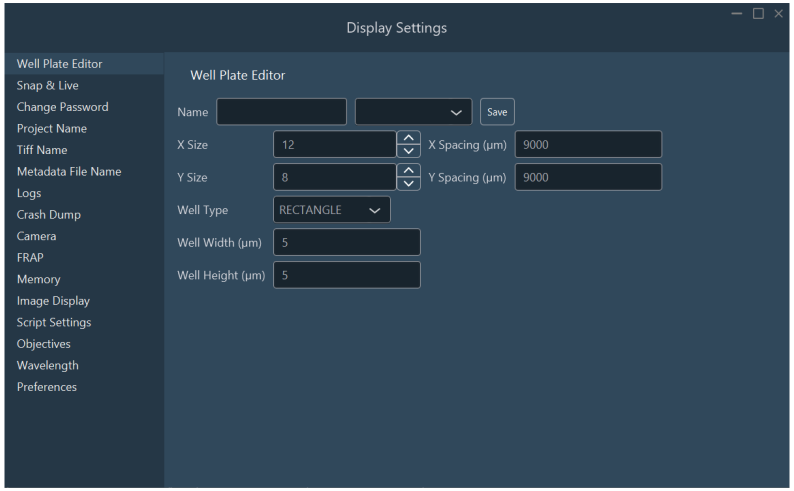
- Name: Assign a name to the template.
- Edit: Select an existing well plate configuration from the drop-down menu to modify and save its parameters.
- Grid: Define the number of horizontal (columns) and vertical (rows) wells, labeled X Size and Y Size respectively.
- Spacing: Define the distance (pitch) between the wells (in µm).
- Type: Select the well shape from the drop-down menu (e.g., circle, square, or rectangle).
- Well Width/Height: Define the internal dimensions of the individual wells (in µm).
- Save: Save this well plate configuration to the database.
Multi-slide holders
Define a custom multi-slide holder by describing each glass slide as a large rectangular well in a 1×4 or 1×8 grid.
Snap & Live
Configure default parameters for the Snap and Live imaging modes:
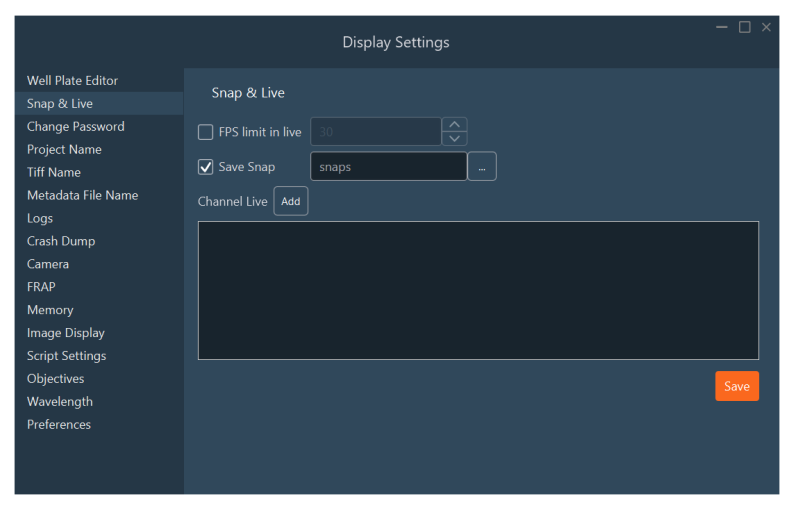
Available parameters:
- Maximum frame rate (FPS): Sets an upper limit on the frame rate during Live streaming.
- Default save directory: Specifies the output directory for Snapshots.
- Default startup channel: Selects the channel that automatically engages when Live mode is toggled.
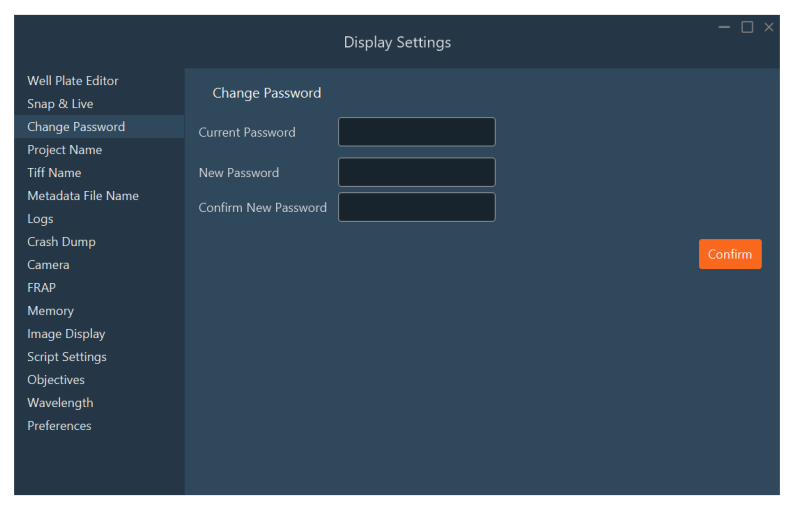
Change Password
Define or update the password required to access Expert Mode.
Project Name
Establish a standardized naming pattern for new projects.
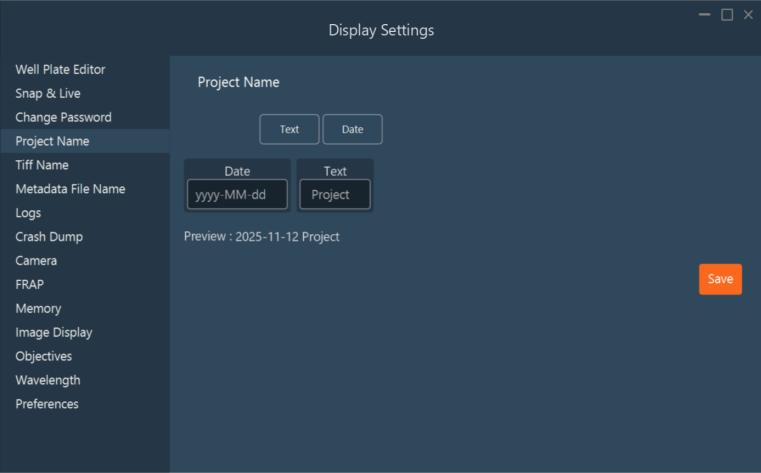
- Select the Project Name tab.
- Click the tags to add.
- Modify the text and format of the selected tags in the line below. Organize the tags through drag and drop, or remove them with a right-click.
- Verify in the Preview that the result matches the desired format.
- Click Save to apply the settings.
Tiff Name
Customize how TIFF image files are named and exported.
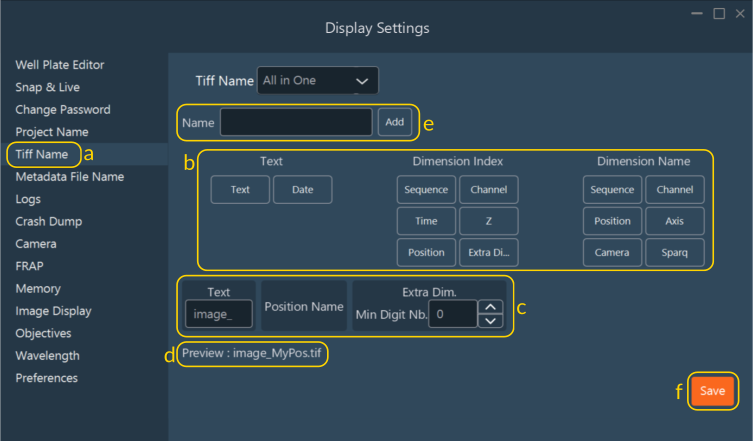
By default, the software bundles all channels for a given position into a single multidimensional OME-TIFF file. Override this behavior to save each channel as a separate file.
- Select the Tiff Name tab.
- Drag and drop metadata tags into the central construction area to build your naming convention (e.g., text block + dimension name + dimension index).
Index Zero-Padding
The Min Digit Nb. field determines the zero-padding length for the dimension index value (e.g., a value of 3 yields 001, 002).

- Name Construction Tool: Displays a visual schematic of the filename structure. Move tags with drag and drop, or remove them with a right-click.
- Name Preview: Displays an example of the generated filename.
- Enter a preset name and click Add to save the convention.
- Click Save to apply the settings.
Metadata File Name
Customize how metadata files are named and exported.
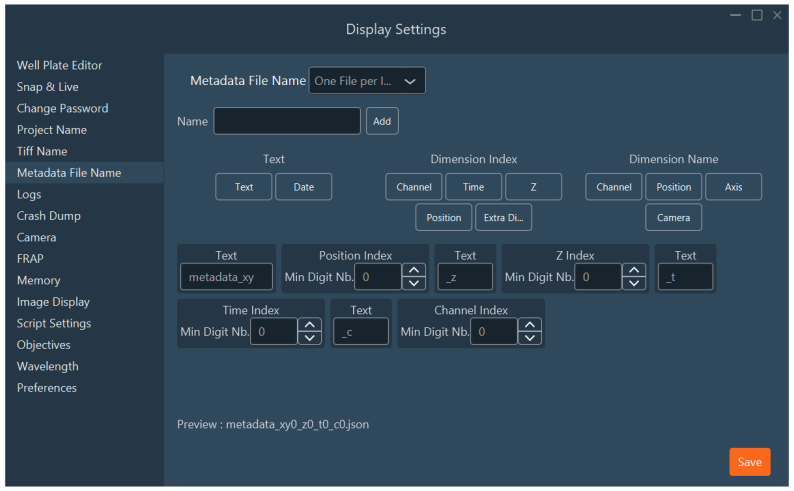
- Select the Metadata File Name tab.
- Click the tags to add.
- Modify the text and format of the selected tags in the line below. Organize the tags through drag and drop, or remove them with a right-click.
- Verify in the Preview that the result matches the desired format.
- Enter a preset name and click Add to save the convention.
- Click Save to apply the settings.
Logs
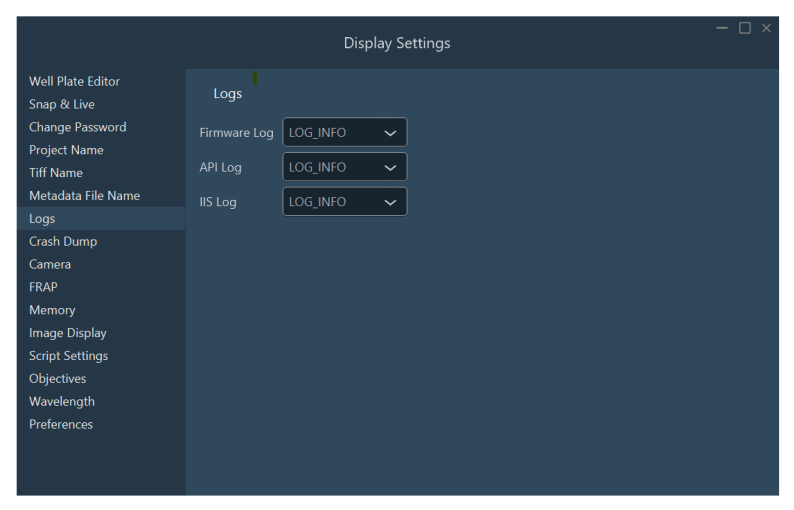
Configure the log verbosity level (e.g., Error, Warning, Info, or Debug).
Crash Dump
Configure crash reporting formats and retention policies.
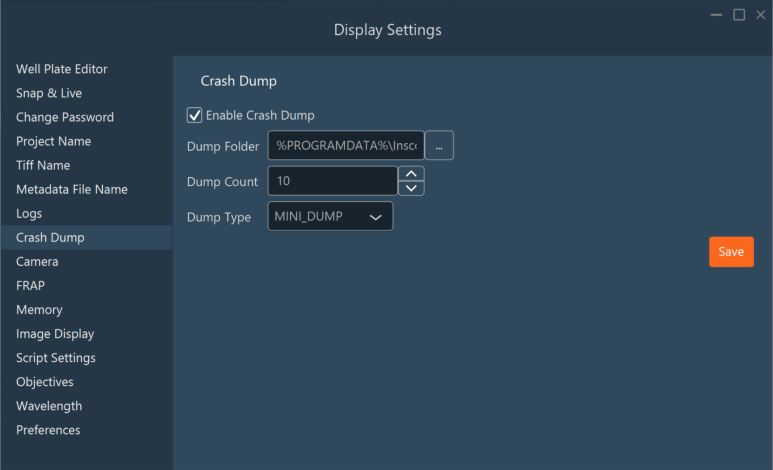
- Dump folder: Define the directory path where the system saves crash reports.
- Dump count: Set the maximum number of reports retained (defaults to 10; the system deletes older files automatically).
- Dump Type:
MINI_DUMP(Standard Default): Saves essential crash stack information, sufficient for most debugging.FULL_DUMP: Saves the complete memory state. Takes longer and consumes significant disk space.
Camera
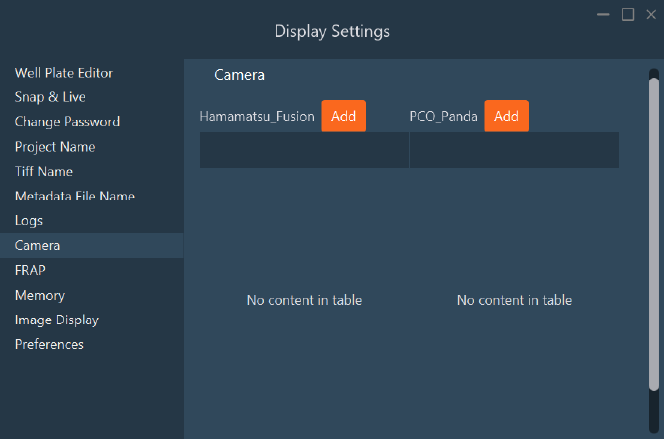
Manage connected cameras. For multi-camera setups that require field-of-view alignment, click Add to apply an image rotation to a camera.
FRAP
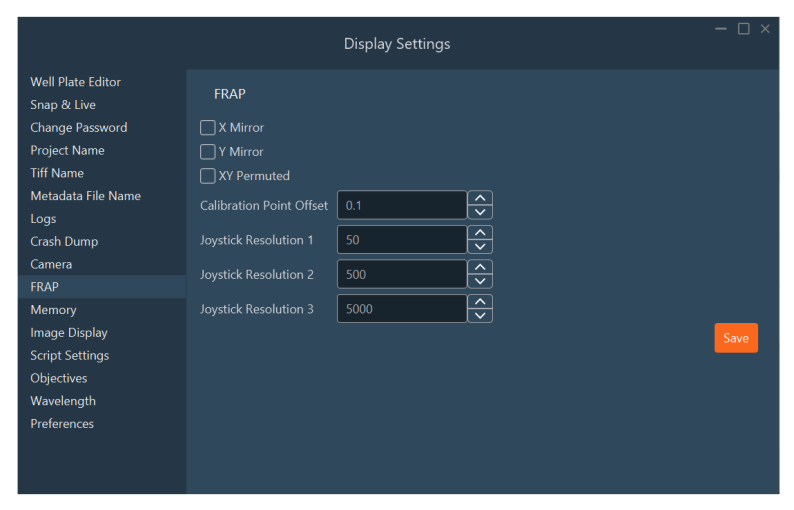
Review the FRAP hardware limits and set the virtual joystick sensitivity used during FRAP calibration.
Memory
Set the memory limits for Inscoper I.S. Memory caps the system RAM available to the application, which defaults to 60% of the installed RAM. Video Memory caps the video buffer, which defaults to 2 GB.
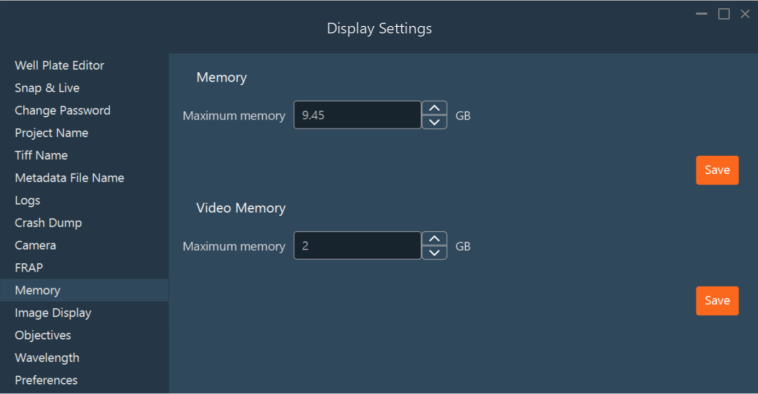
Image Display
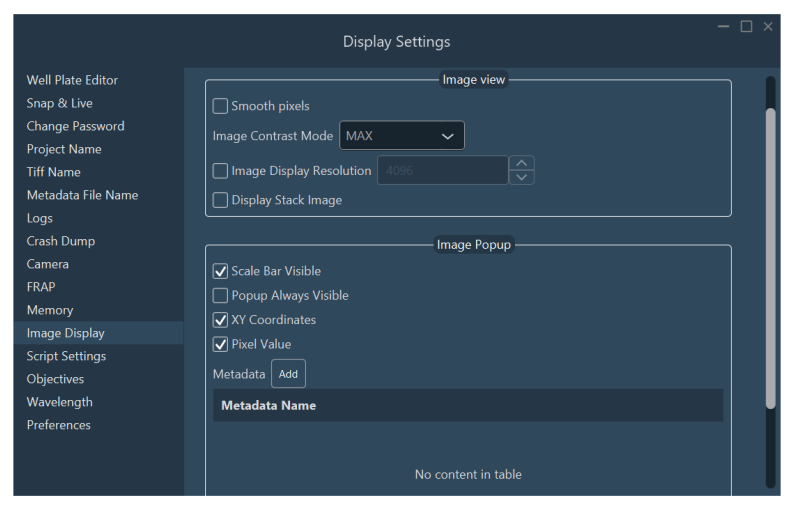
Configure the display preferences applied to the image viewers.
Objectives
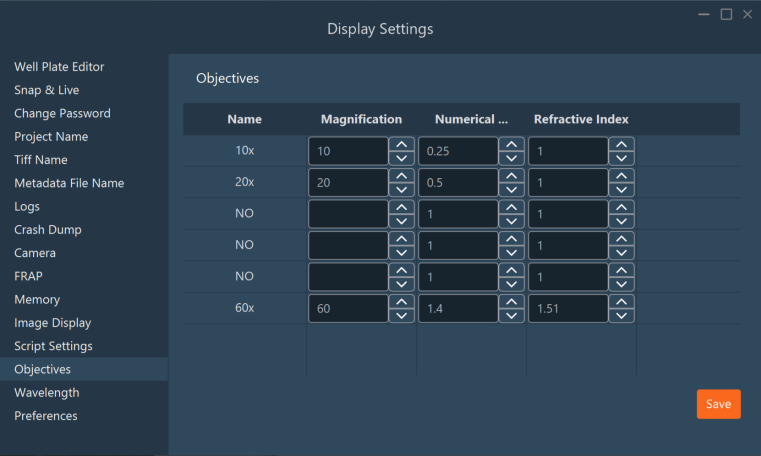
Define the Numerical Aperture (NA) and the immersion Refractive Index parameters for your objectives. The software uses these values for Nyquist sampling limit calculations and image processing.
Wavelength
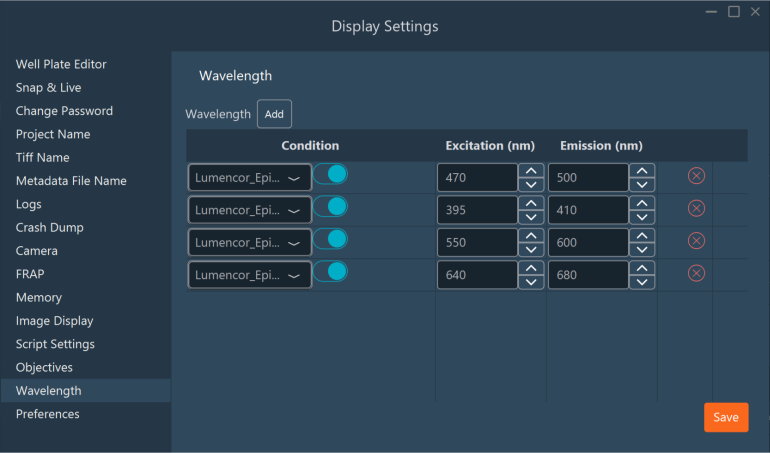
Define the excitation and emission wavelengths for your connected light sources, lasers, and filter cubes. The software uses this data for shading corrections, Nyquist sampling limits, and processing algorithms, and embeds it into the image OME-TIFF metadata.
Preferences
Configure general preferences, including measurement units, timing delays, warning-prompt behavior, and TIFF compression.
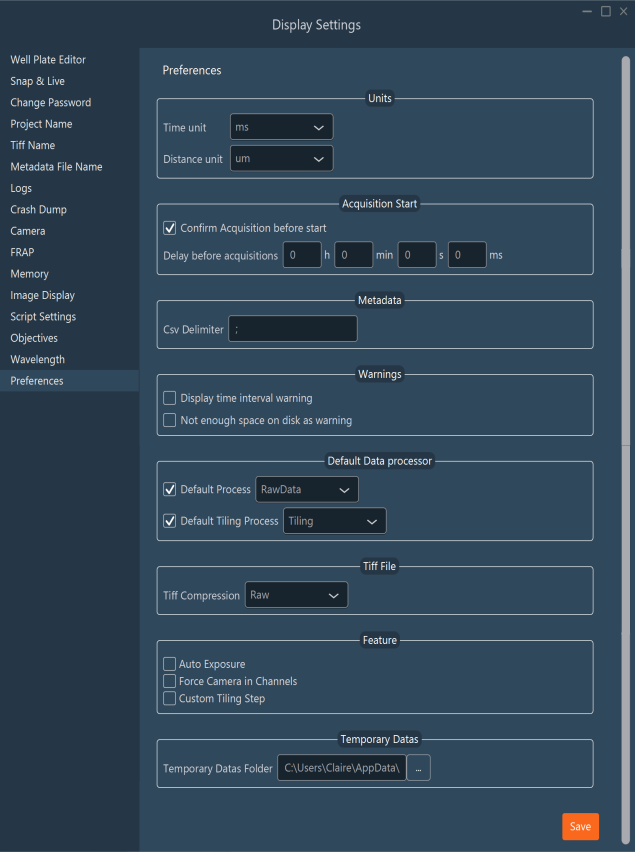
- Auto exposure: Enables the auto-exposure UI button on the primary dashboard.
- Force camera in channels: Associates specific cameras with specific channels, recommended for multi-camera or MAICO configurations.
- Custom tiling step: Define a translational overlap distance (in µm) rather than relying on a relative percentage for sequential tiling acquisitions.
- Tiff Compression (in the Tiff File group): Select the compression applied to the TIFF files written during acquisition.
- Raw (default): Writes uncompressed pixel data. Provides the fastest saving and the widest compatibility.
- ZLib: Applies lossless Deflate compression (TIFF compression code 8). Reduces file size at the cost of additional processing time during saving and opening. Compression efficiency depends on image content: low-noise images with large uniform areas compress well, whereas noisy images compress poorly.
Compatibility
ZLib-compressed files follow the standard TIFF Deflate specification and open in Fiji/ImageJ, Bio-Formats, and other TIFF readers that support Deflate compression.