Preview Feature
The Preview Feature performs a fast, low-resolution scan of the sample to generate an interactive map. Use this map to identify regions of interest, set up multiposition coordinates, or define mosaic boundaries without exposing the entire sample to high-intensity light or capturing full-resolution data.

Setting up a Preview Scan
- Configure the boundaries of the Preview area. Similar to the Tiling dimension, you have two setup options:
- Click Add at multiple boundary points while moving the stage to trace a custom polygon outlining your region of interest.
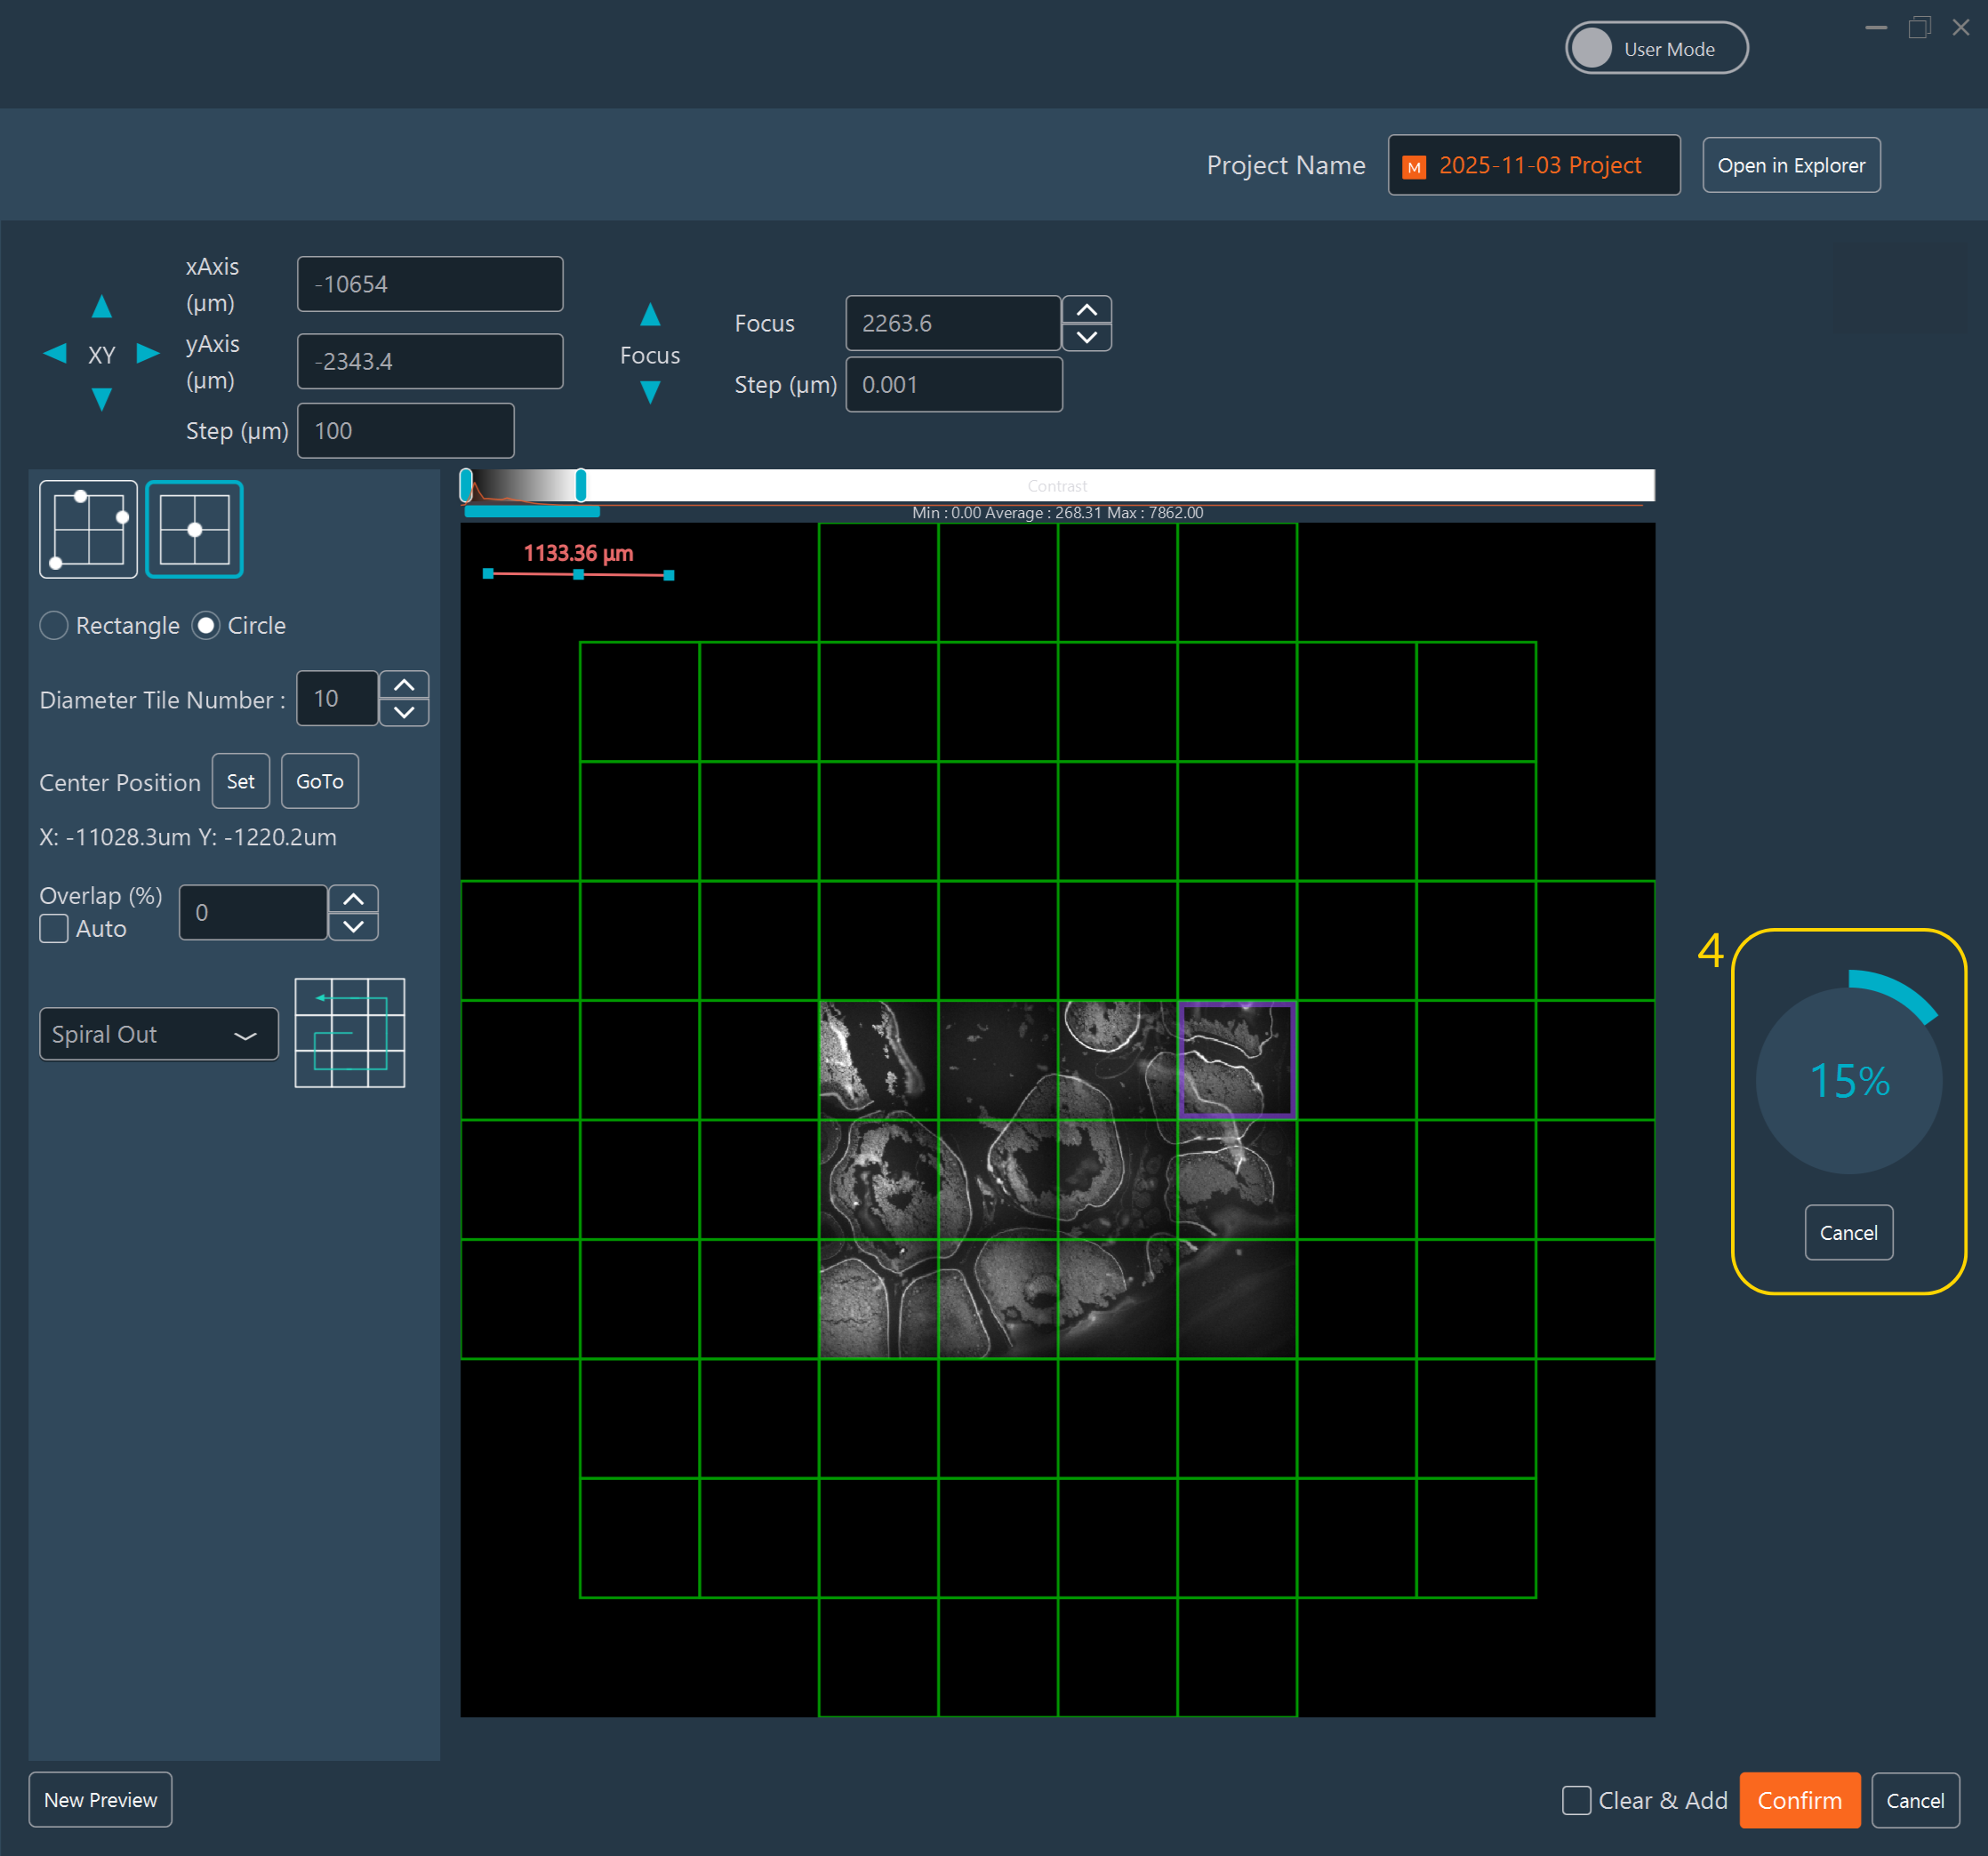
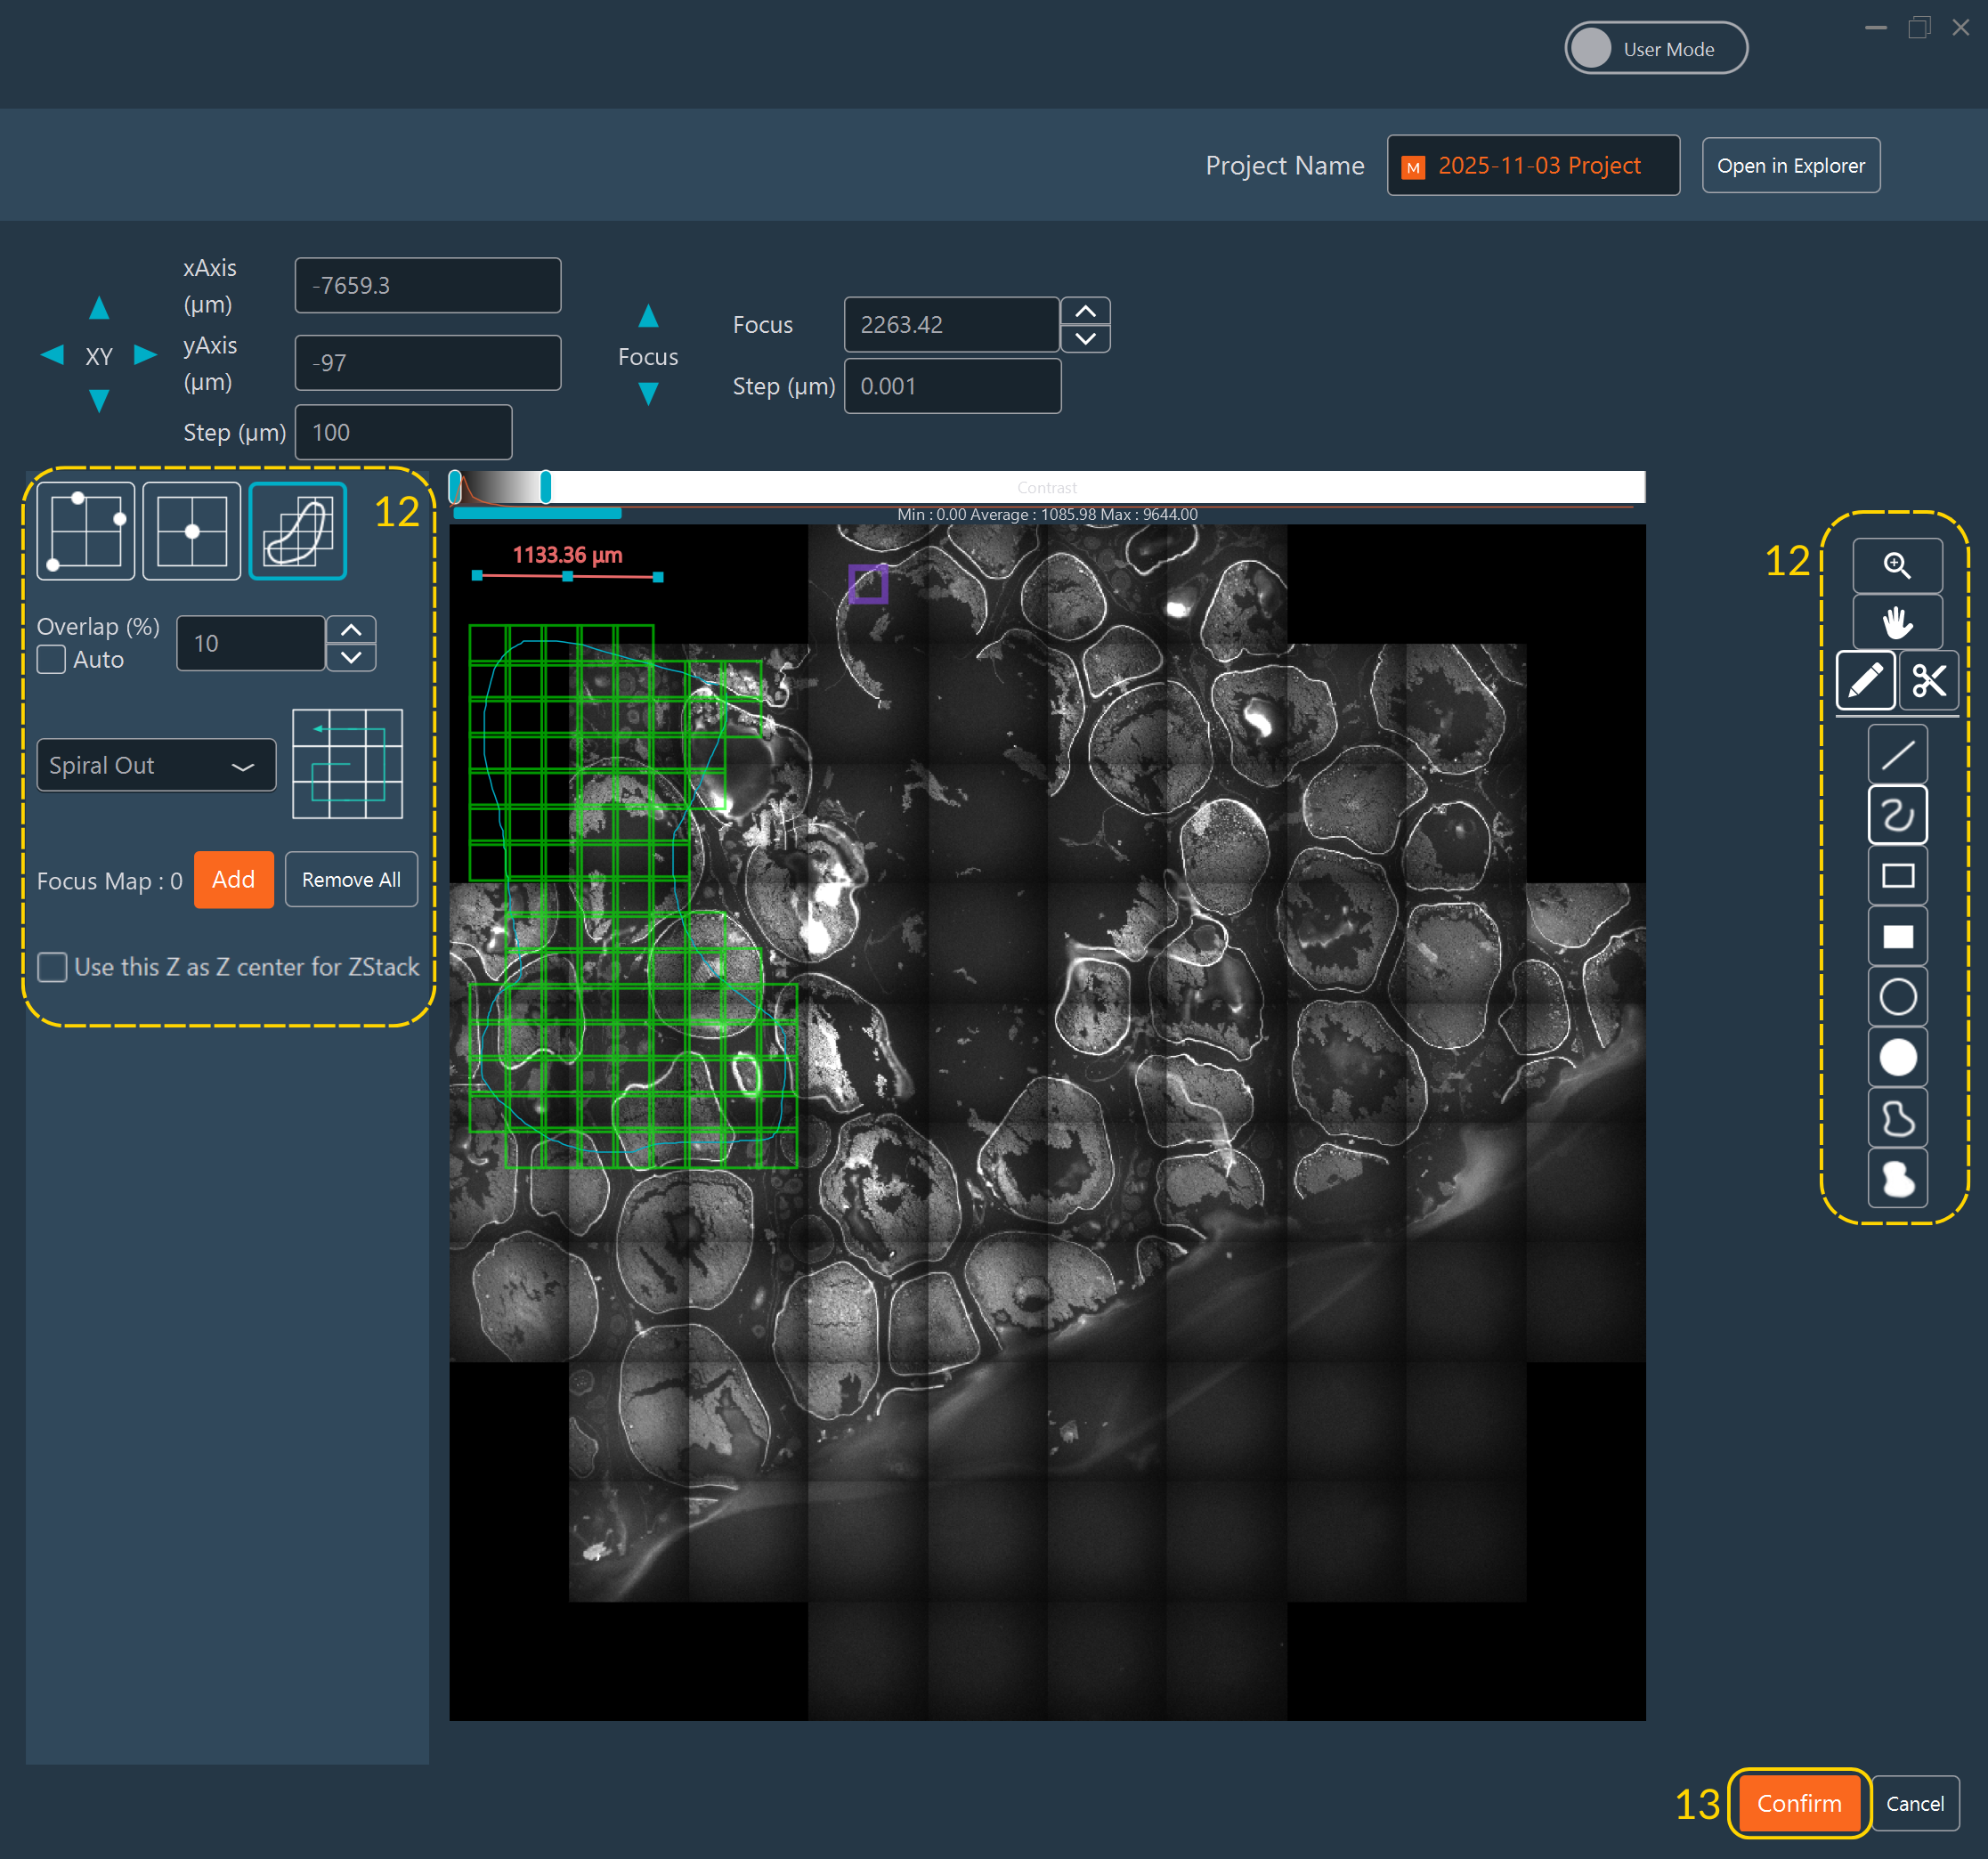
- Alternatively, click Set to define the center coordinate, then specify the bounding grid dimensions (horizontal/vertical tile count).
- Select a Read Mode for how the stage traverses the area (e.g., Spiral, Snake).
-
Click Confirm to lock in the configuration.
-
The preview scan begins, rendering the map in real-time. You can abort the acquisition at any time by clicking Cancel.
-
Click New Preview to discard the current map and start over in a different region.
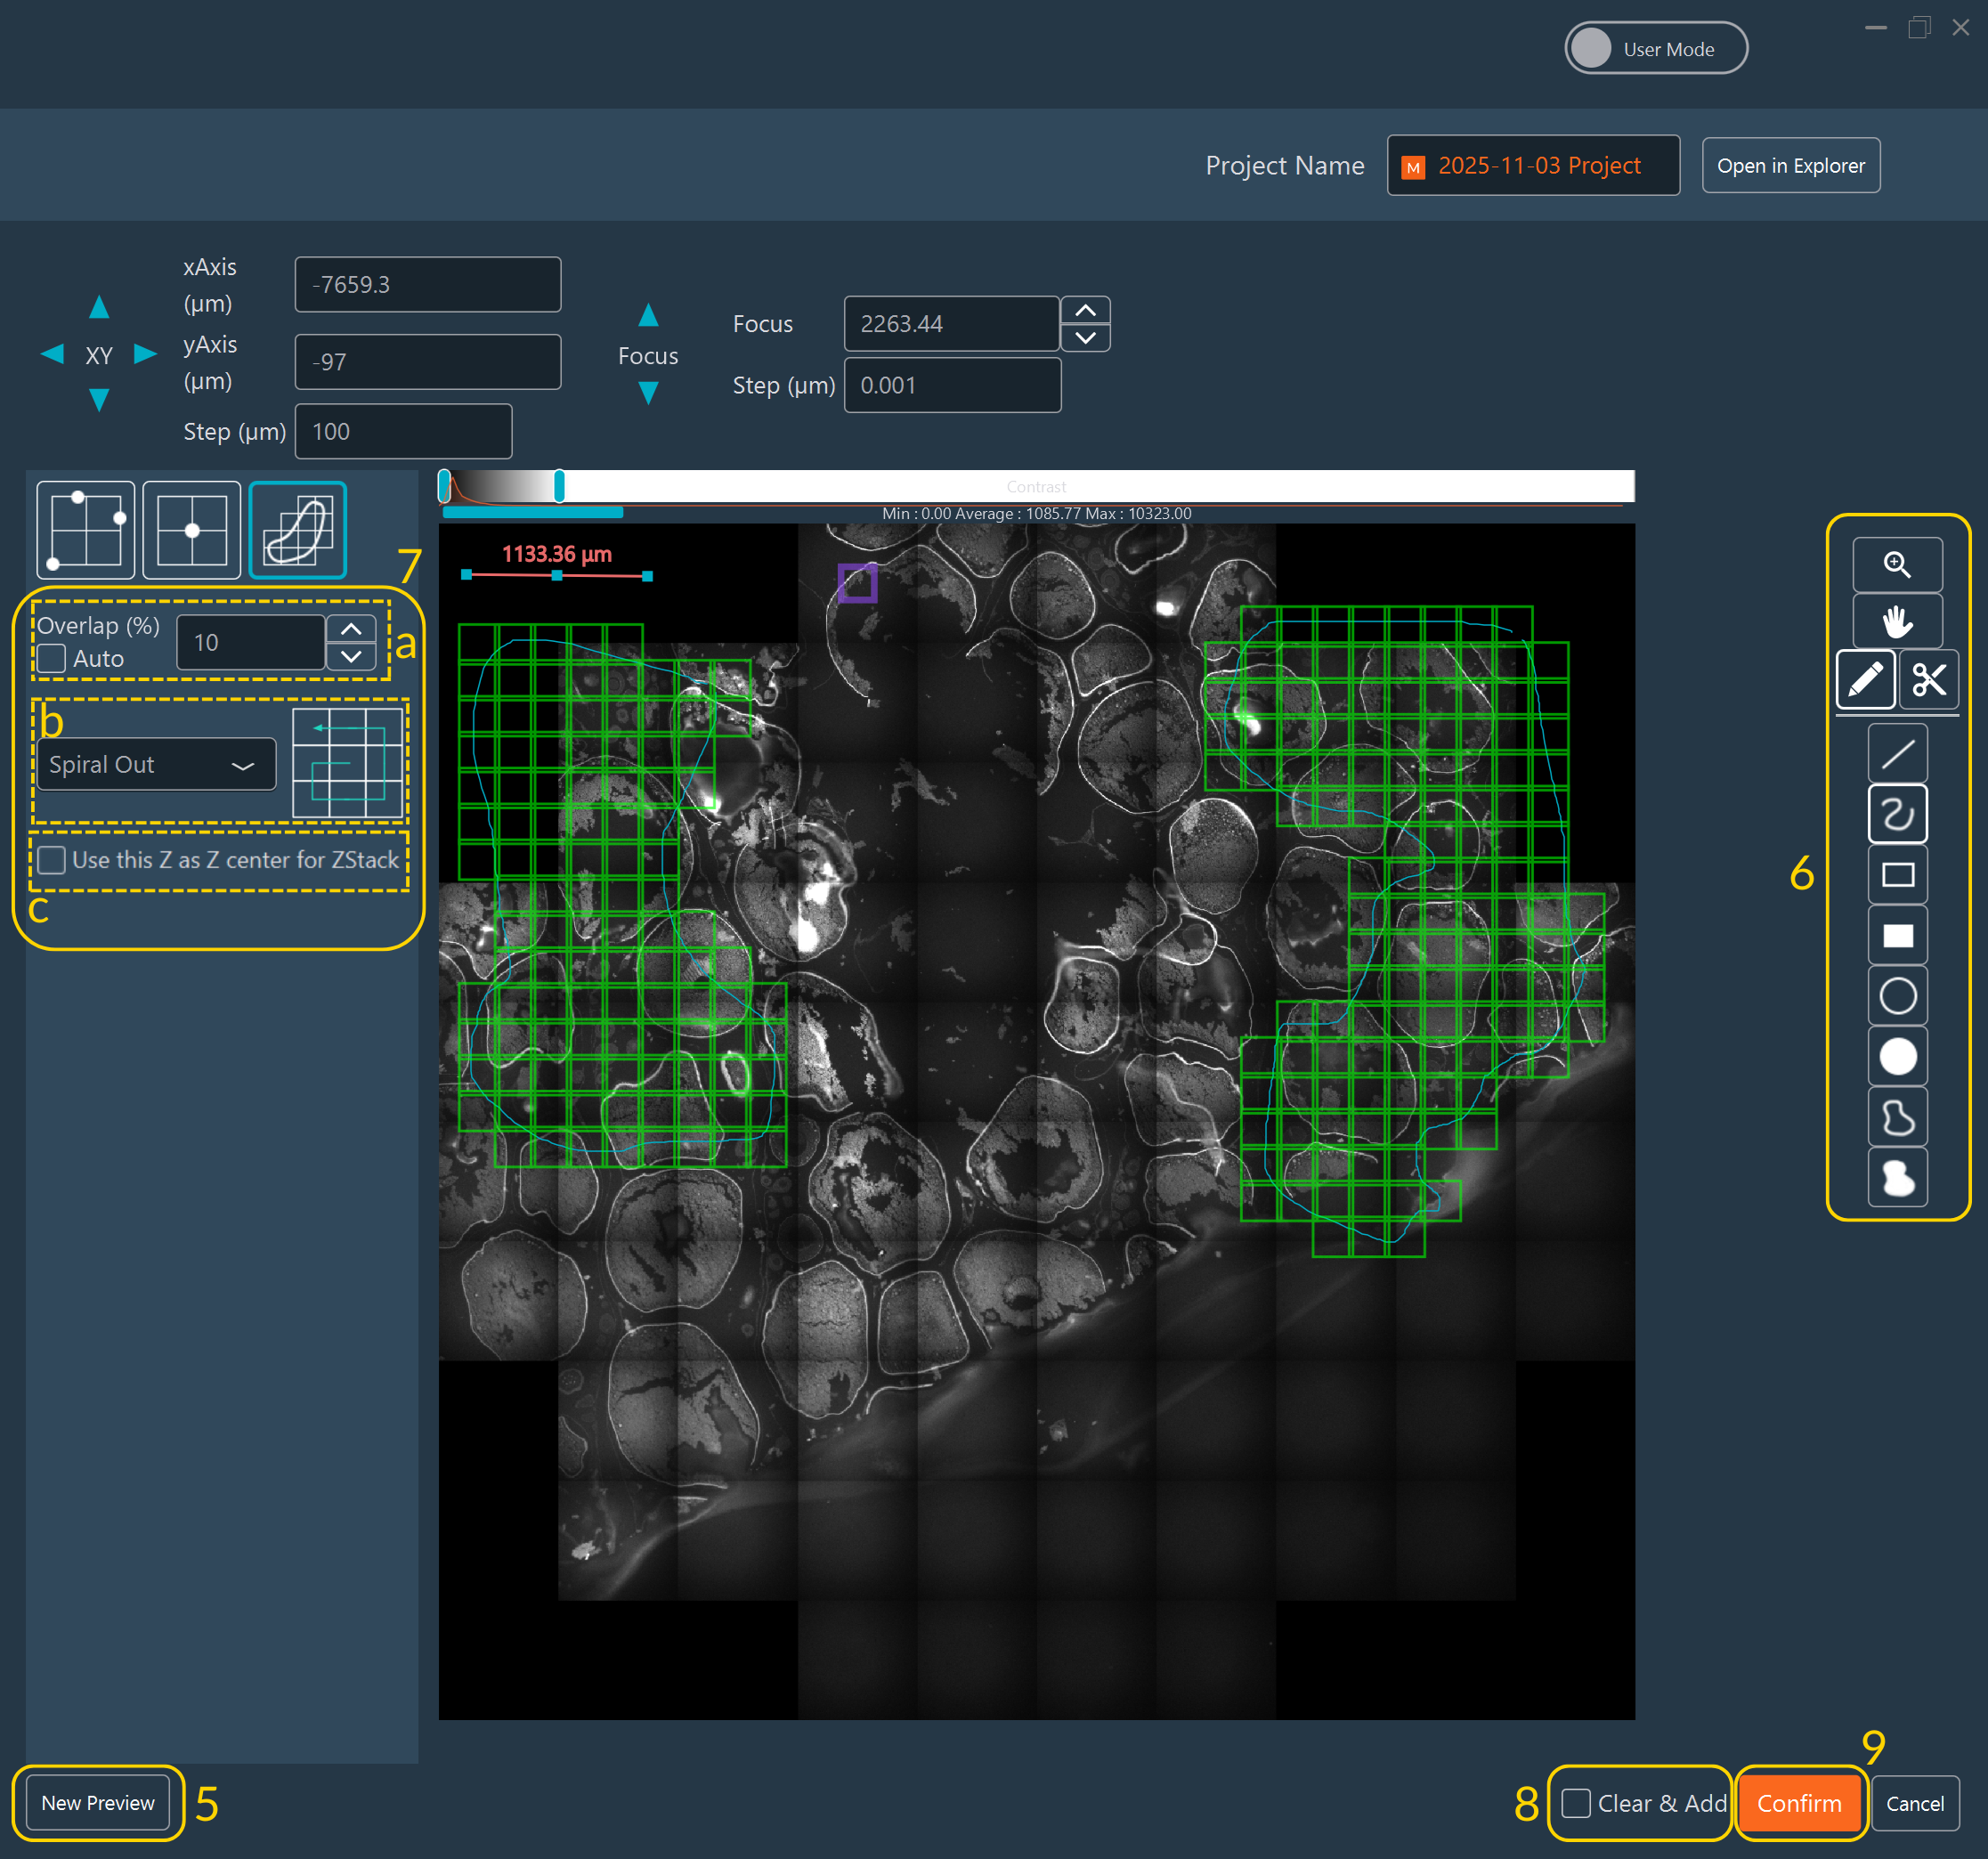
- Draw Regions of Interest (ROIs) directly onto the map to mark targets. Use the provided tools: point (ideal for discrete focal points used in the Positions dimension), freehand, circle, or rectangle.
- Adjust the overlapping tiling settings for the selected ROIs:
- Enable Auto Mode to let the software calculate the image overlap threshold (available only for Tiling imports).
- Choose the specific scanning Read Mode.
- Check the Z-reference box to explicitly center subsequent Z-Stacks around the Z-value established during this preview/focus map phase. If unchecked, the system reverts to the global Z-Stack parameters.
- Check Clear & Add if you want these new targets to overwrite previously defined tilings or positions. Leave it unchecked to append them.
- Click Confirm to validate the ROI selections.
-
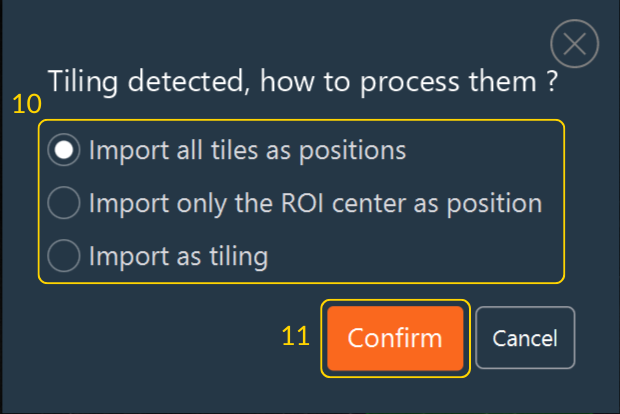
If you drew ROIs that encompass multiple camera tiles but intend to import them into the Positions dimension, the software will prompt you on how to handle the spatial discrepancy:
- Import all tiles as positions: Generates a discrete capture point for every tile covered by the ROI area.
- Import only ROI center as position: Registers a single coordinate at the geometric center of the ROI.
- Import as tiling: Reroutes the coordinate set to the Tiling dimension for continuous mosaic acquisition.
-
Click Confirm to apply your routing choice. After confirmation, all generated positions or tilings appear in their corresponding dimension tabs.
-
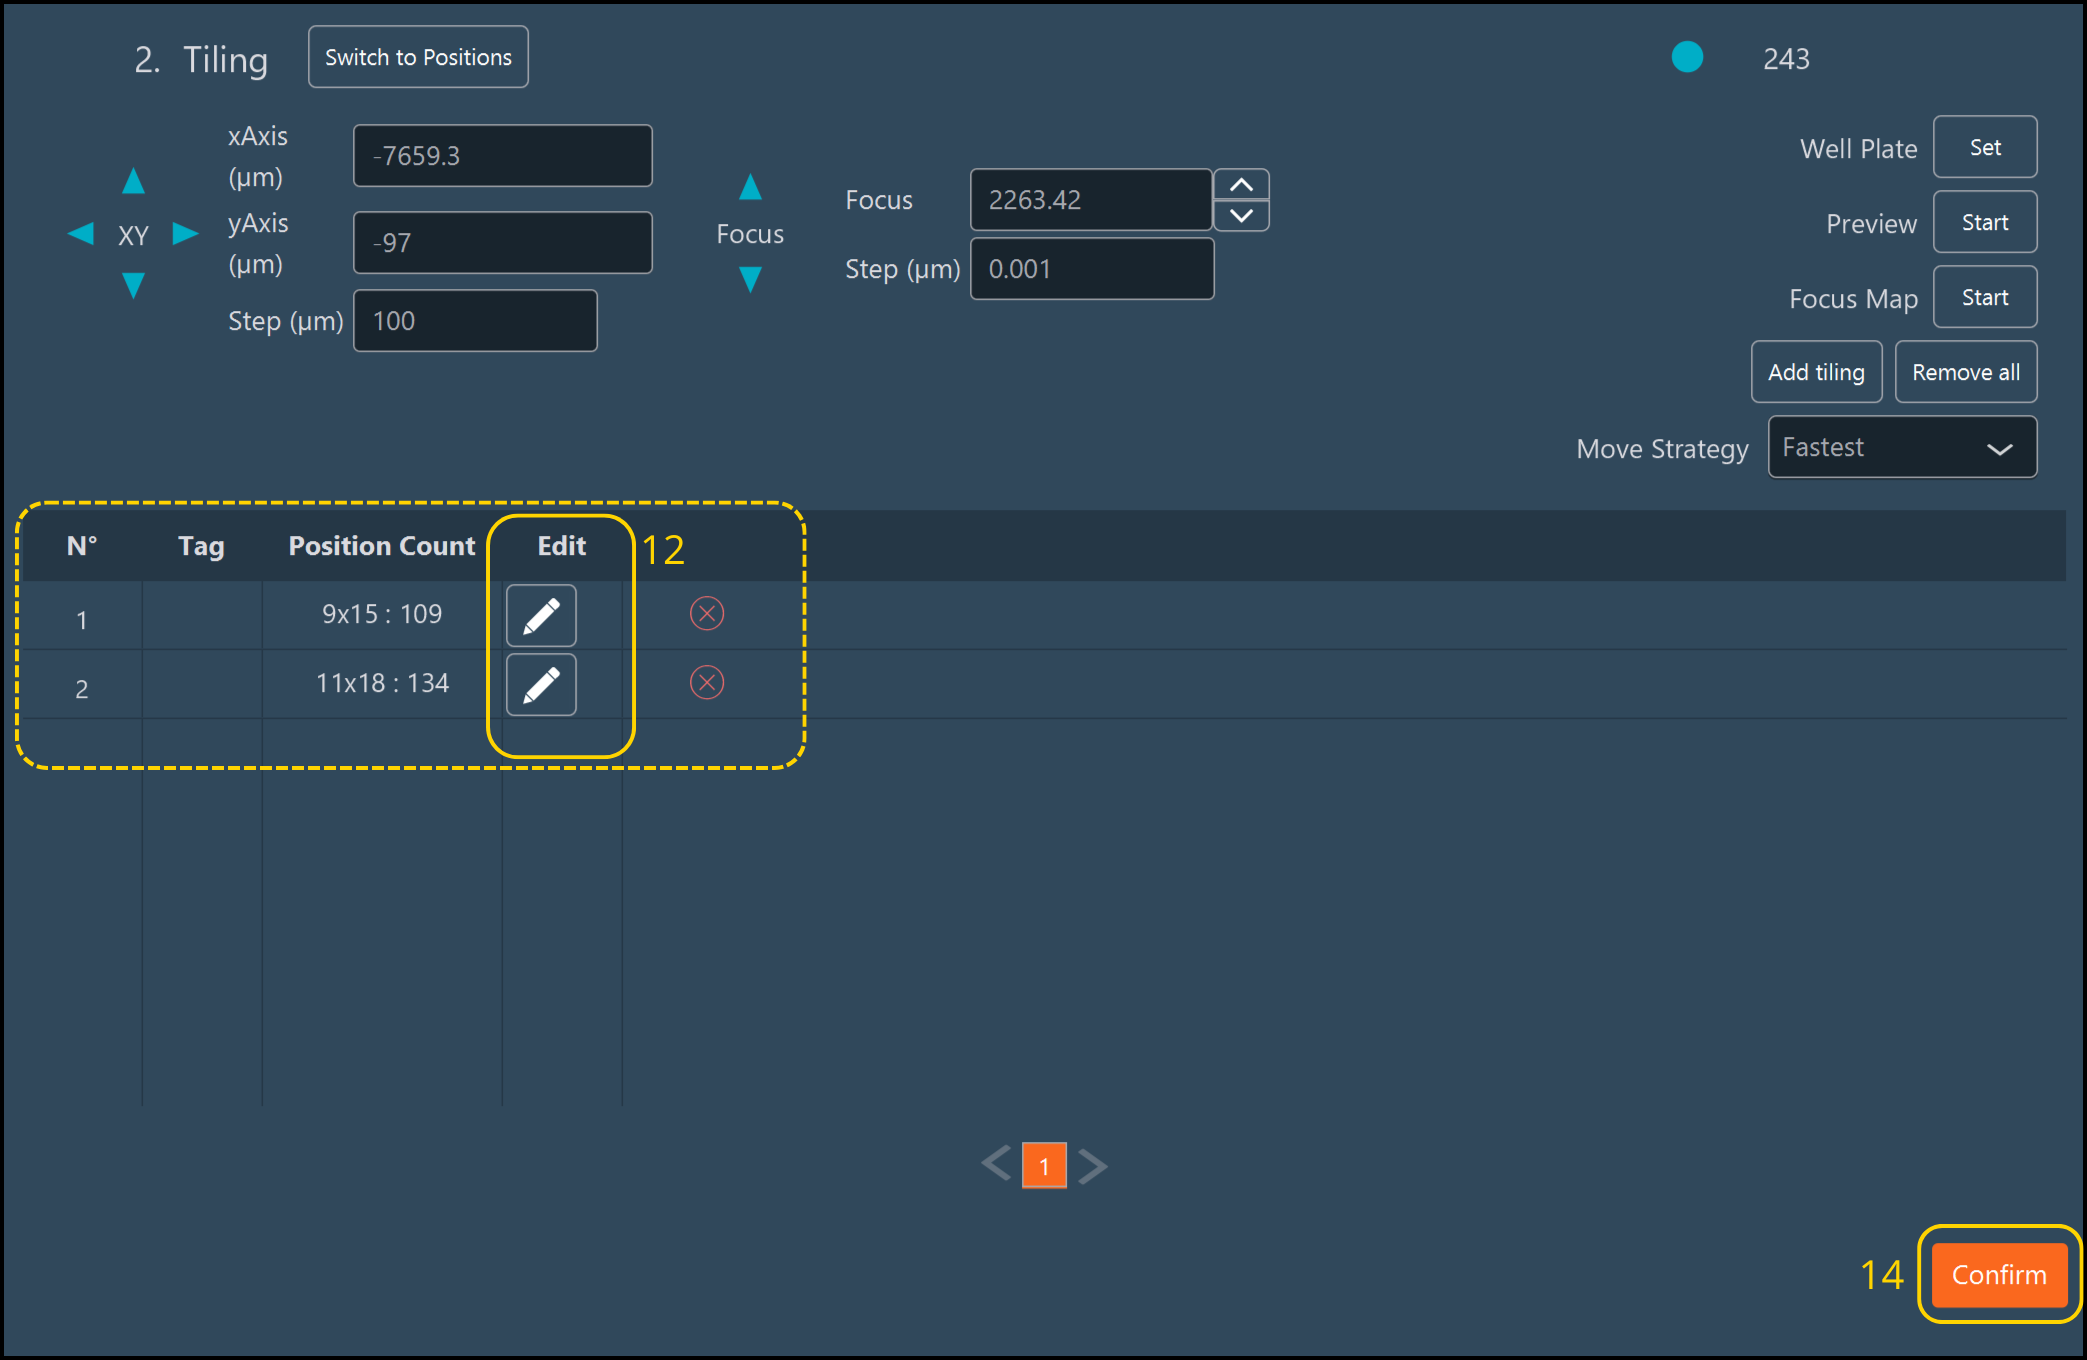
In the Tiling dimension tab, click the Pen icon next to an imported entry to edit it against the original preview map:
- Move, modify, or delete an ROI visually.
- Change the scanning Read Mode.
- Add a local Focus Map within the ROI boundary if your sample is not topologically flat or if you need to precisely adjust the Z-focal plane.
Select whether to use the Z-position saved during this preview as the absolute center of your Z-Stack. If left unchecked, the Z-Stack will default to the Z-value defined in the standalone Z-Stack Dimension parameters.
-
Click Confirm to save your modifications to the individual ROI.
- Finally, click Confirm in the main panel to validate the entire Tiling Dimension sequence.
Tip
To save the visual output of your preview scan as a reference image, right-click anywhere on the preview rendering window.