Tiling edition
.png)
Setting up a Tiling
- Choose how to create the tiling:
- Define multiple points to create either a rectangular tiling or a
custom tiling by outlining its edges (not limited to rectangular
shapes).
To define points, click Add. You can remove all defined points at any time by clicking Remove All or remove one point by a right click on it.
- Define the center of your tiling by clicking
Set, then select whether you want to
create a rectangle or a circle.
Enter the number of tiles to define the size of the tiling, or specify the diameter if you are creating a circular tiling.

Note:You can interact with the right-hand panel to move the stage and delete defined points if needed.
- Define multiple points to create either a rectangular tiling or a
custom tiling by outlining its edges (not limited to rectangular
shapes).
- Set the overlap percentage: Select an appropriate overlap between tiles
(typically 10% is sufficient for final stitching).
Enable Automode to automatically calculate the exact overlap based on the coordinates defined during tiling setup. If needed, adjust the Custom Step (distance between the tiles), To do this, enable the option in the Display Settings.
This step is essential for accurate stitching.
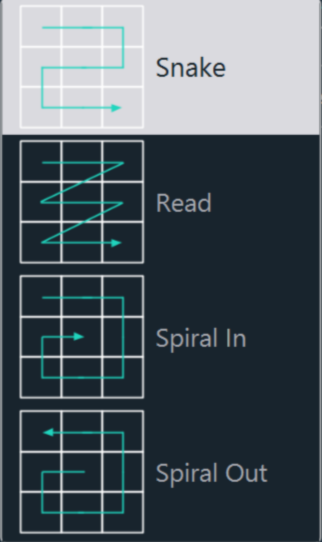
- Select the acquisition order of tiles.
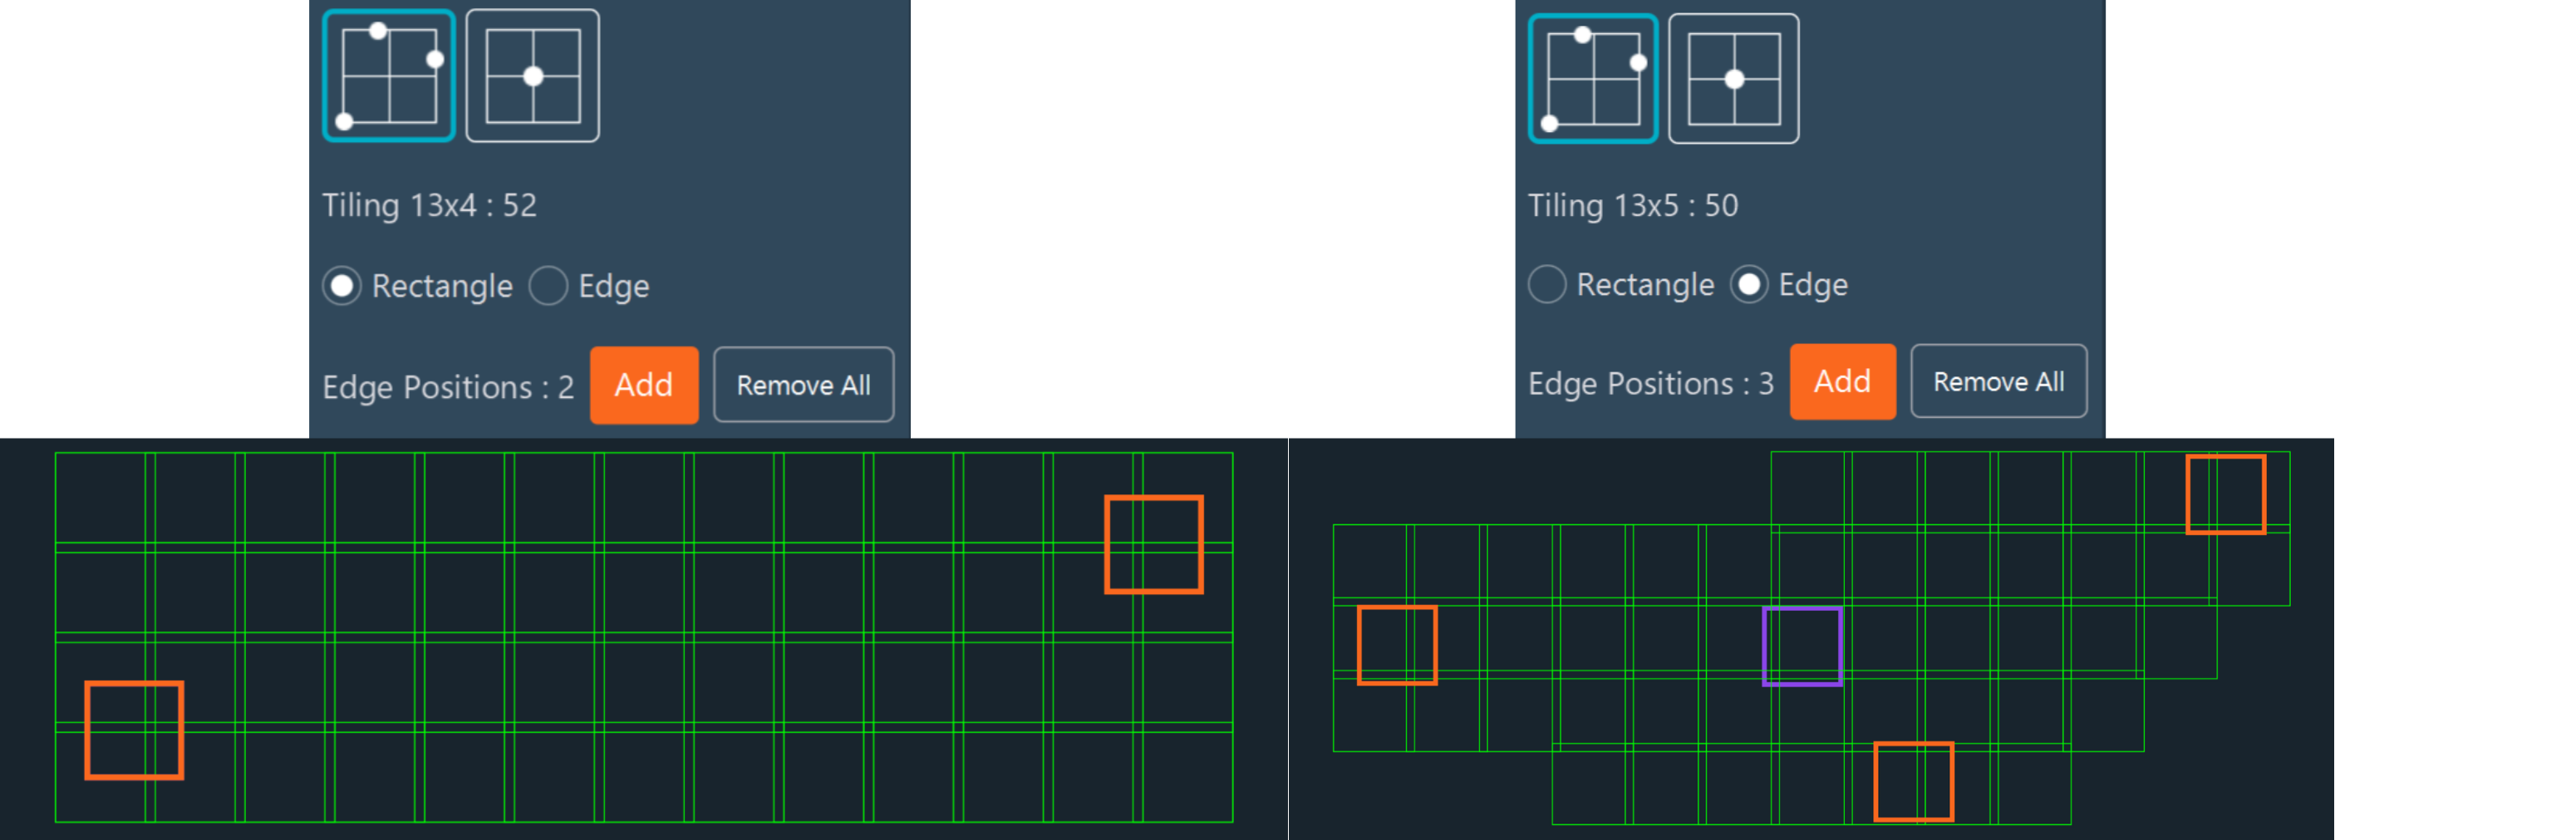
- Create a focus map: Move on XY with the joystick (virtual or physic) or by
clicking on the tiling. Adjust the Z position, then click
Add.
You can add as many focus points as necessary. By right clicking on the orange square you can remove one point of the focus map.
The color displayed within the tiling indicates the Z-height differences between tiles.
.png)
- Check the box if you want to use the Z position saved in the focus map or
used to set-up the tiling as the center of your Z-stack. If the box is
unchecked and :
- you do Z stack : the Z-stack will use the Z value defined in the Z-Stack Dimensions instead.
- you don’t do Z stack, the Z for the tiling will be the Z defined in the Preview (if you have done it) or the current Z.
- Click Confirm to validate and save your tiling
configuration.Note:Orange squares represent the points used to define your tiling and the focus points of the focus map.
The purple square indicates your current XY position.