Imaging Software Layout
The layout stage defines the acquisition interface that the end user sees in the Inscoper Imaging Software. To open it, click Next in the main workspace.
The Configurator builds a first layout automatically from the configured hardware. Use the editor to refine it.
Note
Clicking Next in the main workspace first checks the configuration and may show a validation warning listing outstanding startup values and connections. See The validation warning lists outstanding items.
The editor
The header reads Configure your Software (Preview): the controls displayed are those of the Imaging Software itself, rendered with the values of this configuration.
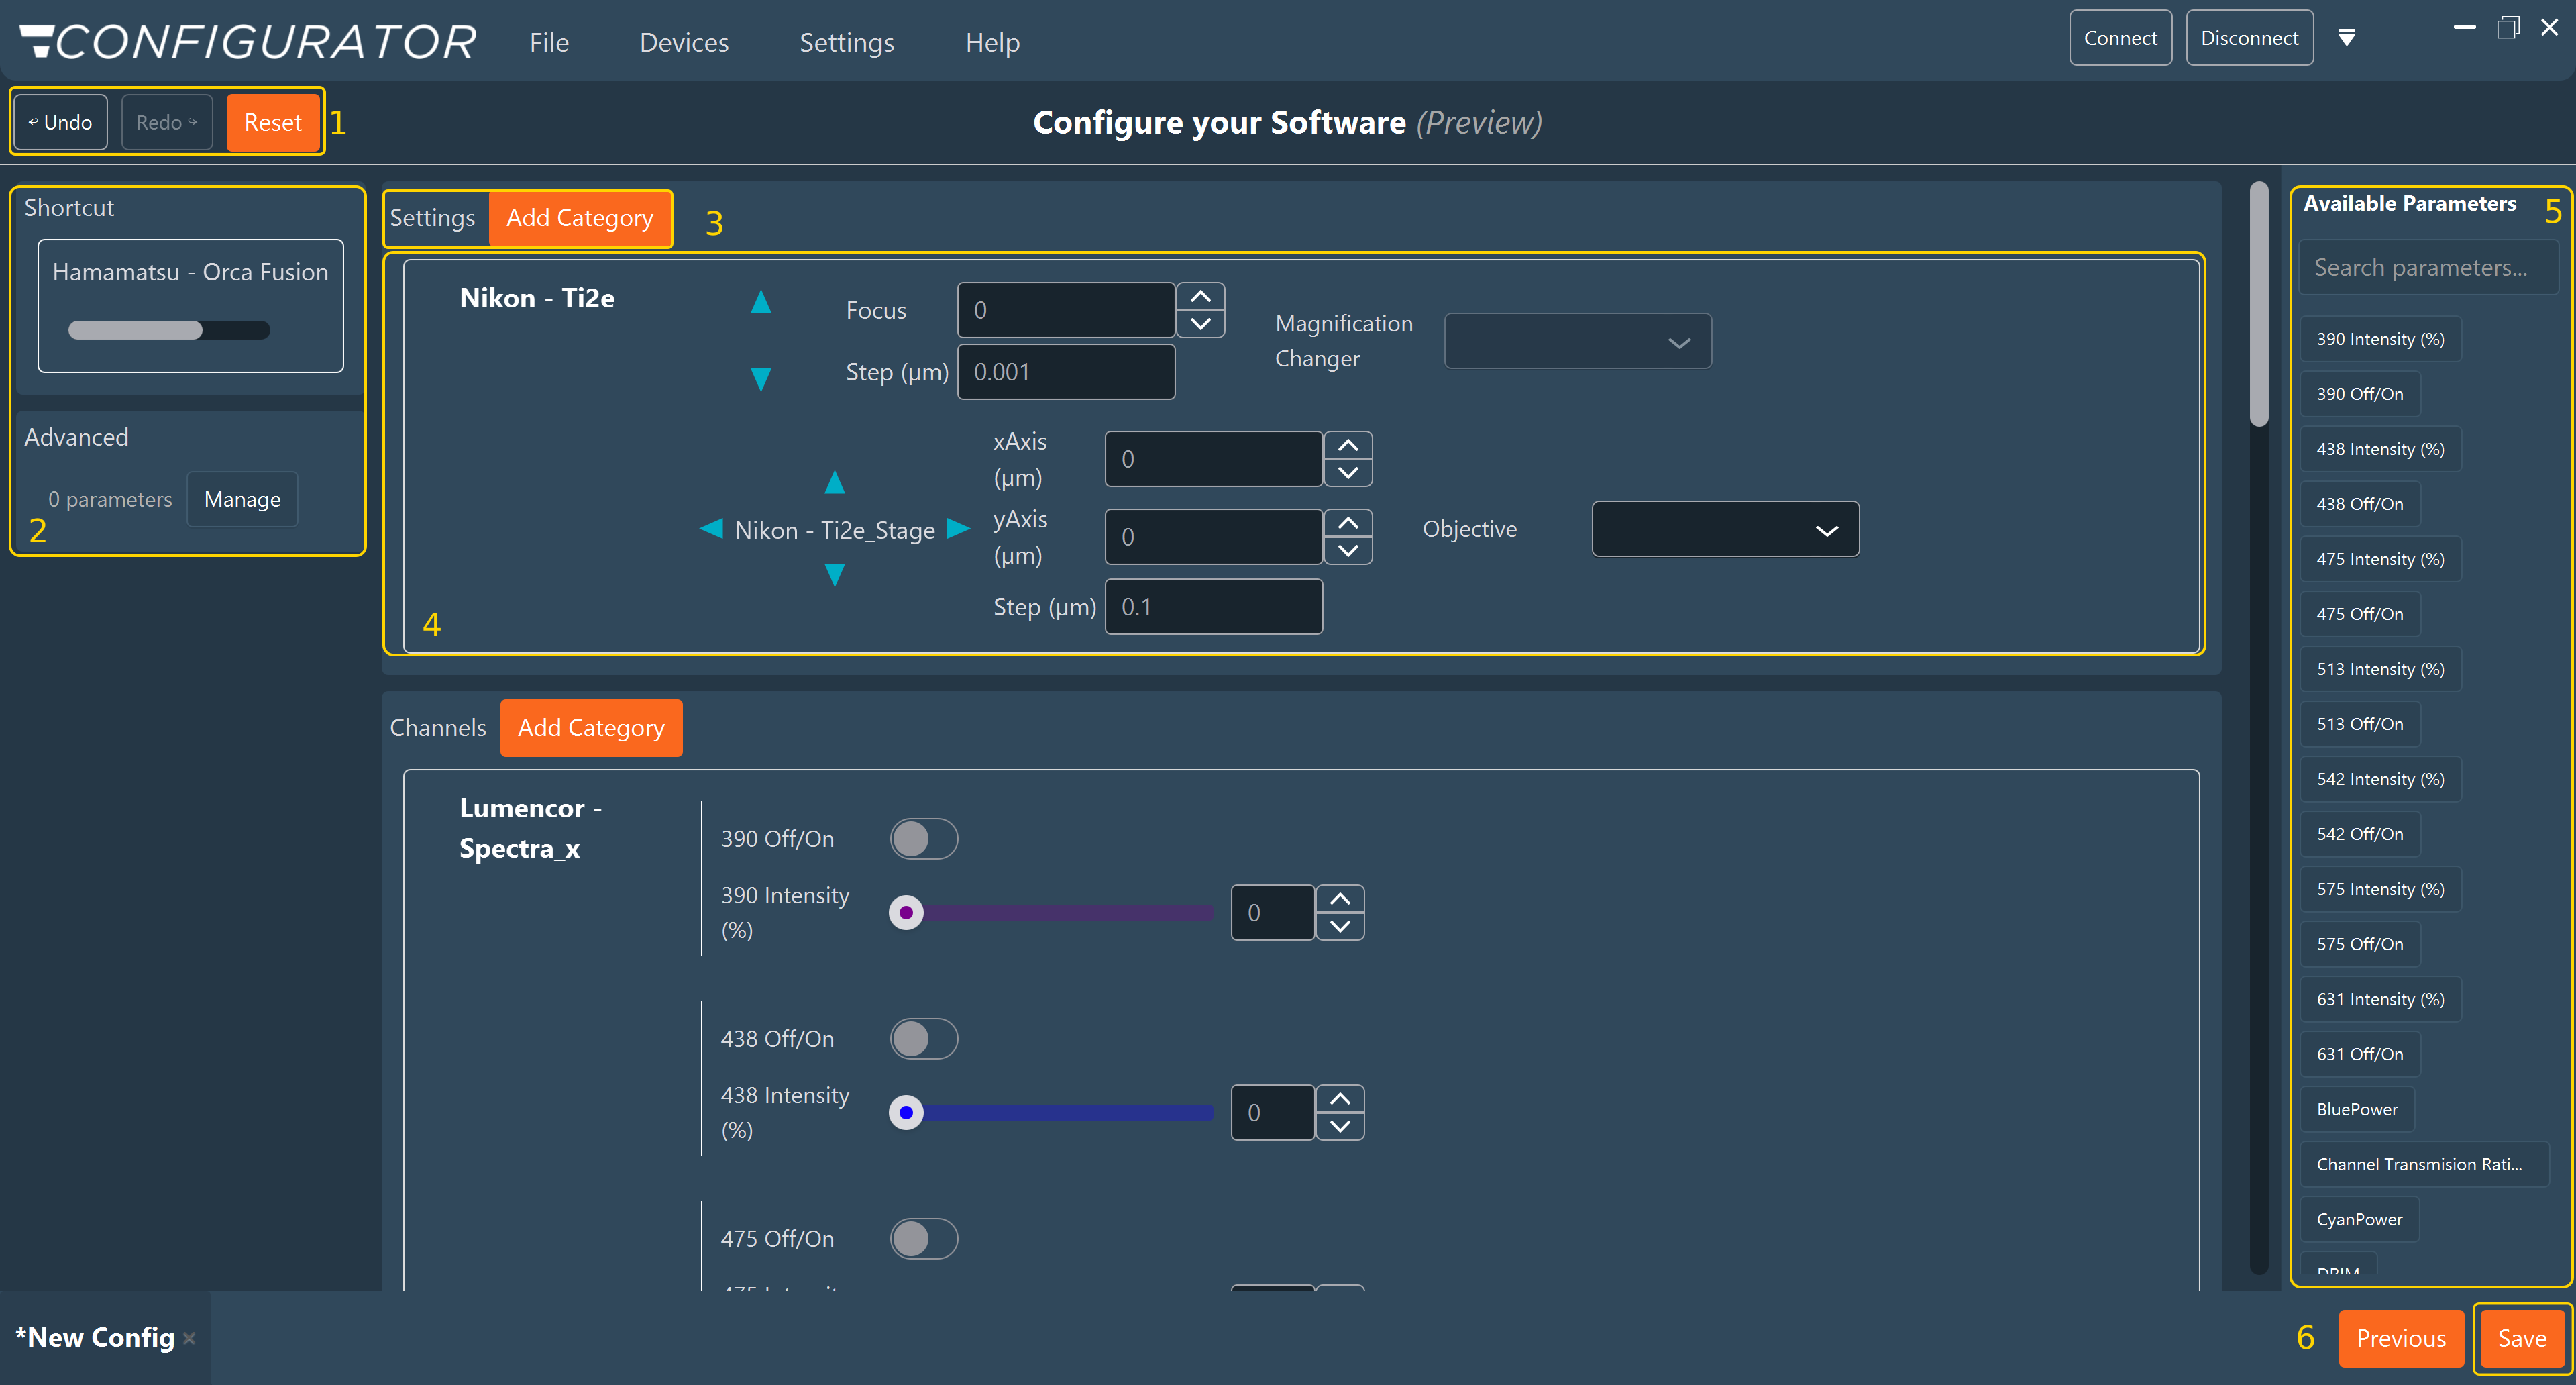
- History controls (1): Undo, Redo, and Reset. Right-click Undo or Redo to list the recorded steps. Reset opens the Update Layout window, which lists the parameters of the configuration and highlights those absent from the layout. The selected parameters are removed from their current position and placed again at their automatic position.
- Shortcut and Advanced panels (2): Two secondary destinations for controls. Shortcut holds the controls promoted to the Imaging Software shortcut bar. Advanced holds controls kept out of the routine interface. It shows how many parameters are assigned, and its Manage button lists them.
- Zone header (3): The name of the zone, with an Add Category button that creates an empty category in it.
- Category card (4): One card per category. Each card holds the controls of one or more devices. Drag a control to move it inside its category or to another category.
- Available Parameters (5): Every parameter of the configuration, with a search field. Drag a chip from this list into a category to add the control. Parameters already placed remain listed, so the same parameter can be shown in more than one place.
- Save (6): Writes the configuration, including the layout. Previous returns to the hardware stage.
Zones
The editor arranges controls into four zones.
| Zone | Purpose |
|---|---|
| Settings | Instrument settings that hold across an acquisition, such as stage position, focus, and objective. |
| Channels | Controls that vary from one acquisition channel to the next, such as filters, shutters, and light source intensities. |
| Shortcut | Controls promoted to the shortcut bar for immediate access. |
| Advanced | Controls reserved for commissioning and calibration, hidden from the routine interface. |
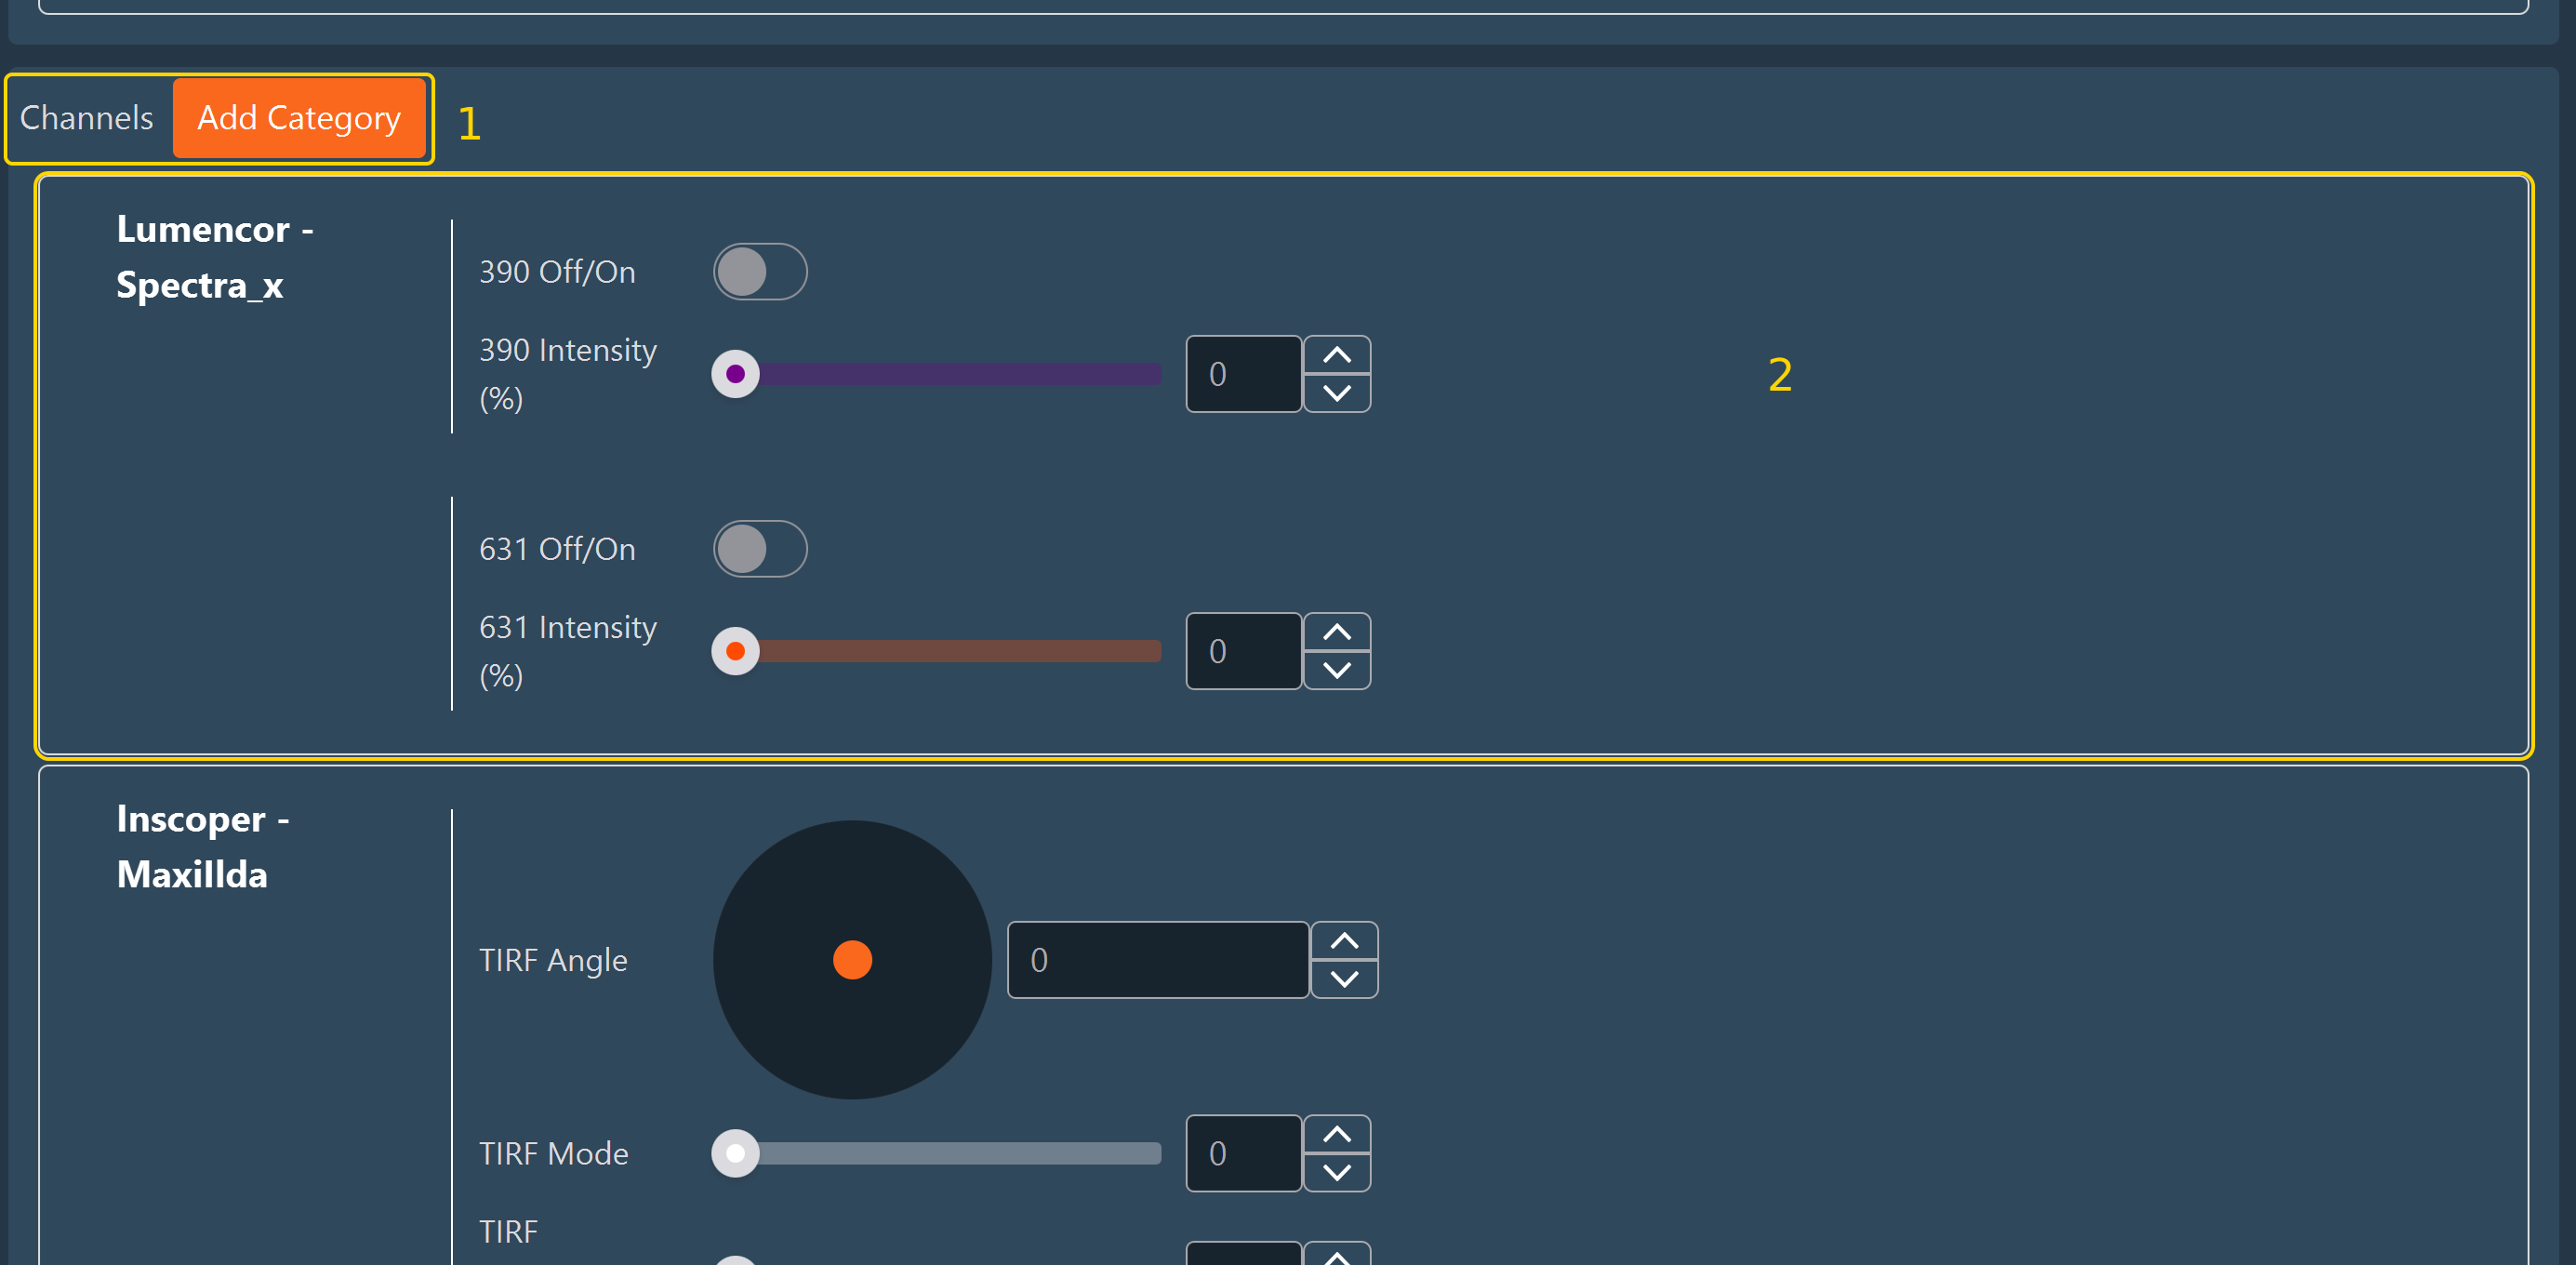
Settings and Channels occupy the central column, one below the other. Scroll down from the Settings zone to reach the header of the Channels zone (1) and its category cards (2).
Settings or Channels
Place a control in Channels only if its value must change between channels of the same acquisition. Placing an instrument-wide setting in Channels forces the user to set it separately for every channel.
Editing the layout
| Task | How |
|---|---|
| Move a control | Drag it to its destination. A placeholder marks the drop position. |
| Move several controls at once | Ctrl-click each control to select it, then drag the selection. |
| Send a control to another zone | Right-click the control, then choose the destination under Send to.... |
| Edit several controls at once | Select two or more controls, right-click the selection, and click Batch Edit. See Imaging Software advanced settings. |
| Add a category | Click Add Category in the zone header. |
| Rename a category | Click its name and type the new name. |
| Remove a category | Hover over the category card and click the X button. |
| Add a control | Drag its chip from Available Parameters. |
| Edit the settings of a control | Hover over the control and click the gear icon, or double-click the control. See Imaging Software advanced settings. |
| Undo or redo | Ctrl+Z to undo, Ctrl+Y or Ctrl+Shift+Z to redo, or the toolbar buttons. |
Warning
Moving a control out of the Channels zone changes how the end user operates the instrument: the parameter can no longer be set per channel. After such a move, the Configurator displays a warning. To suppress the warning for subsequent moves, select Don't show this again before clicking OK. The choice is stored with the application settings.
Adding hardware after the layout exists
Returning to the hardware stage and importing further devices does not discard the layout. The parameters of the new devices are placed automatically at their default position, and they also appear in Available Parameters. The rest of the layout is preserved.
Saving
Click Save to write the configuration. The layout is stored with it and is applied the next time the Imaging Software loads this configuration.
Next step: Proceed to Calibration, or return to Creating a configuration to save.