Camera ROI Synchronization
On an instrument with several cameras, two or more cameras can be grouped so that the Imaging Software treats them as viewing the same field. A camera that belongs to no group is handled on its own.
Group cameras that image the same field of view with matching sensor geometry, for example two identical cameras behind an image splitter. Leave the other cameras ungrouped.
Effect in the Imaging Software
For the cameras of a group, the Imaging Software applies the following behavior:
| Function | Cameras in the same group | Camera in no group |
|---|---|---|
| Regions of interest (ROIs) | An ROI drawn on the image of one camera is also displayed on the images of the other cameras of the group. | ROIs drawn on its image apply to that camera only. |
| Crop | Confirm Crop, hardware or software, applies the same crop region to every camera of the group. | The crop is set from the ROIs drawn on that camera only. |
| Camera calibrations | Calibrations recorded per camera, such as shading correction, mosaic, TIRF, FRAP, and FLIM calibrations, are stored once for the whole group and shared by its cameras. | The camera has its own calibrations. |
| Multiwell plate calibration | The well center is located on one image per group. | The well center is located on the image of each camera. |
A shared ROI or crop takes the same position on the image of each camera of the group. Group only cameras whose images are registered to each other, with the same sensor size and orientation. Otherwise, the shared region covers a different area of the sample on each camera.
Calibrations after a change of grouping
The Imaging Software stores each camera calibration under the identifier of the group. Changing the grouping of a camera changes this identifier, so the calibrations recorded before the change are no longer associated with that camera. Repeat the camera calibrations in the Imaging Software after grouping or ungrouping cameras.
Note
ROI synchronization is available from version 2.0.1. In a configuration created with an earlier version, every camera starts ungrouped.
Where the setting appears
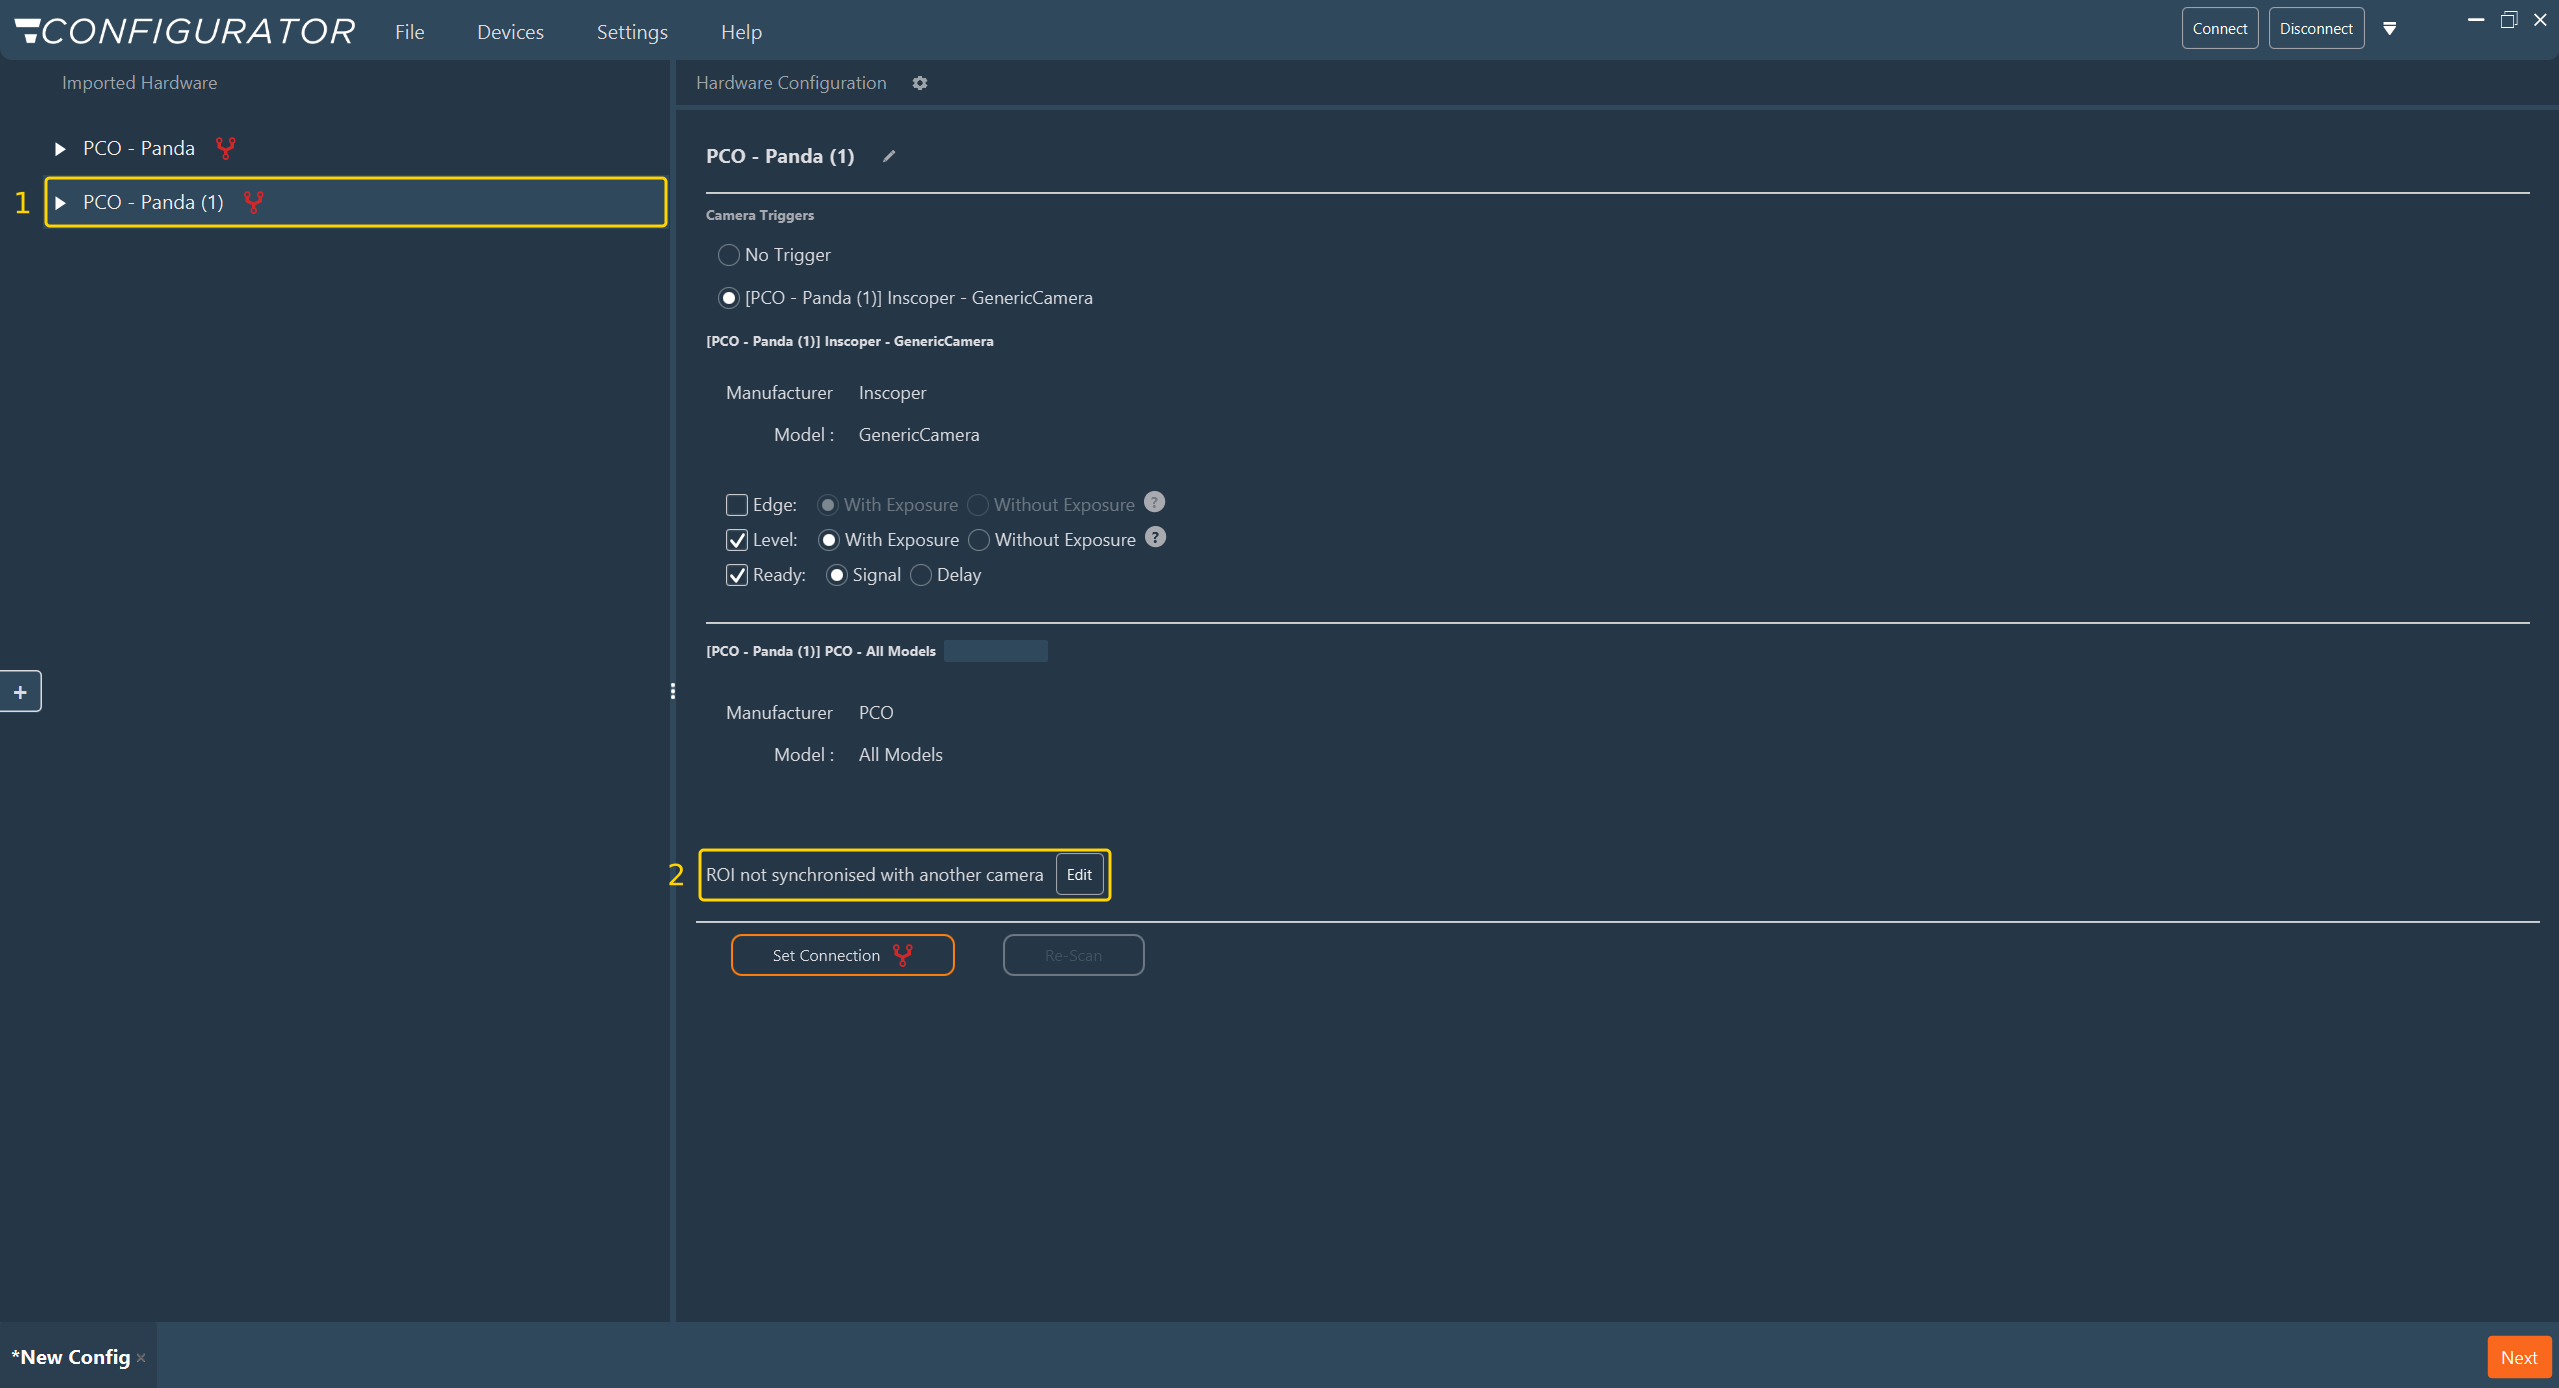
Select a camera in the Imported Hardware tree (1). When the configuration holds at least two cameras, the device view displays a line below the list of internal devices, followed by an Edit button (2). The line states the current grouping of that camera:
| Line | Meaning |
|---|---|
| ROI not synchronised with another camera | The camera belongs to no group. |
| ROI synchronised with followed by camera names | The camera shares its ROI with the cameras listed. |
The line is not displayed when the configuration holds a single camera, since that camera has nothing to synchronize with.
Grouping cameras
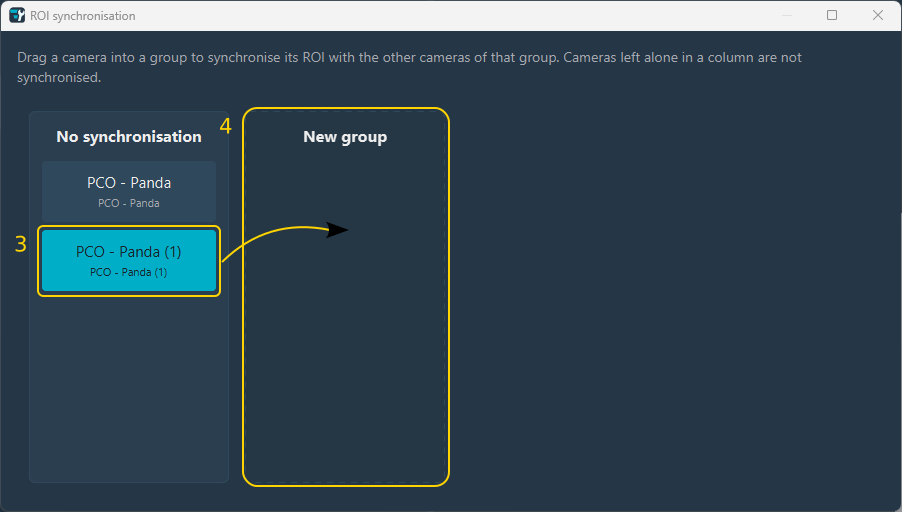
- Select one of the cameras to group in the Imported Hardware tree (1), then click Edit (2). The ROI synchronisation window opens. It lists every camera of the configuration, not only the selected one, and the selected camera starts highlighted.
-
Drag the camera card (3) onto the New group column (4). The Configurator creates Group 1 and places the camera in it.
-
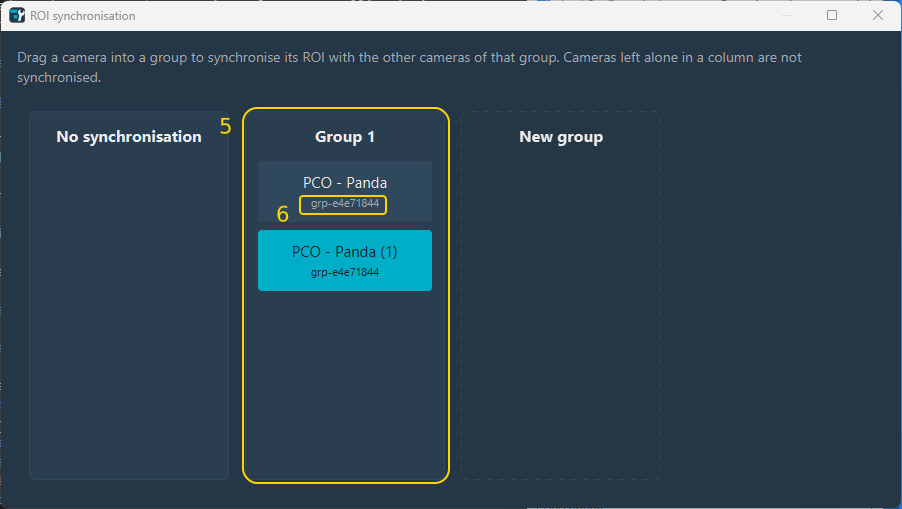
Drag each other camera to synchronize onto the Group 1 column (5). Each card in the group then shows the same group identifier (6).
-
Close the window. The device view of each grouped camera now reads ROI synchronised with followed by the names of the other cameras of the group.
The columns of the window have the following effect:
| Column | Effect |
|---|---|
| No synchronisation (left) | The camera keeps its own ROI. |
| Group 1, Group 2, … | The camera shares its ROI with the other cameras of that column. |
| New group (right) | Starts a new group with the camera, or cameras, dropped there. |
To move a camera, use either method:
- Drag and drop. Drag the camera card onto the target column. The drop can land anywhere in the column.
- Context menu. Right-click the camera card and select the target column from the menu.
To move several cameras at once, select them first: click a card to select it, then Ctrl-click or Shift-click the others. Dragging, or moving through the context menu, any selected card then moves the whole selection. Several cameras dropped together on New group form a single group. Click an empty area of the window to clear the selection.
Each camera card shows the camera name and, below it, the group identifier that the configuration stores for that camera (6). The Configurator generates this identifier, for example grp-e4e71844. For a camera in no group, the identifier is the camera name itself.
When changes take effect
Each move applies to the configuration at once. The window has no Confirm button, and closing it keeps the changes. As with any other modification, save the configuration (File > Save) to write the grouping to disk.
When the window is closed, any group that holds only one camera is dissolved, and that camera returns to No synchronisation. A group can therefore be built one camera at a time without being lost between two moves, but a group of one is not retained.
See also: Camera trigger, Configuring a device.